Sunday, March 27, 2011

Winter Spring Spring Winter


Here in Toronto, we're not sure whether it's still winter, or it's the beginning of spring. Since putting away my big Colombia winter jacket, I've been stubborn and called this week of minus double digit temperatures, wind chill factors and even a day of blowing snow that lasted from 8am - 8pm -- yup, I've called it spring. I've refused to bring my big jacket back out and have fooled myself by adding another thermal layer and pretending that it's spring.

The truth is, that I got through this every year. The end of March and the beginning of April has always been full of weather surprises: warm and sunny one day, wet and rainy the next, and icy and windy the week after. It's a mesh of the two seasons together, and -- shhhhh don't tell -- I kinda like it that way. It's kinda like what this supper was -- a mesh of warm, earthy, winter flavours, with fresh spring ones that wake up of your taste buds and comfort you at the same time.


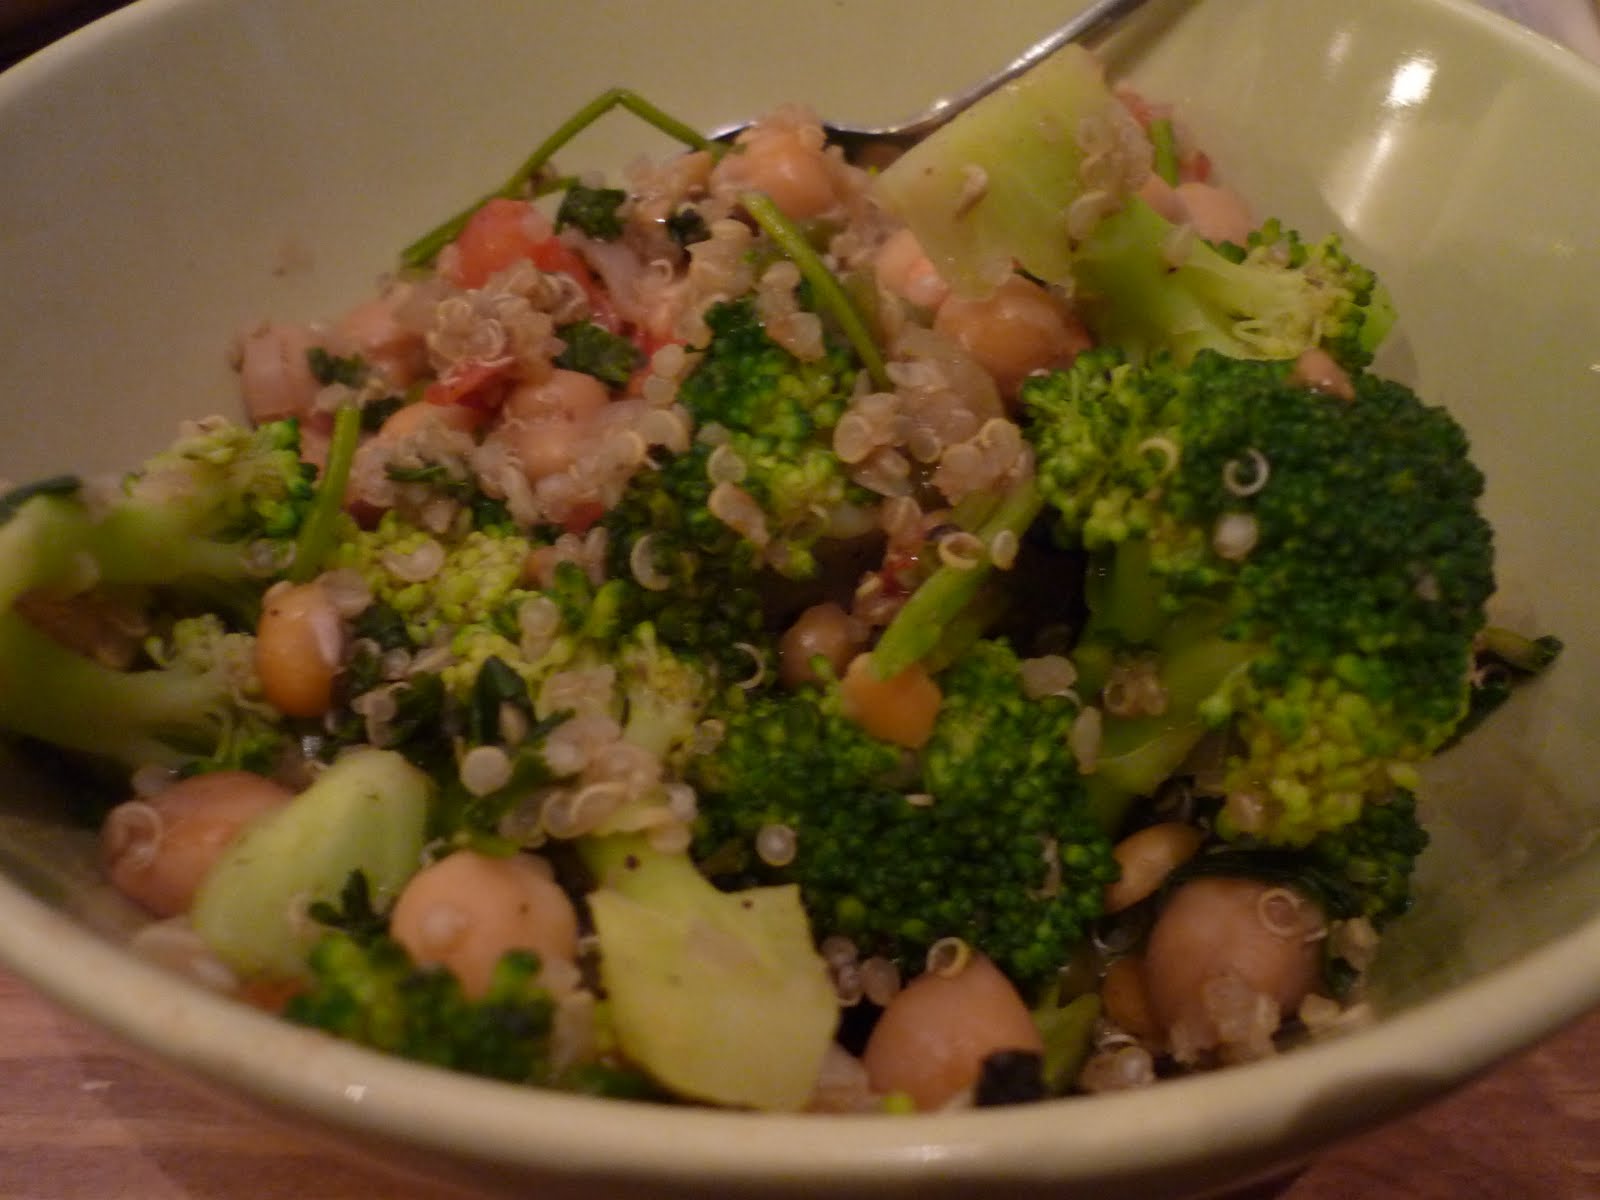
The other night, we made another really easy, tasty and satisfying supper from our latest edition of Vegetarian Times. It was a simple meal of bulgur cooked in broth, flavoured with garlic, shallots, mushrooms and tomatoes, with the added springyness of baby bok choy and fresh thyme. I haven't really cooked with bulgur much, but I found that in this dish, it was perfect -- nutty and hearty and quick to cook, pairing perfectly with the wintery, earthy mushrooms and shallots. The bite from the tomatoes and fresh taste of greens was a comforting reminder that spring is on its way .. for sure.

You could totally up the protein factor of this supper my added tofu, chicken or even chickpeas. I think next time I'll add a bit of lemon zest and squeeze of juice at the end to perk things up a bit more. Chopped fresh parsley would be a great addition as well.

Bulgur with Veggies
adapted from Vegetarian Times

4 small bok choy
2 teaspoon of olive oil
2 cups of cremini mushrooms, sliced
1 cup of grape of cherry tomatoes, halved
2 shallots, minced
1 clove of garlic, minced
1 cup of fine bulgur
2.5 cups of vegetable stock (feel free to use part water)
1 spring of fresh thyme
salt and pepper to taste

1. Blanch the bok choy in boiling, salted water for about 2 minutes, or until tender. Drain, and roughy chop. Set aside.

2. In a large skillet, saute the mushrooms in 1 teaspoon of olive oil. Cook for 5 minutes or until nice and brown. Remove and set aside.

3. Add the tomatoes to the skillet, cut-side down and cook for 2 minutes, until brown. Remove and set aside.

4. Add the remaining 1 teaspoon of olive oil to the skillet. Saute the shallots and garlic for about 2-3 minutes. Add the bulgur and toss to coat. Add broth thyme spring, salt and pepper. Bring to a boil and then cover. Reduce the heat of medium-low and simmer for about 7-8 minutes, or until all the liquid is absorbed and the bulgur is cooked.

5. Add the mushrooms, tomatoes and bok boy back into the skillet and toss until everything is mixed together. Serve immediately.


Coffee Update! (Final One!)


We're finished!!! We sampled the good stuff at 24 different, independent cafes in Toronto. Sadly, our journey is over, but we have plans to make our own list of indy cafes to visit this summer.

The Mascot - mocha, cappuccino and americano enjoyed after a yummy lunch of ethiopian food and followed by a lovely, sunny walk in Parkdale.

The One - We saved the best for last -- one of my all time favourite coffee hangouts: cinnamon-spiked drip coffee, cappuccino and americano, enjoyed with cookies and a vegan chocolate cherry bar and the company of our favourite barista

Sunday, March 20, 2011

Ancient Grains Granola


Last summer, the espresso house down the street started offering a breakfast special: homemade granola with steamed milk and a shot of espresso on the side. I promised myself that when I had a morning to myself, I would sit there and enjoy what sounded like a beautiful breakfast. Summer came and went, and now March break is at its end, and I have not yet been for breakfast at the espresso house. Maybe one day ..

But I did manage to check the last thing off my March bread to-do list: make apple sauce granola. I mixed up the original recipe a little by using a few ancient grains -- spelt and kamut flakes -- mixed in with the good rolled oats. I replaced the oil with a few spoons of apple butter, (and by the way if you haven't discovered apple butter yet, go find it! It replaces oil and sugar at the same time! Brilliant!) and added sesame seeds, a few chopped pecans and a handful of millet for a little extra crunch. The ancient grains really give this granola a hearty, nutty, toasty flavour, and the kamut flakes pack quite a mighty crunch factor.


This afternoon, I considered heating up some milk to go along with the granola in an attempt to imitate the espresso house special, but ultimately, I opted instead to just have it with a huge splash of skim soy and a nice cup of toasted almond flavoured coffee (beans purchased at one of our coffee passport favourites: Moonbean Cafe) on the side. A perfect, beautiful lunch enjoyed on my last day of March break.

Ancient Grains Granola
adapted from Everybody Likes Sandwiches

1 cup of rolled oats
1 cup of kamut flakes
1 cup of spelt flakes
1/2 teaspoon of cinnamon
a pinch each of cardamom and nutmeg
1/4 cup of unsweetened coconut flakes
1 big handful of sesame seeds
1 big handful of millet or quinoa
1/4 cup of chopped pecans
1/2 cup of raisins
1/2 cup of dried cranberries

1 cup of applesauce
2 tablespoons of apple butter
1 tablespoon of maple syrup

1. Toss all the dry ingredients, except for the raisins and cranberries, in a large bowl until things are equally distributed.

2. Add the applesauce, apple butter or maple syrup. Using a spatula (or your hands!) mix everything together really well.

3. Bake in a 325 degree oven for about 45 minutes, tossing every 15 minutes or so, until the mixture gets golden brown and crunchy. Remove from the oven and immediately toss in the raisins and cranberries. Leave it to cool overnight.

4. Enjoy!

Friday, March 18, 2011

Romance in the Everyday


I'm a romantic. Not the flowers, candy and candle-lit dinners kind of romantic, but the kind that yearns to enjoy little things like sunlight on my skin, people-watching, multi-tasking to old favourite CDs and working in cafes. I used to love working cafes -- way before everyone got wifi and you'd like annoying people with one cup of coffee occupying a table for four with their eyes glued to their laptops. I didn't even have a laptop. There was just something so comforting and exciting and fulfilling about sitting alone in a calm, quiet place and working in between thinking, day-dreaming, watching people and soaking up the world.


But cafe culture has really changed, in Toronto anyway, and I'm hard-pressed to find a calm coffee shop on sunny day, much less get a seat by the window, or be able to tune out the loud conversations around me. Thankfully, since moving out, I've realized that I can re-make that working-in-the-cafe feeling right here at home. My huge floor-to-ceiling balcony windows help. So does my trusty Bodum coffee press and largeish Ikea work table. I realized during this March break, that I'm lucky enough to re-make that romantic, cafe feeling in my cozy home. And you know the best part? I can do so many other things in between watching the sun stream onto my balcony, planning my next unit for school, drinking coffee, listening to Alanis Morissette and Jean LeLoup and watching the construction folks on ladders in the building across from me .. like make bread.


Yes, I made cinnamon bread. Twice. Monika tempted me. So did Kickpleat. So did Joy. But ultimately, I went with a recipe from Robin over at A Chow Life. It was easy, wholesome and easy to play with. The first time, I pretty much followed the recipe exactly, but the next time, I switched it up by adding lemon juice and zest, reducing the cinnamon, and replacing the raisins with dried cranberries (that was inspired my these gorgeous-looking rolls). If you've never made bread before, and are afraid because you don't have a fancy, kitchen aid mixer with a dough hook, please get over it! I have no such equipment, and my bread came out beautifully. And the kneading is so much fun! Really relaxing and calming. And when you get that that 7 minute mark, after you've sung along to three songs on your favourite CD, that sticky, stringy ball of dough suddenly becomes a beautiful, smooth, elastic ball of happiness.


Ultimate slow-food ... Go do it. Unleash that romantic side of yourself and take a little time to soak up some happiness.


Lemon Cranberry Buns

adapted from A Chow Life, inspired by Everybody Likes Sandwiches

1/2 cup of warm water
1 teaspoon of sugar
1 package of quick-rising yeast

1.5 cups of all purpose flour
1.5 cups of whole wheat pastry flour (yes, pastry .. it was all I had, but it worked!)
1 pinch of salt
3 tablespoons of sugar
1/2 teaspoon of cinnamon
zest of 1 lemon, juice of half
1/4 cup of water
1 cup of dried cranberries
1/4 cup of melted margarine (or butter)

1. In a large bowl, combine the yeast, warm water and 1 teaspoon of sugar. Mix to combine. Let stand for about 10 minutes, or until it yes frothy.

2. Dump in the flours, salt, sugar, cinnamon, lemon juice and zest, water, cranberries and margarine. Mix to combine.

3. Turn the dough out onto a floured surface and knead for 7-10 minutes, adding additional flour if the dough gets too sticky. Knead until the dough is smooth and elastic.

4. Place the dough in an oiled bowl and cover with a kitchen towel. Let the dough rise for 45 minutes, or until it was doubled in size.

5. Punch down the dough and give it a few kneads. Divide it into 12 equal portions (or as equal as you can get them!) and place them into oiled muffin tins. Cover and let it rise again for another 45 minutes.

6. Bake in a 375 degree oven for about 20 minutes, or until the tops get nice and brown, and the rolls sound hollow when you tap the bottom.

7. Enjoy with a cup of coffee, seated by the window with our favourite CD playing the background.

Tuesday, March 15, 2011

The Easiest, Yummiest, Slow Food Dip


Ok, I know. I know easy and slow don't always go together in the cooking world. But, what about stews that you just leave in the oven? They take FOREVER, but there's minimal chopping and next to no fuss. See? Slow and easy.

I've got a good one for you. This roasted pepper dip is wonderfully chunky, creamy, tangy and so much better than the blended store-bought versions, which taste ok, but always seem to be missing something. The slow part of this dip: it takes a bit more time than simply opening a can of beans and blending it with other stuff. We've got to roast first -- roast roast roast! That's where all the yummiest comes from. You roast a bunch peppers (we used a combination red, green and yellow) with some onion (don't skip the onion! It adds mounds of flavour!), olive oil and seasonings and then blend it up a bit with a few spoonfuls of yogurt. Yum! It's perfectly dipable but we spread most of ours on pita bread to make sandwiches for our lovely hike on the Escarpment Rail Trail in Hamilton. They were a welcome treat at the end of the trail.


Roasted Pepper Dip
makes about a cup of dip

4 bell peppers, sliced up -- any colour!
half an onion, thinly sliced
1 tablespoon of olive oil
salt and pepper to taste
1 tablespoon of skim milk yogurt

1. In a large bowl, toss the bell peppers and onion with the olive oil, salt and pepper. Roast in the oven (under the broiler), tossing often, for about 25 minutes, or until the they toasty around the edges and very fragrant. Remove and let cool.

2. Place the cooled peppers and onion in a mini chopper, or blender with the yogurt. Pulse until you get a chunky, dip-like consistency. Enjoy!!

Saturday, March 12, 2011

Slow Food Week


January and February flew right by me. It really did. Maybe it's because this school year rocks -- I mean seriously rocks. I don't wake up on Mondays with anxiety. I go to bed on Sundays feeling excited. What's come over me? It wonderful, but at the same time, worrisome because I don't think next year will be quite so rockin'.. Is that me being pessimistic? Is that me already worrying about my evaluation coming up when September rolls around .. that my admin will actually think I'm an inadequate teacher who can't spell (especially when writing on the board), who breaks fire safety codes because she ran out of wall space and needs a workshop in classroom management (especially during last period classes).. ? Yeah, well, let's not go there.. not this week anyway .. because....


It's March Break!! And I've declared it, Slow Food Week. Since January, we've been making quick and dirty suppers -- mostly soups that I make a huge batch of and then eat for an entire week. Soups aren't very photogenic, as I've mentioned before, but very tasty, healthy and warming after a long day of work. I've made cabbage and bean soup, all spiced up with fennel seeds, smoked paprika and cayenne pepper, and chickpea and tomato soup jazzed up with the addition of parsnips, and a good dose of cinnamon and cumin (totally inspired by the chickpea tomato soup that seems to always be the soup of the day at Java House). But seeing as it's March break, I've decided to slow things down. I have some beautiful slow cooking in mind -- like this healthy granola that needs lots of stirring and tending, and this beautiful cinnamon pull-apart bread that needs lots of time to rest. Since my slow-food week just kicked off, I'll post a slow-cooked recipe that I made during the holidays: Tuscan bean casserole. It was very yummy and comforting, and totally worth the wait.

Slow food, here I come!

Tuscan Bean Casserole
adapted from Vegetarian Times

3/4 pound of dried white kidney beans
3 sprigs of thyme, 1 sprig with leaves removed and chopped, 2 left on the stem
a big handful of fresh parsley, 2 sprig left whole, the rest chopped
1 medium onion, half chopped, half left whole
2 whole cloves
1/2 fennel bulb, diced
3 cloves of garlic, 2 chopped up, 1 halved
olive oil
1 large carrot, diced
a splash of white wine vinegarAdd Image
3/4 cup of fresh bread crumbs
a good grating of Parmesan cheese

1. Soak the beans in cold water overnight. Drain and place in a dutch oven or oven safe pot with enough water to cover it by a couple inches. Tie the thyme and parsley sprigs together and throw them in. Stick the cloves into the onion half and add that as well. Throw in the halved garlic clove. Partially cover and bring to a boil, then uncover and reduce to a simmer. Let it cook for about 30 minutes until the beans are nice and tender.

2. Drain the beans and reserve the liquid. Give the dutch oven or pot a little rinse and wipe out for the next step.

3. Cook the onions, carrots and fennel in olive oil on medium-low heat until soft and fragrant. Add the garlic and cook a little longer. Remove the pot from the heat and add the vinegar, making sure to scrape any browned bits from the bottom of the pan. Add about 1-1.5 cups of the cooking liquid, the beans, and half the chopped parsley. Stir well to combine.

4. Combine the breadcrumbs, 1 tablespoon of olive oil, the rest of the parsley and the cheese. Spread this mixture on top of the beans.

5. Bake the whole thing in a 375 degree oven for about 30-40 minutes, or until the top is nicely browned (yeah .. ours got a little too brown) and the juices have bubble up. Remove from the oven and let it stand for about 20 minutes so that the beans can soak up the liquid even more. Serve warm.

Saturday, March 5, 2011

Spiced Quinoa Pilaf with Chickpeas and Spinach


The last time I cleansed, I made quinoa porridge with soy milk, mashed banana and frozen fruits. It was satisfying and comforting and I would make it again in an instant. This time around, I used quinoa for dinner instead of breakfast, and made this tasty, hearty pilaf full of yummy goodness like chickpeas, spinach and a big dose of spice.


Last time around, I used lemon and vinegar to flavour my savoury meals, and while they were tasty, I wanted something more comforting and mellow. Our cleanse dictated that no salt was to be added to our food. To make up for that, I made this pilaf lots of delicious spices and herbs: cumin, coriander, ginger, garam masala, curry leaves, dried oregano, lots of black pepper and even more chopped fresh parsley. It turned out wonderful and I almost didn't miss the salt at all. And it was really easy -- basically dumping everything in a pot to cook, and stirring in the chickpeas and fresh herbs and vegetables in at the last second. I made a big batch the night before my cleanse, and ate it both nights along with some fresh steamed broccoli.

Almost makes me want to cleanse more often ... almost... I said almost...

Spiced Quinoa Pilaf with Chickpeas and Spinach
makes 4 hearty servings

1/2 cup of quinoa
a handful each of dried yellow and green split peas
1 teaspoon of cumin
1 teaspoon of grated ginger
1/2 teaspoon each of coriander and garam masala
4 curry leaves (use one bay leaf or lime leaf if you don't have curry leaves)
1/2 teaspoon of dried oregano
a few good grinds of black pepper
half an onion, diced
2 cloves of garlic, minced
1.5 cups of water

a big handful of parsley, chopped, stems separated from leaves
a small bunch of baby spinach, rinsed and chopped
1 can of salt-free chickpeas, drained (you could be really virtuous and used dried)

1. Rinse the quinoa and split peas well. Put them in a large pot with all the spices, onion, garlic, curry leaves, water and chopped parsley stems. Bring to a boil, and then reduce to simmer. Cover and let cook for about 15 minutes, or until most of the water is gone.

2. Add the parsley leaves, spinach and chickpeas and stir well. Cook for another 5 or so minutes, until the chickpeas have warmed through and the spinach and parsley are just cooked and still bright green.

3. Enjoy a beautiful, cleansing dinner.