Sunday, December 30, 2012

Addictive Dip


Do you make New Year's resolutions? I've always thought this idea was made up to make people feel bad about themselves during the holidays and so I never make my resolutions on New Year's. I'm always a little slower. I let the holidays pass, I left myself quickly drift back into my routine of work, and when March break rolls around, I'm always inspired to make changes to better myself. 

This year is probably no exception. I was cleaning up today, and I came across my "March break" list from 2012. They're kind of like resolutions, but more like things I've been wanting to do, but haven't got around to doing. Writing them down always finalizes things for me, so I figure if I write it down, it's more likely that I'll get it done. 

Let's see what was on my March break list from last year: bake a real fruit pie (yes: the "real" was underlined, although I'm not sure what I meant at the time), complete 3-4 more parts of my LSQ course (that's la langues des signes quebecoise), write down the books I have read, write more, read more, listen to the radio more, eat more raw vegetables.


That last one sticks out for me. Eat more raw vegetables. While I love stirring chopped spinach, kale and swiss chard into my soups, using tonnes of cauliflower in my veggie curries, and roasting sweet red peppers and zucchini, I confess that raw veggies were not a huge part of my life. I'm proud to say that I ate more than my weight in raw cucumbers this years, bought at least one head of lettuce a week during the summer, and continue to add grated carrots and chopped celery to my every day lunch. Eating more raw veggies wasn't that hard! Score! 

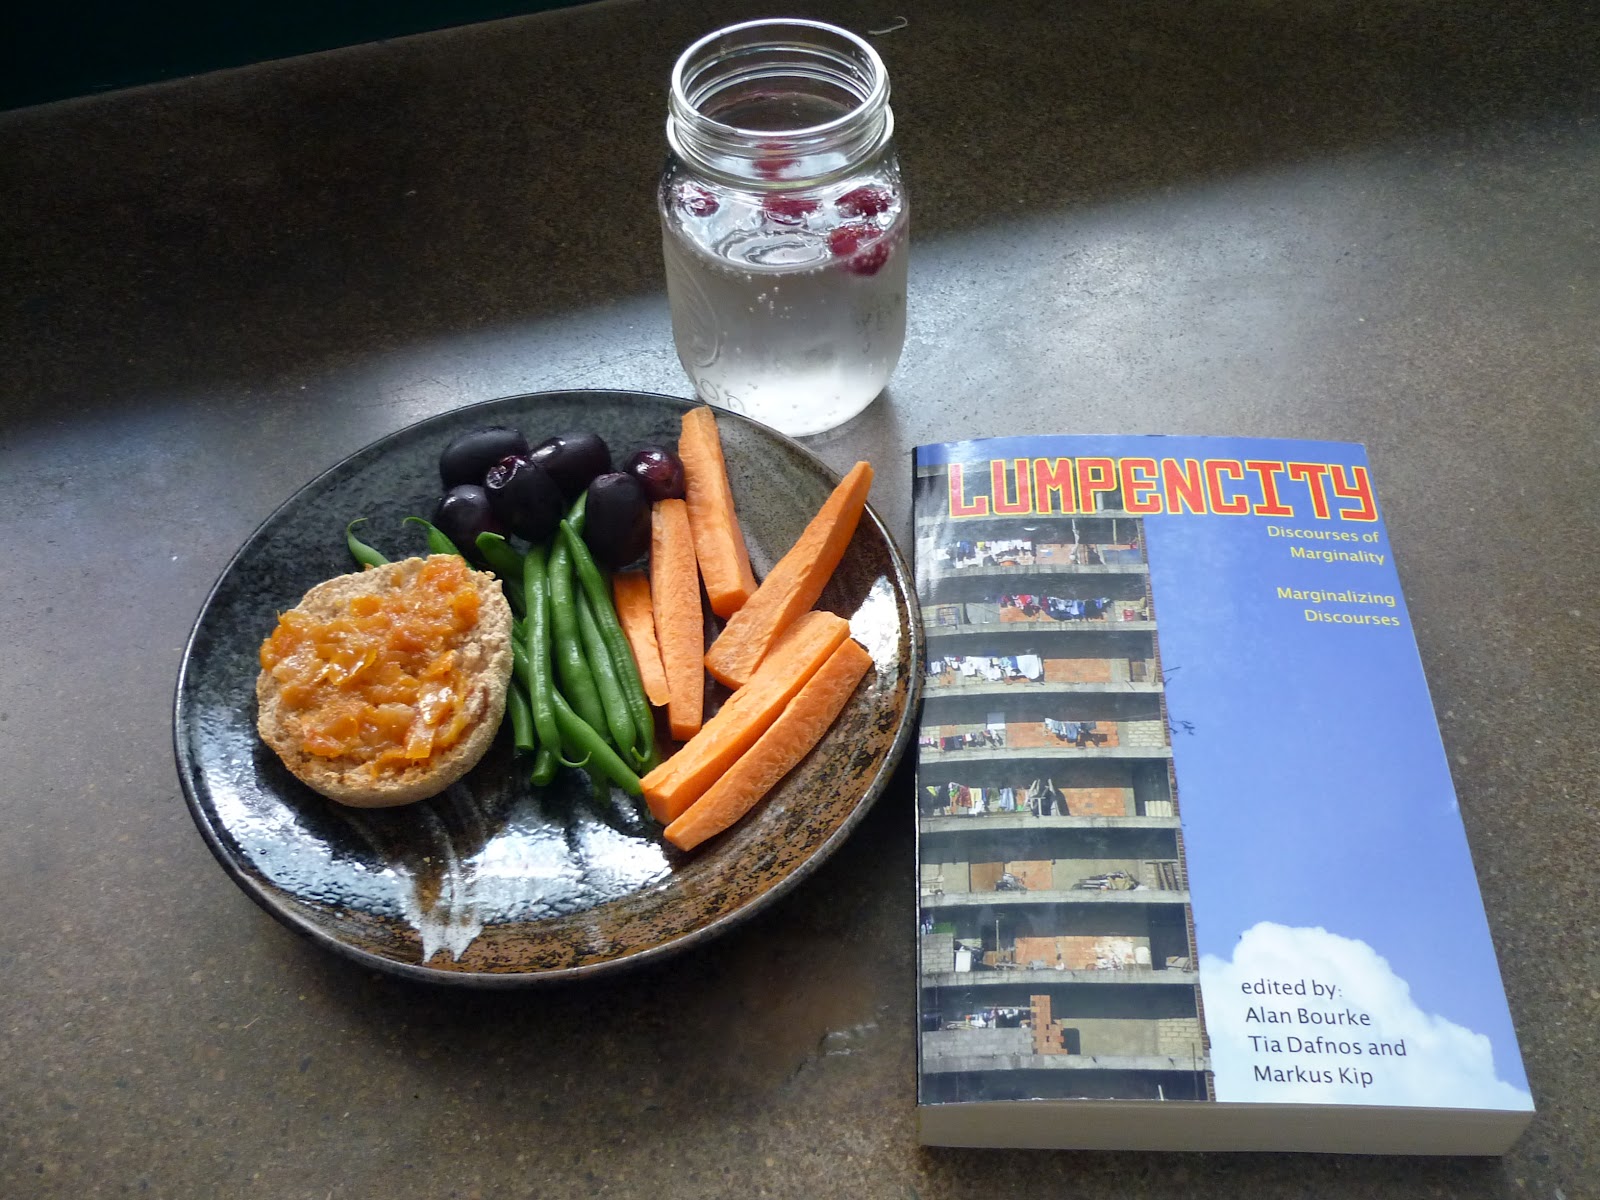
However, it is harder to get psyched about raw vegetables in the winter when everyone is blogging about comforting soups, stews and pot pies. But, I've found a dip that so tangy and yummy and addictive, that I promise you won't be able to put down the carrot sticks. It's a very simple dip, made creamy with white beans, and deliciously tangy with the addition of marinated artichokes and a good dose of lemon. Oh yeah -- and it's also PERFECT to bring to your New Year's eve party, and if you've already eaten your year's share of carrot sticks, try these delicious homemade crackers. I jazzed mine up by adding Swiss cheese and dried cranberries.

Have an amazing start to 2013! Any suggestions on what I should put on my 2013 March break list?

Veggilicious White Bean Dip
adapted from Sweet Roots 

1/2 cup of dried white kidney beans (soaked in cold water overnight); alternatively you can just use one 15 oz can, drained and rinsed
1/2 bunch of spinach
1 3oz jar of marinated artichokes, drained
2 cloves of garlic
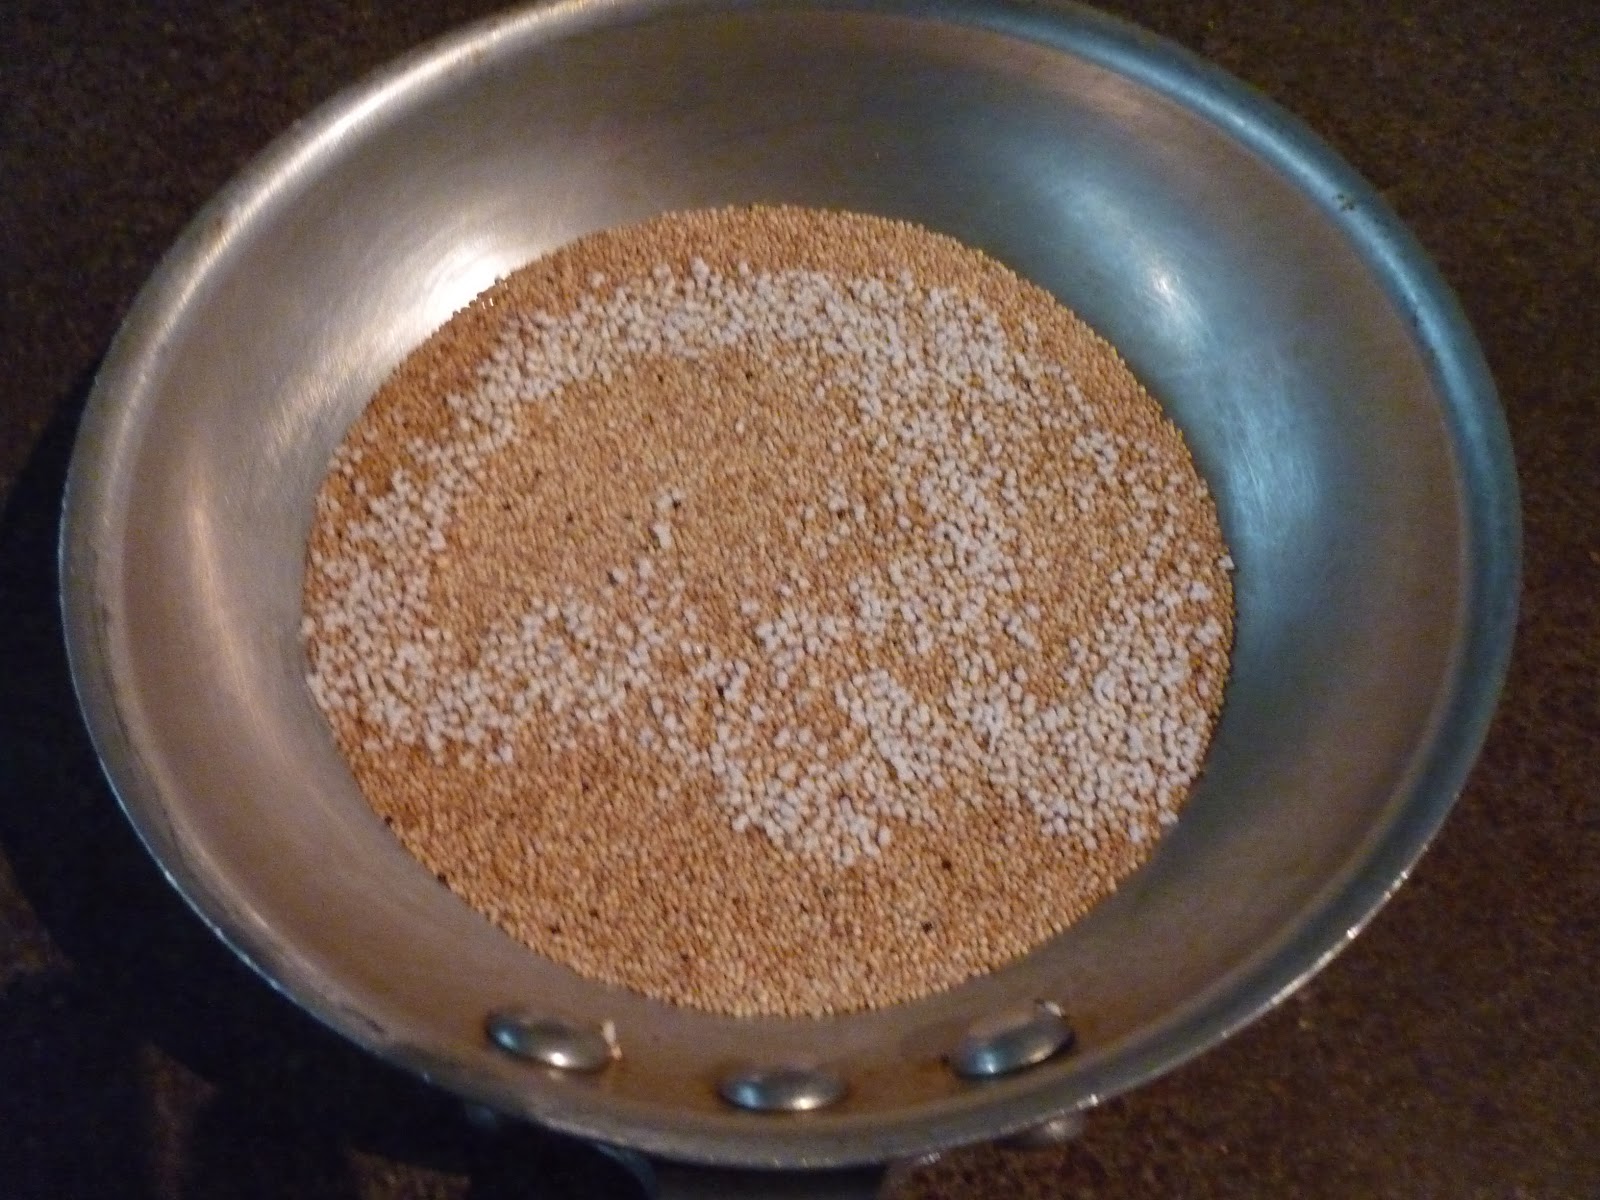
2 tablespoons of sesame seeds
1 tablespoon of olive oil
1 teaspoon of herbes de Provence
a good grinding of black pepper
salt to taste (you may not need any if you're using canned beans)
juice of half a lemon

1. Boil the soaked beans in water for 25-30 minutes, or until they are super tender. Drain and rinse. Set aside.

2. In a small pot, heat the olive oil and cook the garlic for about 1 minute, or until it starts getting soft and fragrant. Add the spinach and stir well.

3. Add the beans, artichokes, sesame seeds and seasonings. Give it a good stir. Cook until the spinach is fully wilted. 

4. Remove the pot from the heat. Using a hand blender, carefully blend up your mixture until it's nice and creamy. Alternatively, you could use mini chopper. Stir in the lemon juice. Taste and adjust the seasonings.

5. Serve warm, cold or at room temperature. It's delicious all ways!

Thursday, December 27, 2012

Warm and Hearty Banana Bread


I am no stranger to banana bread. Nope -- not at all. I've baked my fair share of banana-filled treats -- one with blueberries stealing the show, another with peanut butter and yet another one with peach and spices. All delicious and all easy.  I've tried this banana coffee cake that's yummy and lemony and perfect for breakfast, and these with olive oil and lemon zest and sesame seeds. Oh yeah! And this one with chocolate and coconut is off the charts awesome too!

But I've recently discovered another .. one that's festive and hearty and got a compliment that none of the others did: "This reminds me of my grandma's banana bread." How could I not share a recipe that got compared to grandma's?  It's nothing fancy, nothing too complicated and no tricks involved. Just straightforward ingredients, lots of ripe mashed banana, a sprinkling of oats and a handful of fresh cranberries to add beautiful colour and tart bursts of flavour. It's got a beautiful, golden almost crust-like exterior, while the inside is perfectly moist, a little springy and hearty but not dense.


The first time I made this bread, half got given away and the other half enjoyed with afternoon tea. I made it again for Christmas breakfast dessert. We enjoyed a slice, warm and fresh from the oven after sharing bowls of oats topped with mixed berry compote. I'd say it was the perfect end to Christmas breakfast.

My holidays continue until the 7th of January, but if you're not so lucky, bake this bread today and enjoy slices at work to perk up your day while we wait for 2013 to roll along.


Cranberry Banana Bread
adapted from A Cozy Kitchen
2 medium ripe bananas, mashed
1 egg
1/3 cup of plain yogurt
1/2 cup of brown sugar
1 tablespoon of canola oil
1 teaspoon of vanilla extract
1/4 cup of rolled oats
1 cup of spelt flour
1/2 cup of all purpose flour
1 teaspoon of baking powder
1/2 teaspoon of baking soda
pinch of salt
1 cup of fresh cranberries

1. Whisk together the mashed banana, yogurt, egg, vanilla and canola oil. Mix really well, until all combined. 

2. Add the oats and salt. Sift in the flours and baking powder and soda. Fold the dry ingredients into the wet mixture, mixing until just combined. Carefully fold in the cranberries.

3. Pour the batter into a loaf pan or muffin tins if you prefer. Bake at 350 for about an hour for the loaf, 25-35 minutes for the muffins, or until the cake tester inserted comes out clean and top gets a deep golden brown.

4. Cool completely and serve with coffee!

Sunday, December 23, 2012

Just in Time


I think the holidays came just in time this year .. just in time to save me from jumping over the edge of a never-ending pile of marking and never looking back. In plain language? It saved me from actually taking a sick day, not because I'm sick, but because I'm sick. I don't have a fever, sore throat or hacking cough. I'm not bogged down by a migraine or nausea. This sick comes from a never-ending fatigue, too much florescent light entering my brain, and hearing negative things said about my profession all day long on the news.

The holidays came just in time to save me from being overwhelmed and bringing that negativity into the classroom -- something the children never deserve to see.  It also came just in time to give me that little bit of extra time to catch up on all the various tasks that need to be done, just so I can probably fall behind again come February.


So in the spirit of things happening just in time, I'm offering you this delicious squash pie, just in time for the holidays. It has a flavourful, easy press-in crust, and a sweet, smooth, spicy filling. And it's vegan! It's also almost healthy, but I'm sure you'll enjoy it, especially if you love squash. Although I love pumpkin anything, this fall, I discovered the a whole new squash world. Hubbards, kobochas, buttecups and ambercups -- all delicious, nutty, and impossibly buttery and sweet. That's the real secret to this pie -- a flavourful squash.  They're all over the markets now, so don't be scared. Just halve it, scoop out the seeds, chunk it up and roast at 350 in an inch of water. About an or so later, you'll have perfect squash, ready to be pureed and baked into something delicious.

The pie comes from two different sources; the crust is from have cake will travel --  always a good source for tasty vegan baked treats -- and the beautiful filling is from post punk kitchen. The inspiration came from a good friend of mine at school whose mom used to use hubbard squash to make squash pie (in the old fashioned way of course, with lots of cream and sugar and a buttery crust). The squash was so beautifully sweetened that it didn't need too much help -- a few spoonfuls of apple butter and a big splash of maple syrup did the trick. The real secret is the teaspoon of agar powder to give it a custardy texture without the use of eggs. A teaspoon is all you need to make this beautiful filling set up like a dream.

This pie would make a beautiful dessert to a wholesome holiday meal, and you don't even have to feel bad eating a piece in the morning for breakfast.

Vegan Squash Pie with Spelt Crust
adapted from have cake will travel and post punk kitchen

Crust:
1/14 cups of spelt flour


2 tablespoons of organic cane sugar
a pinch of salt
1 teaspoon of ground cinnamon
1/4 cup of canola oil
2 teaspoons (or more if needed) of almond milk

1. In a bowl, mix together the flour, sugar, salt and cinnamon until well combined. Add the oil and start mixing with a rubber spatula. Add the milk, 1 teaspoon at a time, mixing well in between, until the dough comes together.

2. Press the dough into a 9 inch pie plate. Make the edges fancy if you like. Go for it!

3. Place the dough in the freezer while you make the filling.

Filling:
3 cups of pureed squash
2 tablespoons of apple butter (you could totally skip this if you don't have it)
1/2 cup of almond milk
1/4 cup of maple syrup
2 tablespoons of canola oil
2 tablespoons of corn starch
1 teaspoon of agar powder
1 teaspoon of ground cinnamon
1/4 teaspoon of freshly grated nutmeg
a pinch of allspice

1. Mix all the ingredients together in a large bowl with a whisk. Keep going! Get it smooth and well-combined.

2. Pour the squash filling into your crust and bake in a 350 degree oven for about an hour, or until the edges get nice and golden brown, and the middle of the pie is set but still a bit jiggly.

3. Cool, slice and serve.


Sunday, December 9, 2012

Noodly Goodness


It's time for some supper. I've made post after post of baked goods and treats -- indulgent and healthy breakfast worthy treats -- but now I think it's time for some supper.  Yes, supper. Some winter-comfort-in-a-bowl supper.

Where I live, winter is a bit wonky. It's warm and balmy one day, sunny and icy-cold the next, and then rainy and dreary for a week after that. It snowed a tiny bit, but nothing that lingered, and right now, there's a freezing rain alert out there. It's definitely not a picture perfect winter with bright sunny skies and fluffy snow on the ground, although I remember a time when there was. Last winter was rainy and mild, and I'm not yet sure what winter has in store for us this year, but whatever it may be, I know I'll definitely need quick, comforting suppers to drive away the overcast blues.

It's definitely stew and soup season, and I've got a few that I'll post soon, but today, it's all about the noodles. For awhile, I avoided pasta, partly because of the bad reputation that carbs were getting, and partly because pasta was beginning to not sit right in my stomach. Since discovering brown rice pasta, those days are over. And this dish is the perfect celebration of pasta. Spirally noodles mingle with toothsome black beluga lentils and velvety ribbons of spinach, all held together in a creamy sauce made from pureed squash and plenty of garlic. It's so totally simple, with fresh, natural flavours -- no overwhelming spices, just the beautiful, fresh, sweetness of vegetables hanging out with the mellow, woodsy lentils and pasta. It reminds me of macaroni and cheese because of the creamy squash, but it's totally vegan, heart-healthy and more than delicious.


For this beautiful noodle dinner, I would definitely take the time to roast and puree your own squash. It's simple and so much better than the canned stuff. Plus, if you can get your hands on an ambercup squash or kabocha squash, the flavour is out of this world -- sweet, nutty, buttery .. perfect in this pasta dish, but also in pies and sweet baked goods. All you do split the squash, and after scooping out the seedy slimy bits, cut them into chunks and roast them cut-side down in an inch of water for about 45 minutes at 350 degrees or until their they're super soft and tender. Let them cool down a bit, then the skins come off easily. Throw all the flesh into a pot, add a bit of water and then blend using a hand-blender. I stored my leftover squash in a sealed glass container, and it kept fine for a week.

Happy Winter!

Pasta and Lentils with Squash and Spinach
inspired by Everybody Likes Sandwiches
serves 2-3

2 cups of dried spirally pasta (rotini or fusili)
1/2 cup of dried beluga lentils

1 large clove of garlic
olive oil
1 cup of pureed squash
1 small bunch of spinach, washed and chopped
1/2 cup of water or stock
1 teaspoon of herbes de Provence
salt and pepper to taste

1. Cook the pasta according to the package directions. Drain and set aside.

2. Cook the lentils in water for about 15 minutes, or until they are tender but not mushy. Drain and set aside.

3. While the pasta and lentils are cooking, prepare the sauce. Saute the garlic in olive oil over low heat until things get soft and fragrant. Season with salt and pepper and herbes de Provence.

4. Add the spinach and stock. Stir well and turn up the heat to medium. Cook until the liquid comes up to a boil. Add the squash and stir well.  Add the lentil and pasta and give it a good mix.

5. Let the mixture hang out together for a few more minutes over low heat, adding a bit of stock if things start to get too dry.

6. Serve immediately.

Saturday, December 1, 2012

Warm and Spicy


I've taken a break that's more than a little one. It feels like it's been a long time. I went from sunny, still-warm weekend afternoons to frosty Monday mornings, hectic marking on Fridays and bone-chilling Sundays that, although expected this time of the year, leave us feeling more than a little under the weather.

While I haven't been cooking too much during my time away from the blog world, I have discovered a few new-to-me and delicious things: the winter squash world beyond pie pumpkins and butternut, quinoa's little sister, amaranth, a re-kindled love for pasta, stunningly black beluga lentils and a brief introduction to tempeh.  I confess that, although the thought crossed my mind, I did not photograph all of these discoveries. However, each and everyone of them is worthy of a repeat in the kitchen, and so those recipes will follow (hopefully) soon enough.

This is the first time in about a month and a half that I've felt more or less caught up with marking and planning, that I've not brought home a pile of folders and books only to leave them in the bag near the door untouched again until Monday, that I've not woken up and instantly planned out the hours that I would need to catch up on work and feel ok again when the work week starts in two short days.


What a year. And the action has just started. But I think I'm on way back to my usual grove, on my way back to looking forward to Mondays just as much as Fridays, and back to just feeling ok. But before I delve back into the work week, I'll leave you with a quick little cookie recipe that uses two of my new found favourite ingredients: winter squash and amaranth. I know these ingredients don't sound very cookie-like, but they definitely produce a unique cookie. It's great for using up that tiny bit of pumpkin puree you have left after making a pie, and it's got the warmth and comfort of spiciness and molasses: almost a holiday-type flavour if you ignore the fact that it's low-fat. What you don't want to skip is the amaranth; it gives these cookies a unique crunch, especially if you toast them first. But be careful! If your pan is too hot (like mine was!) you'll end up with popped amaranth-- totally cool, like tiny little popcorns! -- which is better eaten as is, or with a splash of milk, like cereal. So just toast the amaranth lightly and add it to the batter and when it makes, you'll get a interesting crunch, like no other crunch you've experienced.

I'm on my way back to routines and schedules and deadlines and marking, but I think it will be ok.  I think I feel ok.  And I'm hoping that regular blogging will resume. Hoping.  Thanks for your patience.


Spicy Squash Cookies with Toasted Amaranth

makes about 20 smallish cookies


inspired by Everybody Likes Sandwiches

1/4 cup of amaranth seeds (toasted for about 1 minute on a dry pan)
1/3 cup of pureed squash (I used kobacha squash .. it's so tasty!)
2 tablespoons of apple butter
2 tablespoons of molasses
2 tablespoons of canola oil
1 teaspoon of garam masala spice blend
a few good grinds of black pepper (yes, black pepper!!)
1 cup of spelt flour
1/2 teaspoon of baking soda
a pinch of salt
a few slices of candied ginger, chopped fine

1. Heat a small pan over medium heat.  Add the amaranth seeds and toast for about 1-2 minutes, or until the seeds get toasty brown or a few of them start to pop!  Remove from the heat and cool.

2. In a large bowl, whisk together the squash, apple butter, molasses and canola oil until smooth. Add in the spice powder, pepper, flour, baking soda and salt. Stir until a thick batter forms.

3. Add in the cooled, toasted amaranth and candied ginger and mix until thoroughly combined.

4. Drop spoonfuls of batter onto a prepared cookie sheet. Flatten slightly with your fingers, and bake in a preheated 350 degree oven for about 15 minutes.

5. Enjoy with a chai tea latte!

Friday, October 12, 2012

Trying my hand at Pie


I almost made a pie once.  But then I didn't.  I turned it into a maple oat crumble and ate it on the day before labour day while watching In the Name of the Father and lamenting about school beginning again. Bummer.

This summer I tried making a pie again. What, you don't believe me?  Here's the proof.


This was a strawberry, rhubarb crumble pie. The filling was delicious, but that's never the hard part. The hard part is always the crust, which I always want to make vegan. In this particular case, the edges of the crust were perfect, but that bottom fell apart, turned soggy and in some spots, didn't even cook properly.

So I tried again this long weekend, on the dreary Sunday that got a little wet and chilly later on in the day, when making pie seemed like the perfect excuse to not to work that I brought home with me. I was totally inspired by the lovely vegan baking goddess over at have cake will travel. Her plum and almond tarts looked so delicious, but I wanted something with apples. While browsing foodgawker, I stumbled upon this dutch apple pie over at Beyond Sweet and Savory. The almond press-in crust totally sold me. It was decided from there.  Apple pie it was.


I made mine with a almond spelt crust, using canola oil and almond milk to bind it instead of butter, and a nice spelt flake crumble on top. To keep the crust from turning soggy, I stuck it in the freezer for a bit, and then pre-baked it for 20 minutes before adding the apples and crumble topping. That totally did the trick. No soggy, uncooked pie bottom. The crust held together nicely and was crispy and flavourful from the ground almonds. If you're expecting a buttery, flaky crust, this isn't the place to look, but it was still delicious enough to merit a mound of cinnamony lemon-kissed apples being piled on top.

A note about the apples: the original recipe calls for 1 cup of brown sugar! If you like your pie super super sweet, go for it, but I put in about 1/4 cup and found it plenty sweet. But then, I had just found perfect Jonagold apples at the market that didn't need much help in the sweet department.

This has been the most successful vegan pie-making experiment to date. Do you think I could pull of vegan pumpkin pie, with a vegan pumpkin custard filling?  Whoa... that's a tricky one.  Stay tuned!

Vegan Apple Crumble Pie with Spelt Almond Crust
inspired by have cake will travel, and Beyond Sweet and Savory

For the Crust:
1 cup of spelt flour
1 cup of almond meal
1/4 cup of natural cane sugar
1/4 cup of canola oil
3-4 tablespoons of almond milk, as needed

For the Filling:
3 large to medium apples (I used one Matsu and 2 Jonagolds)
1/4 cup of brown sugar
1 teaspoon of cinnamon
1/4 teaspoon of nutmeg
juice of half a lemon

For the Crumble Topping:
1/2 cup of spelt flakes
1/2 cup spelt flour
1/4 cup of brown sugar
juice of half a lemon
2 tablespoons of canola oil

1. Make the pie crust. Blend the flour, sugar, and almond meal together. Add the canola oil and stir gently with a wooden spoon or rubber spatula. Slowly, a little at a time, at the almond milk, stirring between additions, until the dough stays together when pinched. You can do this in a food processor too, and pulse until you get the right texture.

2. Bring the dough together with your hands, just enough so that it chunks off, and then press it into the bottom of a 9 inch pie plate, making sure that you're going up the sides evenly.  There's a perfect pie crust. No rolling!  Woo hoo!  Place your pie crust in a freezer for about 15 minutes.

3. Make your filling. Peel and core your apples and slice them thinly (the original recipe suggest 1/4 inch thick .. I'm not sure how thick mine were..). Sprinkle with brown sugar, cinnamon, nutmeg and lemon juice. Toss with together and set aside.

4. Your pie crust is ready for the oven now! Bake it for about 15-20 minutes in a 350 degree oven, or until it just starts to firm up and get some colour.

5. In the meantime, make your crumble topping. Place the spelt flour and flakes in a bowl. Add the brown sugar, lemon juice and canola oil and mix to form a crumble.

6. Take the pie crust out of the oven. Pile your apples on top and sprinkle over the crumble. Throw it all back in the oven and bake for about 35-45 minutes, or until the apple juices start bubbling up, and the crumble topping is a deep golden brown.

7. Yay!  Vegan apple pie!


Tuesday, October 2, 2012

New Berry!


Check out these little babies.  These are cape gooseberries, or ground cherries.  I first saw them being used by Chuck when watching foodtv at the gym (yeah .. don't ask!). He was making a compote to go with one of his dishes. Then, I saw them on sale at No Frills, but I resisted buying them because I had no idea what they tasted like, and even though I should have probably taken Chuck's word for it that they're delicious, I hesitated -- there were still local strawberries and blueberries abound, no to mention watermelon. So I skipped the ground cherries.

Then, in late August, when the winds were about to change, we took a short trip to Ottawa, and during one of our walks around the market, we bought a mixed fruit bowl to snack on. Low and behold, sitting on top of the blueberries, strawberries, and raspberries, was one lone ground cherry. We shared it -- each bit half of it -- and it really was delicious. I didn't think much about it, until this weekend, when I saw them on sale at our local farmer's market, and I decided that I couldn't pass them up this time. While walking home, we peeled away the little paper-like jackets and bit into the juicy fruit. What does it taste like, besides delicious? Well, to me, they taste like an impossibly sweet and fruity cherry tomato. A trustworthy second opinion said they tasted like pineapple (which, when I thought about it.. was true). Wikipedia describes them as tasting like a cross between .. you guessed it .. a tomato and a pineapple. Go figure.


In any rate they are impossible to stop eating, highly addictive, but totally worthy of being baked into something more delicious. I wanted to bring out the pineapple flavour, so I paired it with orange zest and honey in a simple, fruit-topped, sugar crusted cake. I used spelt flour for this cake, which made the texture very unique -- airy and light, almost like a sponge. The ground cherries get sliced and scattered on top of the cake, where some of them sink to the bottom during baking, and some of them stay on top. The berries on top caramelize with the help of a sprinkling of raw sugar, and ones that sink get lovely, sweet and jammy. The orange really worked well to bring out the pineapple fruitiness of these berries. I considered adding a spice -- maybe cinnamon or cardamom -- but on second thought, I wondered if it might take away from the unique flavour of the ground cherries, and so left it out in the end. I also had some leftover coconut milk hanging around, so I threw that in. Because coconut milk is so rich, there was no need to add any oil. If you don't want to open a whole can just for this recipe, I would suggest using two tablespoons of plain milk, and two tablespoons of canola oil or melted butter.

Although I chose to go the cake route (hey .. who doesn't like cake?), I saw lots of lovely recipes on the web for ground cherry salsas, salads, compotes and jellies. You totally need to try them for yourself. Hurry to the market before they're gone -- you won't regret it!

Sugar-Topped Ground Cherry Cake
makes one small loaf

1 egg
1/4 cup of honey
1/4 cup of plain yogurt
1/4 cup of coconut milk
2 tablespoons of orange juice
1 cup of spelt flour
a pinch of salt
1/2 teaspoon of baking powder
1/4 teaspoon of baking soda
1 cup of ground cherries, sliced in half
1 tablespoon of raw sugar (for sprinkling)

1. In a large bowl, whisk together the egg, honey, yogurt, coconut milk and orange juice until smooth and well-combined.

2. Sift in the flour, salt, baking powder and soda and mix gently until just combined. Pour into a prepared loaf pan.

3. Add the ground cherries on top of the cake batter, and sprinkle with raw sugar. Bake at 350 degrees for about 45 minutes, or until the top gets a nice golden brown crust, and a cake tester inserted comes out clean.

Thursday, September 20, 2012

This Soup ...


This soup .. yes, this soup. This soup reminds me of my very first experience cooking for real in my parents' kitchen, with my sister beside me and my grandma watching. This soup has old familiar flavours and wraps itself around me like a warm knitted scarf on the first breezy, chilly day of fall. This soup isn't by any means a gooey chocolate cake, a wholesome banana bread or a zippy, lemony treat. But this soup welcomed me back into the school year and eased the pain of summer holidays ending and work beginning.

This soup begins with humble ingredients.. ginger, garlic, lentils, greens... and is finished with a whisper of summer -- a big squeeze of lemon juice and a many sprigs of fresh thyme from my balcony garden. Although I could have began this soup in a classic way -- chopped onions, celery carrots -- I didn't, simply because I was tired and I wanted as much reward for as little work as possible.

This soup is the answer to your weeknight dinner problems, and is also the good idea of staying in on Saturday night and curling up with dinner on the sofa. This soup is zingy from the spices and lemon and creamy from the red lentils, cooked until almost completely dissolved. I chose rainbow chard -- stems and leaves -- to put into this soup; the stems add nice bulk and the leaves turn velvety in the broth.

I think if you wanted to add to this soup, a cup of cooked chickpeas would do the trick, or even a few cubes of tofu sprinkled on top when serving. If you're the type, some crusty bread would probably be nice with this soup ... if you're the type, but I'm not really. I enjoyed this soup straight up, piping hot, curled up on the couch on a Saturday night when I should have been out dancing the night away, or enjoying a movie and popcorn. But dancing and movies aren't what I need in September when the winds are trying to change but the seasons won't let go, when that sneaky feeling of something ending and responsibility sinking in makes its way from my mind to the pit of my stomach; what I needed was this soup. And now, I can enjoy my September.


Lentil Soup with Greens
serves 2

olive oil
a chunk of ginger, minced
2 cloves of garlic, minces
juice and zest of half a lemon
a bunch of swiss chard -- stems diced, leaves chopped into ribbons (spinach, kale would be great too)
1 teaspoon of ground cumin
1 teaspoon of curry powder
1 cup of red lentils, rinsed
3 cups of water or vegetable stock (I used a combination of both)
salt and pepper to taste
a splash of light soy sauce (if desired)
a few sprigs of thyme, leaves removed

1. In a soup pot, cook the ginger and garlic in olive oil over medium heat for about a minute, or until things start getting really fragrant. Careful not to burn the garlic!

2. Add the lemon zest and spices and cook for a minute to let the spices toast. Add in the chard stems, lentils and vegetable stock and stir well. Season with salt and pepper. Cover and bring to a boil, then reduce to a simmer and cook for 5 minutes.

3. Add the chard leaves and cook, covered, for another 10-12 minutes, or until the greens are tender, the lentils and cooked and almost dissolving, and the broth is slightly thickened.

4. Turn off the heat and add the lemon juice and fresh thyme. Stir well. Taste and add a splash of soy sauce if desired. Serve!


Monday, September 3, 2012

One last Picnic


 Pssssssssssssst!  Hey, you!  Let's go on a picnic .. a secret supper picnic while the sun still sets after 6pm and the wind is warm and not frosty cold.  Let's pick a park, pack some food, strap on our bike helmets and go. After all, it is the unofficial end of summer, and who wants to spend labour day moping about that?  Certainly not me!  So let's do it!

We can have this warm coucous salad to use up all our summer veggies, or maybe this perfect summer pasta salad with fresh dill? Oh, we definitely have to have potato salad -- so why not try this one, with tons of fresh herbs, a lemony vinaigrette and French twist?

If you want to get more elaborate, we could make this spicy oven fried chicken to have with all of our salads, or maybe something a little more fancy and delicate, likes these vegan cucumber and avocado tea sandwiches.

And what should we have to drink? While I'm partial to coffee all day any day, maybe it's better if we stick to something that won't keep us up all night .. after all, it's back to work tomorrow. How about this blackberry limeade. It would be perfect -- I just a saw blackberries at the market! And dessert? That's too hard! There are just too many picnic perfect desserts. But let's go with something simple, like a cookie .. My lavender on the balcony is thriving, so let's bring these lemon lavender cookies and maybe this chocolate cake, since chocolate is always necessary.

Yay, let's do it!  Let's have a last-day-of-summer picnic ...


Who am I kidding? This is so not happening. I still have 6 seating plans to figure out, a batch of granola to bake, and lunch to figure out for the next 4 days. But we can dream can't we?  If you're like me, and dream of being the care-free picnic type, but are pulled in by the too-many-things to do before work begins again, then let's talk for real.  For real, I'll settle for a piece of this impossibly healthy blueberry banana bread and a cup of jasmine tea. For real, I'll be perfectly happy enjoying it while I make up my seating plans, stir granola and get psyched up for tomorrow. For real, I'll be more than happy to enjoy a slice of this guiltless treat on the streetcar ride home tomorrow. And for real, yes for real, I'm super excited about the new school year, especially if it starts off with bananas, blueberries, oats and feeling awesome.

Vegan Banana Blueberry Bread
adapted from A Cozy Kitchen and Love and Lemons
makes one loaf

2 medium super ripe bananas, mashed
1 tablespoon of canola oil
1/3 cup of brown sugar
1/3 cup of almond milk + a squeeze of lemon juice (or 1/2 teaspoon of cider vinegar)
a splash of vanilla extract
1/4 cup of rolled oats
1 cup of whole wheat pastry flour
1 teaspoon of baking powder
1/4 teaspoon of baking soda
1/2 pint of fresh blueberries

1. In large bowl, mix together the mashed bananas, oil, sugar, milk, and vanilla extract. Add the oats and let it sit for about 10 minutes.

2. Sift in the flour, baking powder and soda and mix until just combine. Carefully fold in the blueberries.

3. Pour the batter in a greased loaf tin and bake at 350 for about 40 minutes, or until the top gets nice and brown, and a cake tester inserted comes out clean.

4. Cool well before slicing .. if you don't, you'll get a slice that's goopy -- delicious, but goopy.

Monday, August 27, 2012

Rainy Day Weekend Treat


I cherish weekends during the school year. On hard weeks (especially around report card time), I actually count the hours. There's something about working all week and coming home on Friday and knowing that there will be no morning routine the next day, and that extra hour of sleep that I craved on Thursday morning can actually happen. It's always a time to refresh and re-energize. I know I've had a great weekend if I look forward to Monday, and believe it or not, that actually happens sometimes.

But weekends kind of lose their meaning in the summer. All the days kind of blend into each other, and the weekends just become like any other days. It's been fun. But it's back to the grind soon. In fact, I have to go into work today to start preparing. School starts in about a week and getting into that familiar weekday routine before I actually have to, helps a lot when I have to suddenly jump from afternoon naps, mornings spent in cafes and bike trips to 6:45am streetcar rides, too much marking and 150 children demanding my attention -- not to mention teaching a little French in between. Weekends will start meaning a lot more in about a week.


I'm looking at the forecast, and it calls for rain all day. If it were a weekend, it would be a perfect one to spend inside on a baking or cooking project, watching an old, favourite movie, or having a long lazy weekend brunch. And what better brunch food than pancakes, especially when I've just brought back a litre of beautiful amber maple syrup from the nation's capital. We've tried a few pancake recipes -- some vegan ones, some with hearty whole wheat flour and other grains (that was a supper pancake!) and they were all great. Only once, did we make a pancake that wasn't too great; it was the Michael Smith pancake recipe from the BlogAid recipe book, and while it produced a stick-to-your-ribs, hearty pancake, they weren't the least bit fluffy, and they actually turned out a little tough. Did we mess up, or was this pancake just not supposed to be fluffy?

Is there a secret to fluffy pancakes? I'm not sure. Is it beating egg whites separately? Is it just the right amount of leavening? Is it using buttermilk, or a splash of vinegar? Or is it all in how you mix the batter? Have you encountered a perfect pancake recipe? I think I have, and it's not surprise that it's a Joy the Baker recipe. It's actually a sexier pancake than we made: the original recipe calls for the addition of meyer lemon zest and fresh berries. But we wanted a nice, plain pancake to savour our last-of-the-season strawberries and maple syrup with , so we nixed the additions. The result was a super fluffy, perfect pancake; no really. It's perfection. I confess that I'm not usually a pancake person, especially in the morning, but these little fluffers had me hooked.  And they're just as good cold if you happen to have left overs ..

We pretty much used the original recipe without the lemon and berries. The only small change we made was replacing the 1 cup of buttermilk with 2/3 cup of plain skim yogurt and 1/3 cup of almond milk. And letting the batter sit for about 10 minutes really makes them super fluffy and sky-high. It's a rainy Monday -- not really pancake day, but it's perfect pancake weather. Break your weekday routine and make these. Go on...

Wednesday, August 22, 2012

More Treats for You: Double Corn Muffins


 Yeah, so like I said before, I sucked at posting this summer. Part of the reason is because I haven't been doing too much cooking. I had a brief love affair with lunch, but that ended, and supper has been a steady stream of variations on this salad. I've been eating an unusual amount of red leaf lettuce and cucumbers lately. No excuses, except to say that in the summer, there are so many more things to do besides cook, and while I love cooking, I love cafe hopping, bike riding, warm afternoon naps, chats with best friends and other such lazy dazy activities. Such is life.

But I have been baking. Baking and preserving. But let's talk about the baking part. I always feel a need to bake in the summer, even when it's sweltering outside, because, well, baking rocks. It's a busy way to waste time, it's relaxing and challenging all at once, and in the end, you always get treats. And I always need treats in the summer time, especially when the end of August rolls around and the start of the school year looms over me, reminding me once again, that play time is over and it will soon be back to work (or legislated back to work as it stands right now ..) So it's settled. Summer time = baking time so let's get to it!


A few weeks ago, I visited one of my favourite farmer's markets, and couldn't resist buying a little basket of sugar plums. These little yellow jewels of sweet and tart usually play second fiddle to the berry and peach bounty that August brings, but at the moment, I could resist scooping up a basket to snack on and play with in the kitchen. The super sweet yellow corn was also calling my name. When I got home, I was aching to put the two together in a baking project. I found this beautiful cornbread muffin recipe after a quick internet search and decided add a double dose of corn to make it extra summery sweet and delicious. These muffins are a perfect afternoon snack, with a cup of nice, strong coffee, but they work perfectly as breakfast in the morning, paired with a bowl of melon or seasonal fruit salad. The little sugar plums provide a beautiful sharp burst of sweet and tart, and when you get a bite with both fresh corn and almost melty, jammy plum, it's like summer exploded in your mouth. Really, I'm not exaggerating. Ok, I might be just a little, but that's ok. These muffins were awesome and you should try them while the plums and corn are still around.

If I had one of two of these little beauties packed away for lunch, it just might ease the first-day-of-school-jitters. We'll see. I'll let you know.  Enjoy the summer while it lasts!

Double Corn Muffins with Sugar Plums
adapted from babble.com
makes 24 mini muffins

6 tablespoons of plain skim yogurt
1/4 cup of almond milk
1 egg
2 tablespoons of olive or canola oil
a tiny splash of almond extract
1 cup of whole wheat pastry flour
1/2 cup of yellow cornmeal
1/3 cup of natural cane sugar
1/2 tablespoon of baking powder
1/4 teaspoon of baking soda
1/4 teaspoon of salt
1 cup of diced and pitted sugar plums
1 cob of corn, de-cobbed

1. In a large bowl, whisk together the yogurt, milk, egg, oil and almond extract. Add the sugar and mix until well combined.

2. Sift in the flour, cornmeal, baking powder and soda, and salt. Fold until just combined. Try not to over mix.

3. Gently mix in the corn kernels and diced plums.  Spoon the batter into prepared muffin tins. Bake at 350 for about 20 minutes (for the minis!) until you have nice, puffy golden, springy muffins, or until a cake tester inserted comes out clean.

4. Enjoy!


Tuesday, August 7, 2012

Refreshing Summer Dessert


I've done a terrible job of posting this summer -- I know. It's not the produce -- the berries are beautiful, the greens are abundant, and the sweet corn is sweet as can be, despite the warnings of bad crops because of our warm March and frosty April. Peaches are sweet and juicy, we've already preserved many pints of strawberries (which are still around in some markets!) and blueberries (from Ontario and all the way from B.C.), and I think I've eaten my weight in green beans (although some yellow and purple ones may have slipped in!) and cherry tomatoes. Recently, I'm seeing beautiful local sugar plums and fresh, pretty speckled roma beans and in certain markets, baskets of beautiful red currents.The basil (purple, and regular) on my balcony is flourishing, as is the thyme. The dill had it's run, but the Italian parsley is hanging in there, and the lavender is still very happy.

But alas, despite the market bounty, I've still sucked at posting this summer. I apologize. This is what happens when I take a course: July wizzes by in a blur of papers, reading and typing, and then when it's over, I feel like doing nothing, and then all of a sudden I'm panicking about planning for September. I now remember why it's been 7 years since my last course. However, procrastinating was definitely a part of this process, and for me, procrastinating always means time in the kitchen.

This time, it involved internet re-runs of the cooking show French Food at Home.  Have you seen that show with Laura Calder? She's incredible, and the other day, I watched her make a wine jelly: a beautiful molded jelly with red and green grapes trapped inside. Beautiful. I wanted to make a non-alcoholic version and take it one step further by trapping bubbles (i.e. carbonation!) in the jelly with the fruit. I also used a vegan substitute for gelatin: agar. It's a jelling agent derived from seaweed and very popular in vegan baking. You could probably get pure, fancy agar flakes at the health food store, but I got mine at an Asian grocery store, and it also contained sugar, so it pretty much worked just like gelatin -- check out this website for details.  Laura used white wine sweetened with sugar in her recipe -- I used white grape juice (totally delicious!) and mixed it with lemon flavoured sparkling water to make up for the extra sugar.  The result was awesome: beautiful summer fruits in a tingly, sweet jelly -- the carbonated water totally worked, and made this dessert extra special. I'm sure if you're in the mood for alcohol, a nice sparkling wine (Prosecco perhaps?) would work nicely. Whatever you choose, go the sparkling route. the jelly leaves a nice tingly sensation on your tongue and makes you savour and enjoy every bite.

Summer can't be over yet, right? Right?!

Sparkling Jelly with Summer Fruit
inspired by Laura Calder
serves 4

1 large peach
1/2 pint of fresh raspberries
1 cup of white grape juice
1 cup of lemon flavoured sparkling water
1 tablespoon of sugar-agar powdered mixture or gelatin
2 tablespoons of water

1. Cut your peach into quarters. Cut each quarter into six little cubes and place them in 4 half-cup ramekins. Divide the raspberries evenly between the ramekins. Set aside.

2. Dissolve the agar in the water and let it sit for a bit. Meanwhile, heat up the grape juice in a small pot. As it just comes to a simmer, add in the agar-water mixture and bring it to a boil. Turn off the heat immediately and add the sparkling water.Stir well.

3. Pour the liquid mixture into the ramekins. Let them sit at room temperature until they cool down. They will probably set as they cool. Place them in the fridge to chill.

4. Enjoy!


Wednesday, August 1, 2012

Embracing Lunch


 What does your lunch look like today? I have to admit that until recently, my lunches were pretty pathetic. I was never a breakfast skipper -- there's always a smoothie around or jazzed up oatmeal on weekends. Even when I'm on vacation, breakfast is always a must -- even if it's a bagged granola and warm pineapple juice (ahem .. that was Spain 2005.. don't ask ..). I almost never skip dinner -- it was a big affair growing up and everybody would sit down. Occasionally I've had hot chocolate and pretzels from the back a car (ahem .. Monton 2010...) and sometimes it's a bowl of chocolate granola at 5:30 and a bowl of Raisin Bran at 8:30 .. but that's rare, and it's still dinner. Lunch on the other hand I'm more prone to skipping, especially on lazy summer days when the morning melts into the afternoon, and I've already been eating mounds of watermelon and drinking too many cups of iced tea. Lunch doesn't seem to fit in.

But for the last couple of days, I've embraced lunch. It's helped that I had beautiful fresh organic eggs and veggies that needed to be eaten up, and a huge craving for citrusy orangey treats -- the perfect time to pull out a little jar of homemade mixed citrus marmalade from the winter. And I poached an egg! For the first time! Lunch is great!  Here's a peak ...


This is: toasted english muffin with marmalade, blanched green beans, carrot sticks, grapes, lemony sparkling water with berries and some good reading.


This is: poached egg (!!) nice and runny and yolky with pepper and herbes de provence on top of blanched green beans, half a peach, grapes, and toasted english muffin with marmalade.


This is: the last of the green beans, chickpea salad -- cooked chickpeas smashed with celery, chopped mint and basil, a dollop of yogurt, mustard, a squeeze of lime juice.


Ok, this is more like dinner, but still ... : beautiful organic eggs scrambled with fresh Ontario spinach, a handful of leftover chickpeas and lots of fresh herbs -- basil, mint and thyme, with beautiful cherries on the side.

I admit that these beautiful lunches only lasted for a few days, and then it was back to watermelon, iced tea and handfuls of granola. But hey, I'm learning.  What should I have for lunch today?

Friday, July 27, 2012

Tea Time Blueberry Cake


Hello there. Are you enjoying the summer? Specifically, are you enjoying the summer fruit? I hope so. This first month of my summer has been uncharacteristically busy -- an out-of-the norm for me. Usually when school ends, I spend a good week and a half doing nothing and mulling about, reminiscing and baking scones or making a treat for a road trip. Not this year. Boo hoo.

But I did make cake. A wonderful, hearty, spelt and blueberry tea cake, sweetened with dark maple syrup and made with the season's first Ontario blueberries. I obsess over berries each summer, and in the fall, I always regret not eating more. Berries are so fleeting and will always be. And even though I know the best way to eat these local delights is to just enjoy them straight up, I can never resist baking up batches of goodies studded with ripe, local fruit. This cake is no different. It's a very simple, no fuss cake, adapted from one of Heidi's recipes at 101 Cookbooks. Her version uses huckleberries and includes a little crumble topping. Seeing as I've never seen a huckleberry here in Ontario before, I decided that blueberries would have to do, and although I love crumble topping, I skipped it for a more wholesome, breakfast friendly-version of this cake. Heidi also included some fresh rosemary and thyme in her cake and I loved the idea of herbs adding that little something extra to a dessert. I followed her lead with the thyme, as each summer they grow like mad on the balcony and I feel bad if I don't use them up, but instead of the rosemary, I added some fresh lavender leaves which perfumed the cake ever-so-slightly -- perfect with the floral, fruity berries.


While making this cake, I thought about one summer when my sister drove my best friend and I to a farm just north of the city, and we spent the afternoon in the sun, picking blueberries and raspberries. When I sampled the blueberries I bought for this cake, the whole day came flooding back to my mind -- the hot, dusty drive out of town, the sun on the back of my neck as we stooped over the pick our berry treasures, the way I giggled when a farm boy with an accent handed me my blended lemonade and grilled corn on the cob, the rustic, touristic feel inside the gift shop where you could buy jams, pies, and other assorted goodies, and the way my best friend giggled at me when I bought honey-roasted soybeans of all things at the shop and snacked on them all the way home in the car. Gosh, that was a good 7 or 8 years ago, but I remember it so clearly.

I'm not sure if there will be road trips, berry picking or dusty car rides into farm land this year. But there will be cake, there's already been lots of coffee, and there will always be giggles and good times.

Happy Summer. I hope you're having a good one .. and I hope it lasts forever ...

Maple Blueberry Tea Cake
adapted from 101 Cookbooks

1/4 cup of spelt flakes
1/3 cup of skim milk yogurt
zest and juice of one lemon
1 egg, beaten
1/4 cup of dark maple syrup (grade B amber)
1 teaspoon of vanilla extract
3 tablespoons of canola oil
3-4 sprigs of fresh thyme, leaves only
5-6 fresh lavender leaves, finely chopped
1 cup of spelt flour
1/2 teaspoon of baking soda
1/2 teaspoon of baking powder
1 cup of fresh blueberries, washed

1. In a large bowl, combine the spelt flakes, lemon juice and zest and yogurt. Stir well and let it sit for 10 minutes before adding the egg, maple syrup, vanilla and canola oil. Mix well.

2. Add the thyme and lavender and sift in the flour, baking soda and powder. Mix until just combined. Add the blueberries and give it one final mix.

3. Pour your batter into a baking pan and bake at 350 for about 25 minutes, or until the cake tester inserted comes out clean and the top of the cake is springy when you touch it.

4. Serve with tea, coffee or big dollop of yogurt and more fresh berries for breakfast!


Sunday, July 15, 2012

Feeling Chocolately


On Monday morning, I woke up wanting to bake a chocolate cake. This chocolate cake to be specific. This chocolate cake that involves stout, maple syrup and cocoa powder. Did I have those things in my pantry? Yup (minus the stout, but there was a lonely dark ale sitting beside the almond milk...) Did I make that cake? Nope.

Ridiculous! Why can't I bake a chocolate cake on Monday, just because? It must be some inherent start-of-the-work-week thing where you feel like you have to do some work to earn the chocolate. Like, you know the episode of Bing Bang Theory where Penny makes French toast for Leonard and Sheldon but Sheldon is too uptight to eat French toast on a Monday?  Yeah, I totally felt like Sheldon -- except I didn't waste perfectly good French toast (or chocolate for that matter!).


Instead, I made granola. Wholesome, healthy, grain-packed Monday-food granola. And I make it chocolatey! I added a nice rounded tablespoon of dark cocoa powder to my oats and spelt and sunflower seeds and a dash of cinnamon to remind me of spicy hot chocolate. The liquid base is a combination of honey, tahini and apple sauce -- oil and guilt free. I tossed a good handful of raisins at the end and snacked on it while it was still warm. The house smelled like a chocolate factory while this was baking and it totally took away my chocolate-cake-baking itch. It was also perfect later that Monday with a splash of almond milk, a few sliced bananas and a sprinkle of blueberries. Beautiful summer Monday food.

Well, it's the weekend now, and a perfect time for chocolate cake, except that I didn't get around to doing any baking or cooking this weekend and ya know what? Tomorrow is Monday and the perfect excuse to make this granola again! This time, I think I'll try adding some coconut flakes, or flaked almonds and cranberries instead of raisins -- although dried cherries would make it a really special treat... and almond butter instead of tahini. Or maybe I'll use this recipe that calls for mashed bananas instead of apple sauce. Chocolate and banana .. Mondays rock!

Chocolatey Tahini Granola
makes about 4ish cups

2 cups of spelt flakes
1 cup of rolled oats
1/2 cup of sunflowerseeds (or almonds and coconut!)
2 tablespoons of black sesame seeds
1 tablespoon of dark cocoa powder
1 teaspoon of cinnamon
3/4 cup of apple sauce (I made my by cooking two little apples in a splash of water and blending it)
2 tablespoons of tahini
1 tablespoon of honey
1 cup of raisins (or dried cranberries or dried cherries)

1. In a large bowl, toss together spelt flakes, oats, sunflower seeds, sesame seeds, cocoa powder and cinnamon until everything is evenly distributed.

2. In a smaller bowl, whisk together the applesauce, tahini and honey. Don't worry if it looks gross -- it'll get better!

3. Add the applesauce mixture to the oat mixture and carefully stir until everything is moistened. Spread the mixture out on a baking sheet making sure it's as even as possible.

4. Bake in a 350 degree oven, turning every 10 minutes for about 30 minutes or until the mixture dries out and gets crisp. You house will smell like heaven. Toss in the raisins as soon as it comes out of the oven. Cool and store in an airtight container. Enjoy!  Happy Monday!


Monday, July 9, 2012

Hooked on this Salad


I love summer and I love summer produce, especially the summer fruit. But when it comes to cooking in the the heat, I'm a bit hesitant. I love summer because I get lots of time off and that means lots of time to experiment in the kitchen. But these past few days have been hazy and humid and hot, weather that takes away your appetite. It's like you want to drink lemonade and eat popsicles for supper every day. Seriously.

While the weather outside today is just perfect -- lots of sunshine, a little breeze and not too much humidity, the 7 day forecast calls for heat alerts by Friday. Turning on the stove is going to be a chore, but we still need to eat, right? One cannot subsist on lemonade a frozen treats -- but add a salad in there and we're probably good to go, especially if it's a nice hearty salad, like this beautiful rice and cucumber bowl. It's nourishing and almost cleansing, and it's the kind of thing that you don't mind eating even in the extreme heat.


I've called it a cucumber and rice bowl, but really, you could put whatever you want in it. It's all about the dressing. I had a huge crush on tahini-based dressings, but in the heat, I prefer something yogurt-based. It's totally simple. Non-fat yogurt, lemon juice and bunch of herbs from your garden. This year, we've started growing dill, so I used a whole bunch of it in the dressing and it really worked well. It's zippy and lemony and cool and creamy -- the perfect way to top my bowl full of goodness. And it goes without saying that you could totally mix it up. Isa says that the essential ingredients of a bowl are "a grain, a green, and 'tein and a sauce." Once you've got that, you're all set. I'm considering switching the grain to soba noodles -- if you choose to go that way, you might want to cut your veggies in a similiar shape (like rather than dicing or chunking, cut them in match sticks or use a grater). This salad is also awesome because you can cook up a big batch of whatever grain you choose, and for the rest of the week, you'll enjoy cooking-free lunches or suppers. Just chop, toss and enjoy.

Want more bowl inspirations?

Glorious Bowl
Lemon Orzo with Spinach, Feta and Almonds
Quinoa and Chickpea Salad with Balsamic Dressing
Green Quinoa
Bulgar, Millet and Chickpea Salad
Roasty Soba Bowl
Qunioa with Currents, Dill and Zucchini
Buttermilk Farro Salad
Wild Rice Salad with Yogurt Viniagrette


I'm sure these cool bowls will keep you happy all summer long!

Cucumber Rice Bowl with Herbed Yogurt Dressing

Fill your bowl with some of the following ...

rice -- red, brown, wild, go nuts!
quinoa
millet
barley
soba noodles
or a combination

cooked and/or drained chickpeas, kidney beans, black beans etc.
tofu cut into cubes (the smoked or marinated kind is awesome)
cooked lentils -- go nuts and try some of the fancy kind

cucumber or raw zucchini chunks
blanched fresh or frozen peas
fresh sweet corn (blanched or raw!)
baby arugula or spinach
chopped lettuce
cherry or grape tomatoes

Herbed Yogurt Dressing
makes about 1/3 cup -- enough to dress 3-4 salads

1/4 cup of skim milk yogurt
juice of one large lemon
a splash of water
salt and pepper to taste
a large bunch of chopped, fresh herbs -- I used dill, oregano and thyme

Whisk all the ingredients until smooth. Taste and adjust the seasonings if necessary. Pour 1-2 tablespoons over your bowl. Toss, eat and be happy and cool.


Saturday, June 30, 2012

Cool and Creamy


It's a hazy one out there. A perfect Pride Weekend, made special because it's my first weekend of summer vacation. It usually takes a few days for the thought of summer vacation to soak in, and another few days to get all unwound, especially with end of the year drama. And while I'll miss the children like crazy, I'm glad to have some time to myself. And it couldn't be a more perfect weekend to start off my holiday.

Enjoying hot hazy days can be tricky. The sunshine begs you to join it outside, but after awhile and a couple gallons of water, you're exhausted. I think the trick is to balance your sunshine adventures with lots of hydration, and some cool creamy treats. These mango lime popsicles are perfect, but so is this unique strawberry rice pudding.


I know some of you aren't pudding people. It's a texture thing, right? I loved pudding as a child. Every once in awhile, my parents would get the Jell-o pudding cups (usually vanilla or tapioca) and I would be allowed to have one as an after school treat. My first perfect memory of pudding as a child was when I went over a friend's house for the first time, and we made lemon pudding together. We poured in the milk, mixed it up, and waited patiently for it to set in the fridge. I think it's the memory of being together with that friend that I miss, rather than the taste of powdered pudding.

 My re-acquaintance with pudding came many years later when I made this super easy chocolate pudding. No messing about with egg yolks or double cream. Cornstarch does an amazing job thickening it to the perfect pudding consistency. I even made a mocha version by substituting some of the milk with extra strong brewed coffee, and a butterscotch version with some leftover butterscotch chips. Then this coconut rice pudding got posted, and I tried that too. In this recent pudding edition of my kitchen adventures, I made a strawberry rice pudding that's just sweet enough, very creamy and totally perfect if you have some stray berries that are getting over-ripened. I originally wanted it to be a coconut strawberry pudding; I used a coconut milk beverage (the kind in the tetra pack that's used as a milk substitute) for the first time, but found out that while it's nice and creamy, it lacked in coconut flavour. But that didn't matter because the strawberries totally shone. When it's chilled and eaten straight from the jar, it's the perfect after-sun-adventure treat.


While I know the pudding probably isn't everyone's cup of tea, I urge you to try it if you like pudding even a little bit. There's just something so satisfying about sticking your spoon into a jar of something creamy and cool ... Happy summer days everyone!

Strawberry Rice Pudding
serves about 2-3

1/4 cup of arborio rice
1.5 cups of milk (or any non-dairy milk -- I used So Nice coconut milk beverage)*
1/2 teaspoon of vanilla extract
2 tablespoons of natural cane sugar
1/2 cup of fresh strawberries, diced

**if you want a more coconut-y pudding, try replacing some of the liquid with the thicker coconut milk that you get in a can -- I would say maybe use half a cup.

1. Place your chopped berries in a small bowl and sprinkle over 1 tablespoon of sugar. Mix well and let sit while the pudding cooks.

2. Rinse your rice well. Place it in a pot with the milk, vanilla and the rest of the sugar. Bring the mixture up to a boil, stirring often. Reduce the heat to a simmer and let it cook, covered, until the rice is tender and the liquid a thickened. It will still be runny -- don't worry that it's not pudding-like yet.

3. Turn the heat off and stir in the diced berries with their juices. Let it cool to room temperature and then refrigerate.  Enjoy when it's completely cool, thick and creamy!  I'd even have it for breakfast!