Sunday, November 20, 2011

Snacky Snacks


Are you a snacky person? I definitely am. I know people that eat three meals and nothing in between. I just can't do that. Snacks are wonderful. They perk me up and refuel me for the next chapter of the day. They are definitely worth taking time out to prepare. I usually make a nice big batch of snack-worthy treats that are enjoyed throughout the week. More than often, these are super healthy snacks loaded with good things that nuts, fruits, fiber and natural sugars. I love decadent treats as snacks --hey, who wouldn't love some chocolate smack in the middle of the day to keep you going? But usually these treats just give you a short term high, when what I mostly need is some long-term sustenance.


Healthy muffins and oatmeal cookies are definitely popular in my snack repertoire, as are fruit-packed or nut-butter loaded quick breads. But lately it's been granola. I love granola. I love it with soy milk, or yogurt, or most lately kefir. But usually, it's just on it's own, crunched while walking to the streetcar stop, forgotten about until the 3:30 bell and then happily munched on the way home. I've made fancy granola chunks, batches with ancient grains like kamut and spelt, and even peanut butter granola and tahini granola.


I've seen many different granola recipes lately, and my best friend raved about one from the New York Times made with olive oil, but I have to say that I love to play with this recipe that uses apple sauce instead. I made this granola batch beautifully fragrant with the addition of orange zest, and I added chopped dates instead of raisins or dried cranberries, a lovely, sweet and sticky alternative that goes great with the orange flavour. There's also chopped almonds and sunflower seeds in there too, because a snack always needs to give you a little protein boost, right? Right?! Get snacking people!

Orange Scented Granola with Dates

adapted from Everybody Likes Sandwiches
makes a big batch!

***3 little apples or 2 big ones -- I used empires, chopped and peeled (if you like .. I left the peel on)
splash of water
1/2 teaspoon of almond extract
3 tablespoons of honey or maple syrup
3 tablespoons of orange juice

2 cups of spelt flakes
1 cup of old fashioned oats
1/2 cup of raw sunflower seeds
1/2 cup of chopped raw almonds
1/2 cup of chopped dates
1 teaspoon of ground cinnamon
1 teaspoon of ground cardamom
zest of 1 large orange

1. In a small saucepan, place the apples and water and bring to a simmer over medium heat. Turn the heat to low, put the lid on, and let them cook for about 15-20 minutes, or until the apples gets nice and soft.

2. Take the apples off the heat and let them cool a bit. Add the almond extract and honey, and give mix well. Set aside.

3. In a large bowl, combine everything else except that dates and mix well so that the spices and zest are well distributed. Add the apple sauce mixture and mix carefully so that everything is coated.

4. Spread the mixture out on a cookie sheet and bake in a 350 degree oven, tossing frequently, until the mixture has dried out and turns golden brown. For me, this took about 45 minutes, turning every 15 minutes.

5. Remove the granola from the oven and add the chopped dates immediately. Toss and let cool. Snack away!

***If you don't feel like making home made applesauce, or already have a nice batch, use about 1 cup
Saturday, November 12, 2011

Freezing the Goodness


Are you one of those clever people that clears out the freezer ever summer to make room for the bounty of berries and sweet corn and then in the dead of winter you pull out these amazing, local frozen berries from the freezer and make your smoothies and baked goods taste like heaven while snickering at the rest of us who have to make due with flown in berries or Europe's Best frozen ones (which are actually a product of Chile?)?


This summer, I sooo wanted to freeze a harvest of blueberries and strawberries -- the problem was, we ate them so quickly, and we could never buy enough. There was also the problem of room shortage in my freezer. Yeah, that'll do it. But we did do something to preserve the goodness of summer: we made preserves! No thick, pectin-laden jam that's almost half sugar. Nope, we made preserves that actually tastes like strawberries, rhubarb and blueberries. It was awesome.


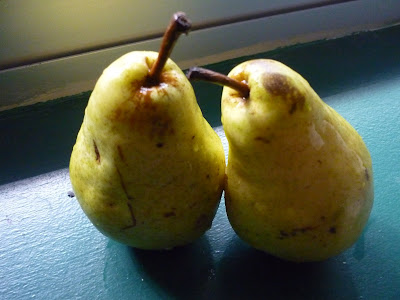
So when fall rolled around -- and I loooooooove fall -- I wanted to preserve a bit of that too. I always get excited about the apples that roll around. A new variety showed up in my local market -- the Ambrosia. Totally delicious. But I find that the apples always overshadow the pears -- which symbolize fall as perfectly as apples do. I remember buying spicy pear jam at a market in Guelph and wanting to re-create it at home. Ours was more of a stewed fruit preserve, with less sugar, kicked up with some fresh ginger and lemon juice and of course, all spiced up. It made for a beautiful topping for my weekend oatmeal brunches, a perfect gift for my mommy, and a welcome alternative to go along side peanut butter. When all was said and done, and the two little jars were sealed and stacked in the freezer, I couldn't help trying one right away. But I'm going to save the other one for early July, when I need a reminder that summer will whip right by me, but fall .. fall is likely to linger..

Spiced Pear Preserves
makes about 1.5 cups -- enough to fill three little mason jars; a really small batch, but I'm sure if you doubled or tripled it would be fine -- just adjust the spices and sugar to your taste.

6 Bartlet pears, peeled and diced
1/2 teaspoon of grated fresh ginger
1/2 teaspoon of cinnamon
1/2 teaspoon of cardamom
a tiny pinch of allspice
juice of half a large lemon
2-3 tablespoons of sugar
splash of water, more if needed

1. Combine all the ingredients in a pot and cook over medium heat, stirring often. When the pears start to break down (about 10 minutes later), turn the heat down to low and let it cook.

2. In the meantime, sterilize your stuff by placing the jars (face up), rims and lids (seal side up) on a cookie tray and in a 200 degree oven for about 20 minutes.

3. By the time your pears are nice and softened and the juices have thickened, your jars will be ready. Carefully spoon the pears in each jar. Seal tightly and turn them upside down on the cookie tray. Let them stand for 20-25 minutes, after which time, they should have sealed.

4. You're ready! Freeze or eat at your leisure! :)

Sunday, November 6, 2011

New Age Wontons


The old school pork and shrimp wonton is a comfort food of my childhood. We would order them in soup with noodles, and they would be swimming around, all hard to pick up with chopsticks , and if you managed to finally spear one, you'd be rewarded with a velvety-smooth pasta-like dumpling stuffed with the classic Asian flavours. Ahhh the wonton.


These days, I don't indulge much in the classic wonton anymore; it's saved for special brunches and Chinese New Year festivals. And that's ok -- they're definitely worth the wait and absence makes the heart grow fonder, especially since they don't tend to sit well in my stomach. One of two will do, thank you very much.


But these new aged, caramalized onion and swiss chard wontons? I could eat these everyday. I originally saw these in my new favourite cooking magazine, Vegetarian Times and marvelled at how pretty they looked: they wonton skins turned kinda transparent when cooking and the ruby red chard stems could be seen on the inside. Totally zen-like and beautiful. But I forgot about them until I saw a dish of leftover caramlized onions in the fridge -- originally used as a gourmet topping for mini burgers at my birthday party.


The originally recipe calls for tofu in the filling, but I skipped that and added some chopped celery instead. I made the filling they day before when I had some free time, and the next day at supper time, all I had to do was package them up and boil them for just a minute. Obviously they would take longer if you were actually caramelizing your onions instead of cheating and using leftovers like I did, but I think the extra 20 minute is worth that deep rich, sweet flavour ... Although, I'm sure plain sauteed onions would be good as well. Which brings me to my other point. You could stuff anything into a wonton wrapper! Heidi at 101 Cookbooks put smashed split peas in hers. A curried lentil mixture with chard would be totally yummy too, as would the original tofu and mushroom. I'm totally making these again this week!

Caramelized Onion and Swiss Chard Wontons
makes may wontons ... enough for 2-3 hungry people

1 onion, sliced thinly
1 tablespoon of olive oil
salt and pepper
about 3 large ruby red swiss chard stalks, stems finely diced, leaves cut into ribbons
1 stalk of celery, finely diced
1 teaspoon of minced ginger
1/2 teaspoon of ground cumin
1 tiny splash of toasted sesame seed oil
1 tiny splash of light soy sauce
a good grinding of black pepper
a package of wonton wrappers
a small dish of water

1. In a heavy-bottom skillet, heat some olive oil until it smokes. Add the onions and season with salt and pepper. Cook the onions, stirring constantly, and adding splashes of water if the brown bits start to build up on the bottom of the pan. Stir them up and keep on cooking for about 15-20 minutes, or until the onions are super soft and a deep brown colour. From the pan and set aside.

2. In a small sauce pan, cook the the celery, chard stems and ginger in some olive oil for about 5 minutes or until things start to get tender and fragrant. Add the cumin and black pepper and give it a good stir. Add the onions, chard leaves and mix together. If things look a bit dry, add a splash of water or broth. Cook until the chard leaves start to wilt.

3. Add the sesame oil and soy sauce and give it one final stir. Taste and adjust your seasonings. Remove the mixture to a bowl and let it cool, or store in the fridge until you want to use it.

4. To make the wontons, place the wonton wrapper flat on your cutting board. Put about 3/4 of a teaspoon of the cooled chard mixture in the centre. Dip your finger the dish of water and wet all four sides of the wrapper. Fold two opposite corners together to form a little triangle. Press down the sides to make sure it's sealed. Repeat!

5. Bring a pot of water to a boil. Add your wontons in batches -- don't over crowd the pot. Cook for 1-2 minutes, or until the skins become soft and translucent. Remove with a slotted spoon. Serve right away, dipped in balsamic vinegar, with an extra splash of soy sauce, or add to a broth and noodle bowl.