Sunday, December 30, 2012

Addictive Dip


Do you make New Year's resolutions? I've always thought this idea was made up to make people feel bad about themselves during the holidays and so I never make my resolutions on New Year's. I'm always a little slower. I let the holidays pass, I left myself quickly drift back into my routine of work, and when March break rolls around, I'm always inspired to make changes to better myself. 

This year is probably no exception. I was cleaning up today, and I came across my "March break" list from 2012. They're kind of like resolutions, but more like things I've been wanting to do, but haven't got around to doing. Writing them down always finalizes things for me, so I figure if I write it down, it's more likely that I'll get it done. 

Let's see what was on my March break list from last year: bake a real fruit pie (yes: the "real" was underlined, although I'm not sure what I meant at the time), complete 3-4 more parts of my LSQ course (that's la langues des signes quebecoise), write down the books I have read, write more, read more, listen to the radio more, eat more raw vegetables.


That last one sticks out for me. Eat more raw vegetables. While I love stirring chopped spinach, kale and swiss chard into my soups, using tonnes of cauliflower in my veggie curries, and roasting sweet red peppers and zucchini, I confess that raw veggies were not a huge part of my life. I'm proud to say that I ate more than my weight in raw cucumbers this years, bought at least one head of lettuce a week during the summer, and continue to add grated carrots and chopped celery to my every day lunch. Eating more raw veggies wasn't that hard! Score! 

However, it is harder to get psyched about raw vegetables in the winter when everyone is blogging about comforting soups, stews and pot pies. But, I've found a dip that so tangy and yummy and addictive, that I promise you won't be able to put down the carrot sticks. It's a very simple dip, made creamy with white beans, and deliciously tangy with the addition of marinated artichokes and a good dose of lemon. Oh yeah -- and it's also PERFECT to bring to your New Year's eve party, and if you've already eaten your year's share of carrot sticks, try these delicious homemade crackers. I jazzed mine up by adding Swiss cheese and dried cranberries.

Have an amazing start to 2013! Any suggestions on what I should put on my 2013 March break list?

Veggilicious White Bean Dip
adapted from Sweet Roots 

1/2 cup of dried white kidney beans (soaked in cold water overnight); alternatively you can just use one 15 oz can, drained and rinsed
1/2 bunch of spinach
1 3oz jar of marinated artichokes, drained
2 cloves of garlic
2 tablespoons of sesame seeds
1 tablespoon of olive oil
1 teaspoon of herbes de Provence
a good grinding of black pepper
salt to taste (you may not need any if you're using canned beans)
juice of half a lemon

1. Boil the soaked beans in water for 25-30 minutes, or until they are super tender. Drain and rinse. Set aside.

2. In a small pot, heat the olive oil and cook the garlic for about 1 minute, or until it starts getting soft and fragrant. Add the spinach and stir well.

3. Add the beans, artichokes, sesame seeds and seasonings. Give it a good stir. Cook until the spinach is fully wilted. 

4. Remove the pot from the heat. Using a hand blender, carefully blend up your mixture until it's nice and creamy. Alternatively, you could use mini chopper. Stir in the lemon juice. Taste and adjust the seasonings.

5. Serve warm, cold or at room temperature. It's delicious all ways!

Thursday, December 27, 2012

Warm and Hearty Banana Bread


I am no stranger to banana bread. Nope -- not at all. I've baked my fair share of banana-filled treats -- one with blueberries stealing the show, another with peanut butter and yet another one with peach and spices. All delicious and all easy.  I've tried this banana coffee cake that's yummy and lemony and perfect for breakfast, and these with olive oil and lemon zest and sesame seeds. Oh yeah! And this one with chocolate and coconut is off the charts awesome too!

But I've recently discovered another .. one that's festive and hearty and got a compliment that none of the others did: "This reminds me of my grandma's banana bread." How could I not share a recipe that got compared to grandma's?  It's nothing fancy, nothing too complicated and no tricks involved. Just straightforward ingredients, lots of ripe mashed banana, a sprinkling of oats and a handful of fresh cranberries to add beautiful colour and tart bursts of flavour. It's got a beautiful, golden almost crust-like exterior, while the inside is perfectly moist, a little springy and hearty but not dense.


The first time I made this bread, half got given away and the other half enjoyed with afternoon tea. I made it again for Christmas breakfast dessert. We enjoyed a slice, warm and fresh from the oven after sharing bowls of oats topped with mixed berry compote. I'd say it was the perfect end to Christmas breakfast.

My holidays continue until the 7th of January, but if you're not so lucky, bake this bread today and enjoy slices at work to perk up your day while we wait for 2013 to roll along.


Cranberry Banana Bread
adapted from A Cozy Kitchen
2 medium ripe bananas, mashed
1 egg
1/3 cup of plain yogurt
1/2 cup of brown sugar
1 tablespoon of canola oil
1 teaspoon of vanilla extract
1/4 cup of rolled oats
1 cup of spelt flour
1/2 cup of all purpose flour
1 teaspoon of baking powder
1/2 teaspoon of baking soda
pinch of salt
1 cup of fresh cranberries

1. Whisk together the mashed banana, yogurt, egg, vanilla and canola oil. Mix really well, until all combined. 

2. Add the oats and salt. Sift in the flours and baking powder and soda. Fold the dry ingredients into the wet mixture, mixing until just combined. Carefully fold in the cranberries.

3. Pour the batter into a loaf pan or muffin tins if you prefer. Bake at 350 for about an hour for the loaf, 25-35 minutes for the muffins, or until the cake tester inserted comes out clean and top gets a deep golden brown.

4. Cool completely and serve with coffee!

Sunday, December 23, 2012

Just in Time


I think the holidays came just in time this year .. just in time to save me from jumping over the edge of a never-ending pile of marking and never looking back. In plain language? It saved me from actually taking a sick day, not because I'm sick, but because I'm sick. I don't have a fever, sore throat or hacking cough. I'm not bogged down by a migraine or nausea. This sick comes from a never-ending fatigue, too much florescent light entering my brain, and hearing negative things said about my profession all day long on the news.

The holidays came just in time to save me from being overwhelmed and bringing that negativity into the classroom -- something the children never deserve to see.  It also came just in time to give me that little bit of extra time to catch up on all the various tasks that need to be done, just so I can probably fall behind again come February.


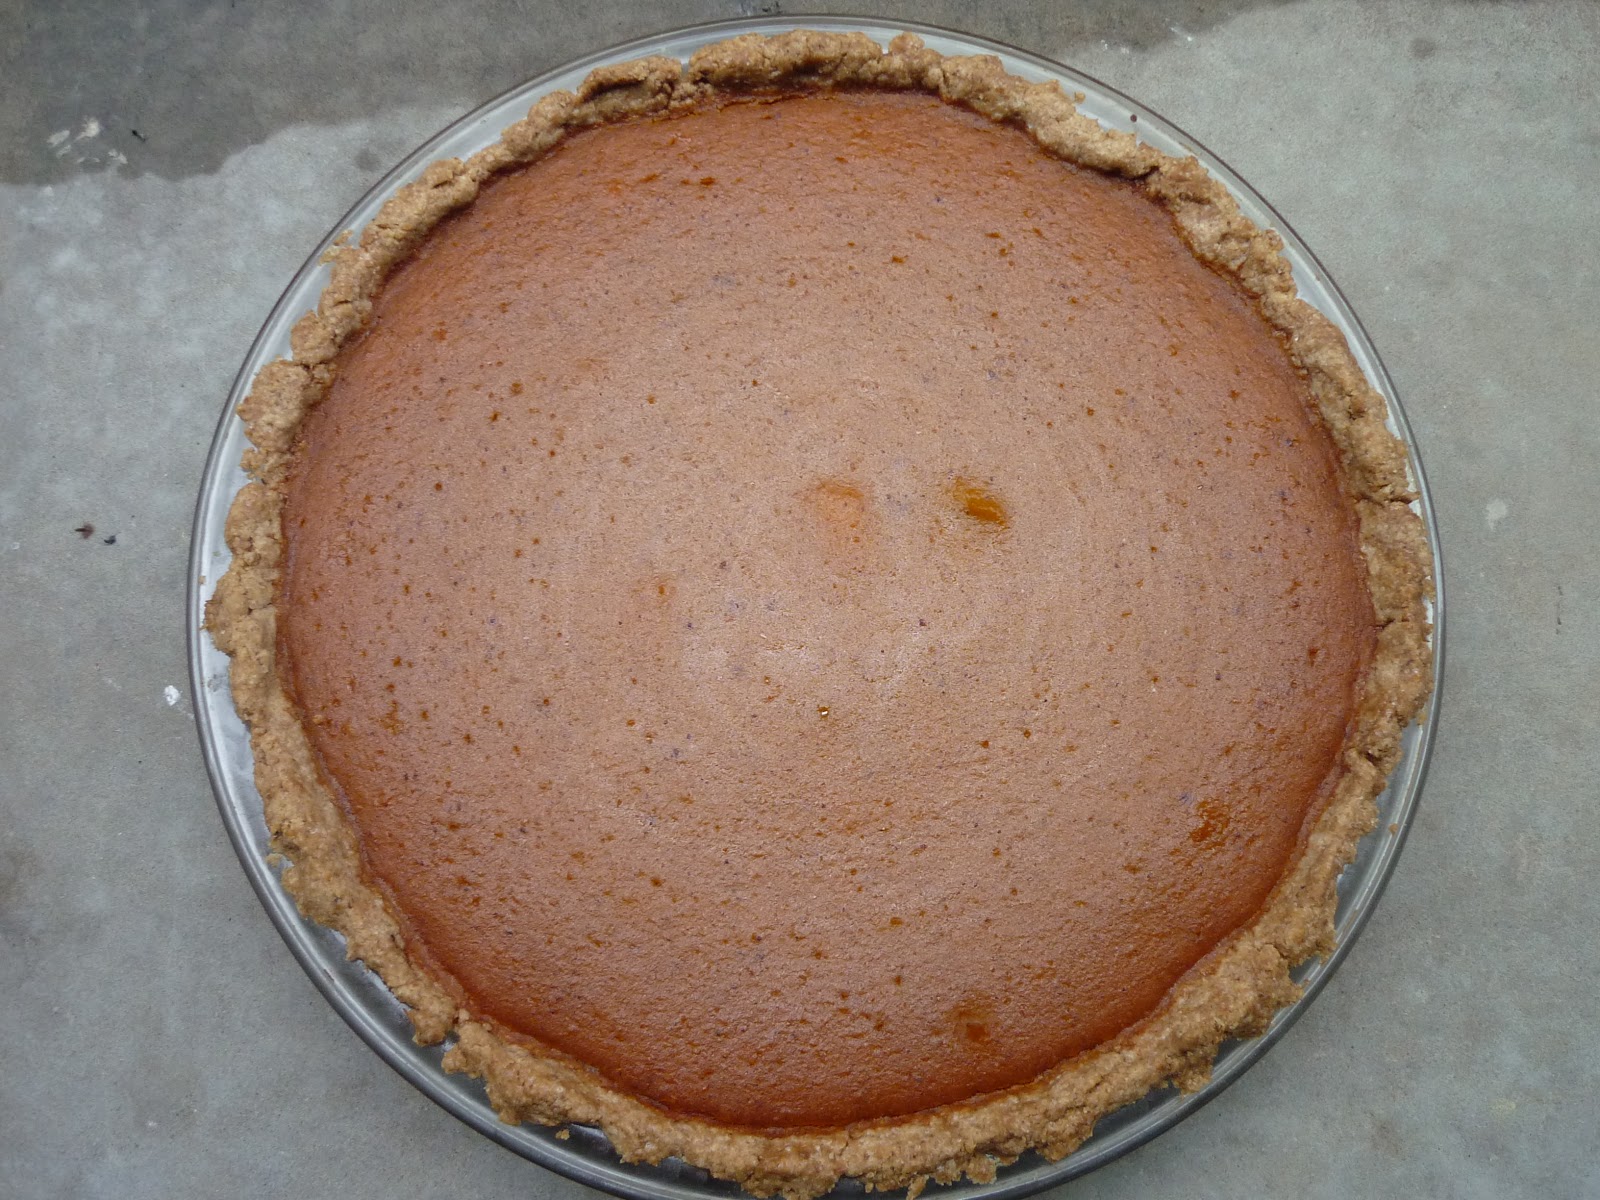
So in the spirit of things happening just in time, I'm offering you this delicious squash pie, just in time for the holidays. It has a flavourful, easy press-in crust, and a sweet, smooth, spicy filling. And it's vegan! It's also almost healthy, but I'm sure you'll enjoy it, especially if you love squash. Although I love pumpkin anything, this fall, I discovered the a whole new squash world. Hubbards, kobochas, buttecups and ambercups -- all delicious, nutty, and impossibly buttery and sweet. That's the real secret to this pie -- a flavourful squash.  They're all over the markets now, so don't be scared. Just halve it, scoop out the seeds, chunk it up and roast at 350 in an inch of water. About an or so later, you'll have perfect squash, ready to be pureed and baked into something delicious.

The pie comes from two different sources; the crust is from have cake will travel --  always a good source for tasty vegan baked treats -- and the beautiful filling is from post punk kitchen. The inspiration came from a good friend of mine at school whose mom used to use hubbard squash to make squash pie (in the old fashioned way of course, with lots of cream and sugar and a buttery crust). The squash was so beautifully sweetened that it didn't need too much help -- a few spoonfuls of apple butter and a big splash of maple syrup did the trick. The real secret is the teaspoon of agar powder to give it a custardy texture without the use of eggs. A teaspoon is all you need to make this beautiful filling set up like a dream.

This pie would make a beautiful dessert to a wholesome holiday meal, and you don't even have to feel bad eating a piece in the morning for breakfast.

Vegan Squash Pie with Spelt Crust
adapted from have cake will travel and post punk kitchen

Crust:
1/14 cups of spelt flour


2 tablespoons of organic cane sugar
a pinch of salt
1 teaspoon of ground cinnamon
1/4 cup of canola oil
2 teaspoons (or more if needed) of almond milk

1. In a bowl, mix together the flour, sugar, salt and cinnamon until well combined. Add the oil and start mixing with a rubber spatula. Add the milk, 1 teaspoon at a time, mixing well in between, until the dough comes together.

2. Press the dough into a 9 inch pie plate. Make the edges fancy if you like. Go for it!

3. Place the dough in the freezer while you make the filling.

Filling:
3 cups of pureed squash
2 tablespoons of apple butter (you could totally skip this if you don't have it)
1/2 cup of almond milk
1/4 cup of maple syrup
2 tablespoons of canola oil
2 tablespoons of corn starch
1 teaspoon of agar powder
1 teaspoon of ground cinnamon
1/4 teaspoon of freshly grated nutmeg
a pinch of allspice

1. Mix all the ingredients together in a large bowl with a whisk. Keep going! Get it smooth and well-combined.

2. Pour the squash filling into your crust and bake in a 350 degree oven for about an hour, or until the edges get nice and golden brown, and the middle of the pie is set but still a bit jiggly.

3. Cool, slice and serve.


Sunday, December 9, 2012

Noodly Goodness


It's time for some supper. I've made post after post of baked goods and treats -- indulgent and healthy breakfast worthy treats -- but now I think it's time for some supper.  Yes, supper. Some winter-comfort-in-a-bowl supper.

Where I live, winter is a bit wonky. It's warm and balmy one day, sunny and icy-cold the next, and then rainy and dreary for a week after that. It snowed a tiny bit, but nothing that lingered, and right now, there's a freezing rain alert out there. It's definitely not a picture perfect winter with bright sunny skies and fluffy snow on the ground, although I remember a time when there was. Last winter was rainy and mild, and I'm not yet sure what winter has in store for us this year, but whatever it may be, I know I'll definitely need quick, comforting suppers to drive away the overcast blues.

It's definitely stew and soup season, and I've got a few that I'll post soon, but today, it's all about the noodles. For awhile, I avoided pasta, partly because of the bad reputation that carbs were getting, and partly because pasta was beginning to not sit right in my stomach. Since discovering brown rice pasta, those days are over. And this dish is the perfect celebration of pasta. Spirally noodles mingle with toothsome black beluga lentils and velvety ribbons of spinach, all held together in a creamy sauce made from pureed squash and plenty of garlic. It's so totally simple, with fresh, natural flavours -- no overwhelming spices, just the beautiful, fresh, sweetness of vegetables hanging out with the mellow, woodsy lentils and pasta. It reminds me of macaroni and cheese because of the creamy squash, but it's totally vegan, heart-healthy and more than delicious.


For this beautiful noodle dinner, I would definitely take the time to roast and puree your own squash. It's simple and so much better than the canned stuff. Plus, if you can get your hands on an ambercup squash or kabocha squash, the flavour is out of this world -- sweet, nutty, buttery .. perfect in this pasta dish, but also in pies and sweet baked goods. All you do split the squash, and after scooping out the seedy slimy bits, cut them into chunks and roast them cut-side down in an inch of water for about 45 minutes at 350 degrees or until their they're super soft and tender. Let them cool down a bit, then the skins come off easily. Throw all the flesh into a pot, add a bit of water and then blend using a hand-blender. I stored my leftover squash in a sealed glass container, and it kept fine for a week.

Happy Winter!

Pasta and Lentils with Squash and Spinach
inspired by Everybody Likes Sandwiches
serves 2-3

2 cups of dried spirally pasta (rotini or fusili)
1/2 cup of dried beluga lentils

1 large clove of garlic
olive oil
1 cup of pureed squash
1 small bunch of spinach, washed and chopped
1/2 cup of water or stock
1 teaspoon of herbes de Provence
salt and pepper to taste

1. Cook the pasta according to the package directions. Drain and set aside.

2. Cook the lentils in water for about 15 minutes, or until they are tender but not mushy. Drain and set aside.

3. While the pasta and lentils are cooking, prepare the sauce. Saute the garlic in olive oil over low heat until things get soft and fragrant. Season with salt and pepper and herbes de Provence.

4. Add the spinach and stock. Stir well and turn up the heat to medium. Cook until the liquid comes up to a boil. Add the squash and stir well.  Add the lentil and pasta and give it a good mix.

5. Let the mixture hang out together for a few more minutes over low heat, adding a bit of stock if things start to get too dry.

6. Serve immediately.

Saturday, December 1, 2012

Warm and Spicy


I've taken a break that's more than a little one. It feels like it's been a long time. I went from sunny, still-warm weekend afternoons to frosty Monday mornings, hectic marking on Fridays and bone-chilling Sundays that, although expected this time of the year, leave us feeling more than a little under the weather.

While I haven't been cooking too much during my time away from the blog world, I have discovered a few new-to-me and delicious things: the winter squash world beyond pie pumpkins and butternut, quinoa's little sister, amaranth, a re-kindled love for pasta, stunningly black beluga lentils and a brief introduction to tempeh.  I confess that, although the thought crossed my mind, I did not photograph all of these discoveries. However, each and everyone of them is worthy of a repeat in the kitchen, and so those recipes will follow (hopefully) soon enough.

This is the first time in about a month and a half that I've felt more or less caught up with marking and planning, that I've not brought home a pile of folders and books only to leave them in the bag near the door untouched again until Monday, that I've not woken up and instantly planned out the hours that I would need to catch up on work and feel ok again when the work week starts in two short days.


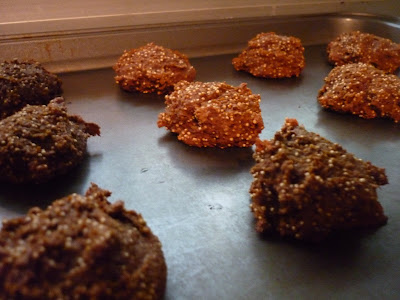
What a year. And the action has just started. But I think I'm on way back to my usual grove, on my way back to looking forward to Mondays just as much as Fridays, and back to just feeling ok. But before I delve back into the work week, I'll leave you with a quick little cookie recipe that uses two of my new found favourite ingredients: winter squash and amaranth. I know these ingredients don't sound very cookie-like, but they definitely produce a unique cookie. It's great for using up that tiny bit of pumpkin puree you have left after making a pie, and it's got the warmth and comfort of spiciness and molasses: almost a holiday-type flavour if you ignore the fact that it's low-fat. What you don't want to skip is the amaranth; it gives these cookies a unique crunch, especially if you toast them first. But be careful! If your pan is too hot (like mine was!) you'll end up with popped amaranth-- totally cool, like tiny little popcorns! -- which is better eaten as is, or with a splash of milk, like cereal. So just toast the amaranth lightly and add it to the batter and when it makes, you'll get a interesting crunch, like no other crunch you've experienced.

I'm on my way back to routines and schedules and deadlines and marking, but I think it will be ok.  I think I feel ok.  And I'm hoping that regular blogging will resume. Hoping.  Thanks for your patience.


Spicy Squash Cookies with Toasted Amaranth

makes about 20 smallish cookies


inspired by Everybody Likes Sandwiches

1/4 cup of amaranth seeds (toasted for about 1 minute on a dry pan)
1/3 cup of pureed squash (I used kobacha squash .. it's so tasty!)
2 tablespoons of apple butter
2 tablespoons of molasses
2 tablespoons of canola oil
1 teaspoon of garam masala spice blend
a few good grinds of black pepper (yes, black pepper!!)
1 cup of spelt flour
1/2 teaspoon of baking soda
a pinch of salt
a few slices of candied ginger, chopped fine

1. Heat a small pan over medium heat.  Add the amaranth seeds and toast for about 1-2 minutes, or until the seeds get toasty brown or a few of them start to pop!  Remove from the heat and cool.

2. In a large bowl, whisk together the squash, apple butter, molasses and canola oil until smooth. Add in the spice powder, pepper, flour, baking soda and salt. Stir until a thick batter forms.

3. Add in the cooled, toasted amaranth and candied ginger and mix until thoroughly combined.

4. Drop spoonfuls of batter onto a prepared cookie sheet. Flatten slightly with your fingers, and bake in a preheated 350 degree oven for about 15 minutes.

5. Enjoy with a chai tea latte!

Friday, October 12, 2012

Trying my hand at Pie


I almost made a pie once.  But then I didn't.  I turned it into a maple oat crumble and ate it on the day before labour day while watching In the Name of the Father and lamenting about school beginning again. Bummer.

This summer I tried making a pie again. What, you don't believe me?  Here's the proof.


This was a strawberry, rhubarb crumble pie. The filling was delicious, but that's never the hard part. The hard part is always the crust, which I always want to make vegan. In this particular case, the edges of the crust were perfect, but that bottom fell apart, turned soggy and in some spots, didn't even cook properly.

So I tried again this long weekend, on the dreary Sunday that got a little wet and chilly later on in the day, when making pie seemed like the perfect excuse to not to work that I brought home with me. I was totally inspired by the lovely vegan baking goddess over at have cake will travel. Her plum and almond tarts looked so delicious, but I wanted something with apples. While browsing foodgawker, I stumbled upon this dutch apple pie over at Beyond Sweet and Savory. The almond press-in crust totally sold me. It was decided from there.  Apple pie it was.


I made mine with a almond spelt crust, using canola oil and almond milk to bind it instead of butter, and a nice spelt flake crumble on top. To keep the crust from turning soggy, I stuck it in the freezer for a bit, and then pre-baked it for 20 minutes before adding the apples and crumble topping. That totally did the trick. No soggy, uncooked pie bottom. The crust held together nicely and was crispy and flavourful from the ground almonds. If you're expecting a buttery, flaky crust, this isn't the place to look, but it was still delicious enough to merit a mound of cinnamony lemon-kissed apples being piled on top.

A note about the apples: the original recipe calls for 1 cup of brown sugar! If you like your pie super super sweet, go for it, but I put in about 1/4 cup and found it plenty sweet. But then, I had just found perfect Jonagold apples at the market that didn't need much help in the sweet department.

This has been the most successful vegan pie-making experiment to date. Do you think I could pull of vegan pumpkin pie, with a vegan pumpkin custard filling?  Whoa... that's a tricky one.  Stay tuned!

Vegan Apple Crumble Pie with Spelt Almond Crust
inspired by have cake will travel, and Beyond Sweet and Savory

For the Crust:
1 cup of spelt flour
1 cup of almond meal
1/4 cup of natural cane sugar
1/4 cup of canola oil
3-4 tablespoons of almond milk, as needed

For the Filling:
3 large to medium apples (I used one Matsu and 2 Jonagolds)
1/4 cup of brown sugar
1 teaspoon of cinnamon
1/4 teaspoon of nutmeg
juice of half a lemon

For the Crumble Topping:
1/2 cup of spelt flakes
1/2 cup spelt flour
1/4 cup of brown sugar
juice of half a lemon
2 tablespoons of canola oil

1. Make the pie crust. Blend the flour, sugar, and almond meal together. Add the canola oil and stir gently with a wooden spoon or rubber spatula. Slowly, a little at a time, at the almond milk, stirring between additions, until the dough stays together when pinched. You can do this in a food processor too, and pulse until you get the right texture.

2. Bring the dough together with your hands, just enough so that it chunks off, and then press it into the bottom of a 9 inch pie plate, making sure that you're going up the sides evenly.  There's a perfect pie crust. No rolling!  Woo hoo!  Place your pie crust in a freezer for about 15 minutes.

3. Make your filling. Peel and core your apples and slice them thinly (the original recipe suggest 1/4 inch thick .. I'm not sure how thick mine were..). Sprinkle with brown sugar, cinnamon, nutmeg and lemon juice. Toss with together and set aside.

4. Your pie crust is ready for the oven now! Bake it for about 15-20 minutes in a 350 degree oven, or until it just starts to firm up and get some colour.

5. In the meantime, make your crumble topping. Place the spelt flour and flakes in a bowl. Add the brown sugar, lemon juice and canola oil and mix to form a crumble.

6. Take the pie crust out of the oven. Pile your apples on top and sprinkle over the crumble. Throw it all back in the oven and bake for about 35-45 minutes, or until the apple juices start bubbling up, and the crumble topping is a deep golden brown.

7. Yay!  Vegan apple pie!


Tuesday, October 2, 2012

New Berry!


Check out these little babies.  These are cape gooseberries, or ground cherries.  I first saw them being used by Chuck when watching foodtv at the gym (yeah .. don't ask!). He was making a compote to go with one of his dishes. Then, I saw them on sale at No Frills, but I resisted buying them because I had no idea what they tasted like, and even though I should have probably taken Chuck's word for it that they're delicious, I hesitated -- there were still local strawberries and blueberries abound, no to mention watermelon. So I skipped the ground cherries.

Then, in late August, when the winds were about to change, we took a short trip to Ottawa, and during one of our walks around the market, we bought a mixed fruit bowl to snack on. Low and behold, sitting on top of the blueberries, strawberries, and raspberries, was one lone ground cherry. We shared it -- each bit half of it -- and it really was delicious. I didn't think much about it, until this weekend, when I saw them on sale at our local farmer's market, and I decided that I couldn't pass them up this time. While walking home, we peeled away the little paper-like jackets and bit into the juicy fruit. What does it taste like, besides delicious? Well, to me, they taste like an impossibly sweet and fruity cherry tomato. A trustworthy second opinion said they tasted like pineapple (which, when I thought about it.. was true). Wikipedia describes them as tasting like a cross between .. you guessed it .. a tomato and a pineapple. Go figure.


In any rate they are impossible to stop eating, highly addictive, but totally worthy of being baked into something more delicious. I wanted to bring out the pineapple flavour, so I paired it with orange zest and honey in a simple, fruit-topped, sugar crusted cake. I used spelt flour for this cake, which made the texture very unique -- airy and light, almost like a sponge. The ground cherries get sliced and scattered on top of the cake, where some of them sink to the bottom during baking, and some of them stay on top. The berries on top caramelize with the help of a sprinkling of raw sugar, and ones that sink get lovely, sweet and jammy. The orange really worked well to bring out the pineapple fruitiness of these berries. I considered adding a spice -- maybe cinnamon or cardamom -- but on second thought, I wondered if it might take away from the unique flavour of the ground cherries, and so left it out in the end. I also had some leftover coconut milk hanging around, so I threw that in. Because coconut milk is so rich, there was no need to add any oil. If you don't want to open a whole can just for this recipe, I would suggest using two tablespoons of plain milk, and two tablespoons of canola oil or melted butter.

Although I chose to go the cake route (hey .. who doesn't like cake?), I saw lots of lovely recipes on the web for ground cherry salsas, salads, compotes and jellies. You totally need to try them for yourself. Hurry to the market before they're gone -- you won't regret it!

Sugar-Topped Ground Cherry Cake
makes one small loaf

1 egg
1/4 cup of honey
1/4 cup of plain yogurt
1/4 cup of coconut milk
2 tablespoons of orange juice
1 cup of spelt flour
a pinch of salt
1/2 teaspoon of baking powder
1/4 teaspoon of baking soda
1 cup of ground cherries, sliced in half
1 tablespoon of raw sugar (for sprinkling)

1. In a large bowl, whisk together the egg, honey, yogurt, coconut milk and orange juice until smooth and well-combined.

2. Sift in the flour, salt, baking powder and soda and mix gently until just combined. Pour into a prepared loaf pan.

3. Add the ground cherries on top of the cake batter, and sprinkle with raw sugar. Bake at 350 degrees for about 45 minutes, or until the top gets a nice golden brown crust, and a cake tester inserted comes out clean.