Sunday, December 29, 2013

Morning After Salad with Dilly Dressing


Listen: I haven't had a hang-over in many years. After realizing that when I ingest alcohol, my body skips the "nice buzz" stage and goes straight to the throwing up stage, I've stayed away. Last night, while others enjoyed IPAs, specialty porters and ales, and vintage red wine, I stuck to a nice rotation of juices -- mango and local apple cider, to be precise.

But somehow, even minus the hang-over, my body feels like it needs a boost the morning after a party. Around these parts, the 25th of December is pretty quiet -- some family time, a movie with my best friend, and an early turn-in. We save the parties for after Christmas, during the painful lull when you're waiting for New Year's to happen and the inevitable return to the normal schedule. 

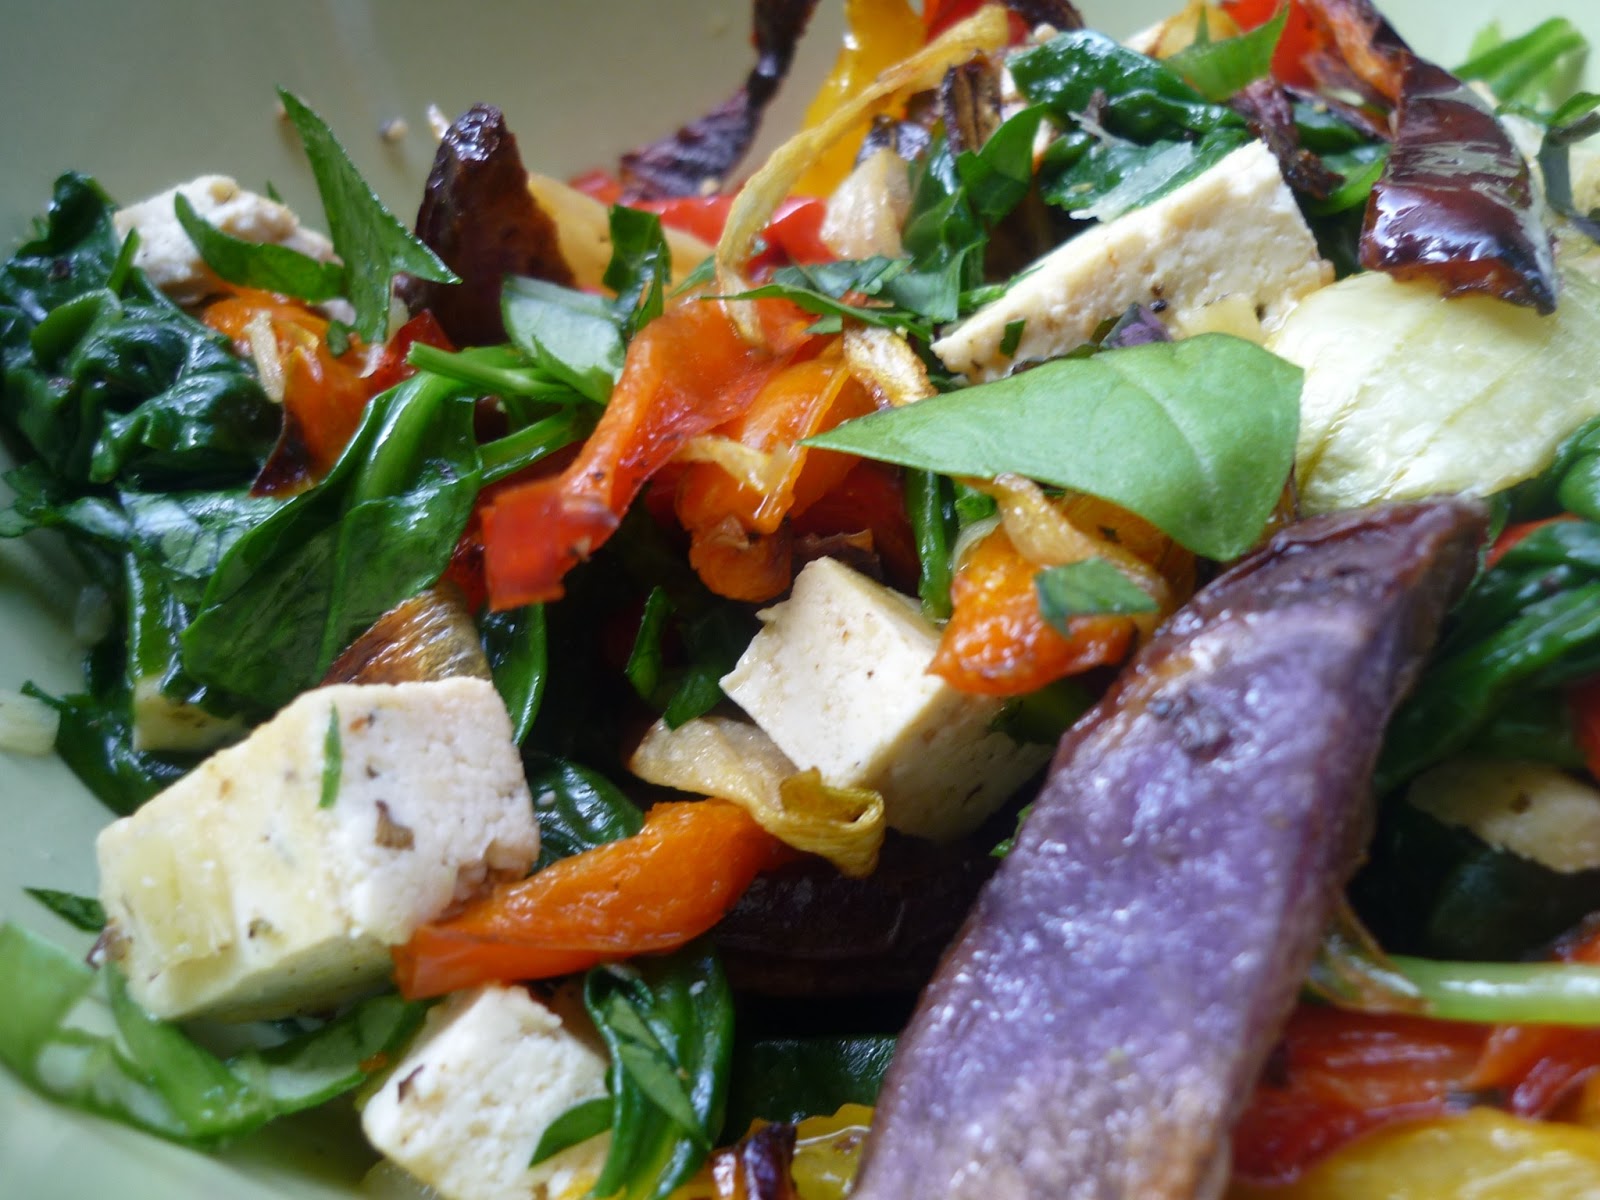
We had a little gathering last night -- nothing fancy: just four of us, some crazy laughs and catching up, a couple games of cranium and some good food: pasta, turkey meatballs, marinated mushrooms, the fluffiest homemade gingerbread and some good old salad. For lunch today, I ate up the leftover salad of arugula, spinach, cherry tomatoes, cucumbers and added a bit of tofu for a boost. I dressed it with a lovely, tangy, dilly dressing, inspired by the delicious salad recipes in Isa Does It -- one of my Christmas gifts. 

Really, you can throw this dressing on anything and it would taste good, but if you're plugging through the morning after and can't handle another piece of chocolate, drizzle this over some veggies and your body will thank you.

Maple Dill Vinaigrette
inspired by Isa Does It
1/4 cup of white wine vinegar
2 tablespoons of olive oil
1 tablespoon of grainy mustard
1 tablespoon of maple syrup
a good grinding of salt and pepper
1/2 cup of loosely-packed dill, chopped finely

Mix up all the ingredients together. Taste and adjust the seasonings to please your palate. Alternatively, you can blend up all the ingredients for a creamy, bright-green dressing.
Enjoy over your favourite, restorative leafy-greens and protein.

Tuesday, December 24, 2013

Merry Holiday Baking


It's been a wild few weeks, folks. But I finally have my voice back (well .. 80% of it anyway), school is finally out until 2014, and I finally found time to bake. And boy oh boy .. I've been baking. I don't have a recipe for you today, but I do have a bunch of awesome links to where you can found awesome baking.

I embarked on an experiment this holiday season -- a little baketivism. In the spirit of veganism and animal-loving, healthyish and healthier baking, I've made an agreement with myself to only bake vegan treats to give as presents this holiday season.

It's been awesome, and not as hard as I expected -- vanilla custard powder and graham cracker crumbs at Bulk Barn are totally vegan! I'd like to thank my good friends Earth Balance (regular, soy-free AND my new favourite -- coconut spread), apple butter, ground flax (flax eggs are totally easy and totally cool!), maple syrup, and nut butter. Let's rock the hippie vegan lifestyle and make wild, unattainable new year's resolutions that we might .. just .. want ... to keep.

So, Merry Holidays everyone, and here we go with the vegan baking!

Lemon Chewies -- I used extra lemon juice and lemon zest to make them extra lemony.

Chai Spiced Snickerdoodles -- I made a great new friend -- cream of tartar -- that gave these cookies the perfect crispy-outside-chewy-inside texture.

Pignoli Almond Cookies -- I totally failed on these cookies -- they melted and fell apart in the oven, but they tasted so good that I squished them back into shape while they were still warm, and presented them as almond, pinenut fudge. Totally worked.

Vegan Nanaimo Bars -- I made these in honour of my visit to out west this summer where we biked over the Lion's Gate bridge into Nanaimo, BC. There weren't any Nanaimo bars to be found, so I made some of my own.

Rosemary Chocolate Chip Cookies -- This cookie has the perfect classic texture and flavour, with a little added Christmasy flavour from rosemary.

Fudgy Coconut Milk Brownies, veganized -- The original recipe called for eggs and butter, but thanks to flax eggs and Earth Balance, no animals were harmed or enslaved in the making of these delicious, fudgy, chocolately brownies.

 Nutty Jam Thumbprints -- I made these cookies a little healthier by replacing most of the Earth Balance with apple butter and almond butter. They turned out beautiful -- chewy and moist, with a nice rich, nutty flavour. Find the recipe in "Vegan Cookies Take Over Your Cookie Jar" by Isa Chandra (of Post Punk Kitchen!) and Terry Hope Romero.

Chocolate Bottom Macaroons -- No one will guess that there's tofu in these coconutty balls of goodness, but it's the secret to making perfect macaroons without condensed milk.

Crispy, Nutty Cut Out Sugar Cookies -- I usually don't bother with cut-out cookies, but when it's Christmas Eve and you're spending a cozy day indoors, cut-out cookies are so much fun! Spelt flour, almond butter and apple butter make these cookies a little healthier so you and afford to decorate them with a little icing.

We just finished putting the icing on the last batch of cookies. And oh .. we're bringing smoked tofu and swiss chard casserole to Christmas Eve dinner .. everyone is going to fall in love with tofu and millet!

Merry Holidays everyone!


Sunday, December 8, 2013

Perfect Soup Day


Winter will come with many perfect soup days and today seems like one. It's a little icy outside, mainly overcast with a peak of sunshine. I'll probably venture out later in the day -- nothing too strenuous -- but it would be nice to come home to a nice bit of weekend puttering about the kitchen.

This soup is perfect for the kind of weekend where you feel like spending all day in the kitchen with the oven on, baking something, cooking something and being relaxingly busy. This soup reminds me of one that I had on a kind of day like this, where the sunshine is deceiving and the wind is sharp and cold. I ordered it at one of our favourite brunch restaurants, and enjoyed it with a large chunk of toasted eggy-bread dipped in home-made ketchup. Since I don't feel like lining up for an hour to have soup at that restaurant, I'll try to make it at home instead.


 This is a easy-going soup, with mellow flavours, pantry staples and vegetables easy to find in the deepest, darkest days of winter. It is imperative that you roast the squash first -- the roasty toasty flavour it gives this soup is hard to substitute, and it would help if you had a nice homemade veggie stock as well. Other than that, it comes together quickly, and is even better the next day. Perfect to come home to after long day at work, and just the thing to make you feel better if you're under the weather, which, let's face it, happens to the best of us.

Stay warm.

Roasted Squash, Leek and Potato Soup
serves 4-6

1 small sweet potato squash or pepper squash
2 stalks of celery, diced
2 small-medium carrots, diced
half large leek, diced
2 large cloves of garlic, minced
1 large, russet potato, cut into small cubes
1/2 bunch of swiss chard, stems diced, leaves shredded
2 teaspoon of herbes de Provence
1 bay leaf
1/3 cup of red lentils, rinsed
5 cups of veggie stock or water (I used a mixture of both)
salt and pepper to taste

1. Cut the squash in half and scoop out the seeds. Drizzle with olive oil and season with salt and pepper. Place the halves cut side up on roasting tray and roast for about 45 minutes, or until the flesh is soft. Remove from the oven and set aside to cool.

2. In a large pot, sweat the the leeks for a minute. Season with salt, pepper and herbes to provence. Add the garlic and cook for another minute, stirring occasionally.

3. Add the celery, carrots, chard stems and potatoes, and stir well. Let the vegetables cook for another few minutes. While you're waiting, scoop out the flesh of the roasted squash.

4. Add the squash and lentils and stir well. Add the veggie stock and bay leaf, stir and turn up the heat.

5. Bring your soup to rolling boil, then reduce the heat to a simmer, and cover. Cook for 12-15 minutes, or until the lentils break down and thicken the soup, and potatoes are tender. Add more liquid if necessary.

6. Stir in the chard leaves and cook for another 5 minutes, uncovered. Taste and adjust the seasonings.


Sunday, December 1, 2013

Starting Early


Last year around December, I remember being totally overwhelmed. The holidays snuck up on me at the very last second, and I barely had time to enjoy my holiday baking and relax before all the hustle and bustle began. This year, I don't want that to happen, so I've started early.

My favourite part of the holidays (besides getting time off work!) is the baking. I've baked many holiday treats over the years, and this year I have bunch of new recipes I'd like to use. But while in the past, I've baked edible presents for those I love with tried and tested recipes, this year, I'm branching out. But you can't bake a present with a recipe you haven't tried yet .. am I right?

So I'm taking the next three weeks to test all the new recipes I plan on baking for family and friends. I know ... hard job, but it's gotta get done! ;)


I've started with these little cut-out gingerbread cookies. And let me tell you, the dough is a dream. I usually save roll-out cookies for the holidays specifically because they take a lot of time to make. The dusting, the chilling, the rolling, the chilling again .. It's a labour of love. With these cookies, you still have to dust and chill and all the jazz, but the dough is so easy to use that it takes half the work out of it. It doesn't crack, you don't have to take it out of the fridge 30 minutes before rolling and it doesn't even stick that much to counter, provided you give it just a small dusting of flour when rolling out. They also don't need to be chilled right before baking in order to keep their shape, which makes them perfect for using your cute holiday cookie cutters.

And the dough is delicious -- spicy and deep but not too sweet (making them perfect for decorating with icing and sprinkles!) and since it's vegan, you can snack on it without worrying about eating raw egg. It's also perfect if you have left over pumpkin puree that you're dying to use up.

Bake up a batch and don't forget to share. 'Tis the season!

Vegan Gingerbread Cookies
adapted from That's So Vegan
makes about 3 dozen smallish cookies

1/3 cup of Earth Balance
1/2 cup of brown sugar
1/4 cup of pumpkin puree
1 tablespoon of ground flax
3 tablespoons of molasses
1 teaspoon of baking powder
1 teaspoon of cinnamon
1/2 teaspoon of ground ginger
1/4 teaspoon of nutmeg
1 cup of spelt flour
1.5 cups of all purpose flour
2-3 tablespoons of soy milk as needed

1. In a large mixing bowl, cream the earth balance and sugar until well combined. Add the flax, pumpkin puree and molasses and mix well.

2. Add the baking powder, spices and flour and stir gently. Add soy milk one tablespoon at a time, stirring gently in between, until you get a nice firm dough.

3. Chill your dough for at least an hour, or over night.

4. On a lightly floured surface, working in batches (I divided my dough into 4 batches), roll out the dough to your desired thickness, dusting with flour as needed. Cut out using your favourite cookie cutters and place on a non-stick or parchment-lined baking tray. If you're using sprinkles, press them into the cookies.

5. Bake at 350 for about 10-12 minutes (depending on the thickness). Let them cool completely before adorning with icing.

Sunday, November 24, 2013

Hearty Smoked Tofu and Chard Casserole with Millet Topping


It's snowed yesterday. A wonderful, blowy, billowing snow that didn't last too long, but just long enough to me me feel like winter is saying hello. The sky is clear and the air is frosty and chilly and it's the perfect day for a winter adventure, even if it's just a small one. We have somewhat of a winter tradition of warming up during our winter walks with Tim Horton's hot chocolate. I love summer and fall, but I also love winter and everything that comes with it.

I'm all for snuggly, pj days spent watching movies and drinking endless cups of hot drinks, but winter adventures get my blood flowing and bring all the cool, crisp oxygen to my brain -- something that helps me stay focused at work and happy at home. But after winter adventures, it's always nice to warm up to something hearty and comforting when supper time rolls around. This nice casserole fits the bill perfectly. It's filled with hearty winter greens, red lentils, smoked tofu (although you could use any firm tofu) and a unique, creamy and crunchy millet topping. It's kind of like a vegan shepherd's pie -- the kind of stick-to-your-ribs meal that reminds you of all the good things winter has to offer.  It's also the kind of relaxing meal that you can make while the wind howls at your balcony door and you sing along with your favourite album -- lots of chopping and stirring, nothing too complicated.


If you've never cooked millet before, it's pretty easy. I used a 1-2 millet-water ratio, but for a real flavour kick, use some veggie stock instead. Some people like to toast their millet in a dry pan before adding the water, which is totally cool as well. Once the millet is made, the rest of the recipe comes together in a snap. It's made even easier if you have a dutch oven that can go directly from the stove-top to the oven. But if you don't, it's no sweat. Just transfer your beautiful stew to a casserole dish, top with the millet crust and pop under the broiler. And if you can't find smoked tofu, just use regular firm tofu and add a nice sprinkling of sweet smoked paprika. It's a meal that you can make on Sunday and enjoy all snowy week long.

Smoked Tofu and Chard Casserole with Millet Topping
adapted from Project Foodie
serves 4-5, generously

1/2 cup of millet
1 cup of water or stock
1 teaspoon of olive oil

3 small carrots, diced
1 stalk of celery, diced
1 medium onion, diced
2 cloves of garlic, diced
1 red bell pepper, diced
1 small bunch of swiss chard, stems diced, leaves cut into ribbons
1/3 cup of red lentils, rinsed well
4-6 ounces of smoked of regular tofu, cut into cubes
salt and pepper to taste
1-2 teaspoon of herbes de Provence
1 teaspoon of dark soy sauce
2 cups of vegetable stock

1. In small pot, bring water and millet to boil. Turn down the heat to a simmer, cover and cook for about 15 minutes or until the millet has absorbed all the liquid. Set aside.

2. In a large pot of dutch oven, sweat the onions and garlic in olive oil for about 5 minutes, or until they start to soften and become fragrant. Add the carrots, celery, red bell pepper, chard stems and stir well. Add salt, pepper and herbes to provence. Cook for another 3-4 minutes.

3. Add the lentils, and vegetable stock and stir well. Cover, and reduce the heat to a simmer. Let the stew cook for about 10-15 minutes, or until the lentils start to break down and the vegetables start to soften.

4. Add the chard leaves and tofu. Stir well. Cook for another 5-7 minutes, uncovered to let the liquid reduce a little more. Stir in the soy sauce and taste. Adjust seasoning as desired.

5. Turn off the heat. If you're not using a dutch oven, pour your stew out into a large casserole dish (try to choose one that's more deep and not too wide). Spoon the cooked millet on top of the stew. Drizzle with olive oil.

6. Put your casserole under the broiler for about 5-6 minutes, or until you see a nice brown crust. Remove from the oven and serve immediately.


Sunday, November 3, 2013

Pumpkin Everything!


It's that time again when the blog world is flooded with pumpkin posts, and I'm not going to try to be different. Let's go with the flow. Pumpkin everything! Well... I actually used golden hubbard squash for these muffins.  Golden Hubbard Squash everything! No. That doesn't have the same ring to it. Pumpkin everything!

I first came across the golden hubbard squash at the advice of a friend and colleague, whose mom used to make pumpkin pie with hubbard squash because it simply was sweeter and more flavourful than a regular pumpkin. And I can't disagree. Regular pumpkin is perfect for soups and stews, but when I'm baking, the golden hubbard or golden nugget squash is hard to beat.

These muffins are very quick to make, provided that you already have your squash roasted and pureed. In pinch, go ahead and used canned pumpkin puree, but I urge you to give the golden hubbard squash a try, just once this season. You won't be disappointed. A large handful of dried cranberries add a nice burst of tangy flavour. I used fresh Ontario cranberries from the farmer's market when I made these the first time, and they were also lovely. Chopped fresh apple would be a great addition as well. But what makes these muffins special is the pumpkin seed butter. It lends a rich, nutty, hearty flavour to the muffins and combined with the spelt flour and ground flax seeds, you have a protein-packed, energy-filled snack to look forward to in the middle of your day.


The original recipe called for peanut butter which I'm sure is delicious as well, but while I'm a definite peanut butter addict, I would strongly recommend making that trip to the health food store to pick up pumpkin seed butter. The flavour is just too unique to substitute. And despite being vegan, these muffins baked up light and fluffy and held together perfectly.

It's a chilly day out there today which is making me believe all the rumors about winter arriving early. Bake up a batch of these muffins and they will definitely warm up your day.

Vegan Pumpkin Cranberry Muffins
adapted from Crazy for Crust
makes 12 medium-sized muffins

2/3 cup of pureed squash

1/4 cup of brown sugar
1 tablespoon of ground flax + 3 tablespoons of water
1/4 cup of pumpkin seed butter
2 tablespoons of soy milk + 1/2 teaspoon of cider vinegar
1 cup of spelt flour
1/2 teaspoon of baking soda
1/2 teaspoon of cinnamon
1/2 cup of dried cranberries

1. In a large bowl, combine the squash, sugar, flax, water, pumpkin seed butter, soy milk and vinegar. Stir well to combined.

2. Sift in the flour, baking soda and cinnamon. Gently mix until just combined. Stir in the dried cranberries.

3. Spoon the mixture (it will be very thick) into lined muffin tins and bake in at 350 degree oven for about 20 minutes, or until a cake tester inserted comes out clean.

Sunday, October 13, 2013

I've been ...


I've been doing things the same, but just a bit differently lately.
I've been enjoying this beautiful autumn in Toronto: cool, chilly mornings and warm, fragrant afternoons.
I've been going outside for recess, even when I don't have to.
I've been kicking up leaves when no one is looking and even when someone is.


Instead of folding my arms, leaning my head against the cool glass and restlessly napping, I've been opening the window on the streetcar on my way to work at 6:30 in the morning, and breathing in the fresh, fall air.


I've been getting up before the sun, even on Saturday, and spending time waking up with the city.
I've been ordering eggs instead of salad, and enjoying mid-week chocolate and early morning coffee.
I've been putting millet in my granola, mint in my green tea and spinach in my smoothies.

I've been learning how to enjoy today, and trying not to apologize for tomorrow.
I've been reading ...

This blog in particular.

I've made this soup, this granola, and this bread and jam.

I've been wanting to make this shake and this salad and this stew.


I've been thinking less about smiling, and actually doing it more often.

Saturday, September 21, 2013

On This Last Day of Summer ...


On this last, cool, rainy day of summer, I'm bringing you something comforting to cook while the rain trickles down outside, but will still help you get through the bounty of late summer veggies that you couldn't resist buying at the market this morning.

It's nothing fancy, nothing celebratory, just some stew. But it's not rich, with a heavy gravy and loaded down with the starchy potatoes and and dried legumes of the winter. It's flavourful and summery, with just a hint of spice, perfect to pop into the oven and forget about for an hour while you curl up on the couch with a book, or have a quiet coffee in the late afternoon. It has the beautiful late summer harvest of beef steak tomatoes, so ripe and juicy that didn't need to add a drop of water or stock to this stew, some yellow summer squash, the last of the season, a juicy yellow pepper and some fresh, borloti beans that went wonderfully soft and creamy. Fresh herbs from my balcony garden, that won't last many more weeks, were both cooked into the stew and sprinkled on top, and the whole thing has just a whisper of middle eastern spice -- namely zaatar, cumin and tumeric. I happily ate bowls of this for dinner a few nights in a row, accompanied by tumeric scented brown rice and barley pilaf, but you don't to get that involved. Simple brown rice or white rice would be perfect, as would a chunk of crusty bread, or even some short pasta.


This stew was inspired by a dish I had at a restaurant called Nuba in Vancouver. It was called simply the vegan stew, and was described as a stew of seasonal vegetables with tomatoes, onions and chickpeasm served over brown rice. It had creamy roasted eggplant and zucchini and a delicious, rich spice blend. Nuba was the first place we ate out at in Vancouver, and it was a beautiful treat -- delicious food, relaxed atmosphere, and the excitement that our vacation had just begun.

Our Vancouver trip is long gone, and I've gotten into the groove of teaching again, but every once in a while, I'll indulge in a little daydreaming of times past. This stew is beautiful, rainy day indulgence and the perfect way to good-bye to summer.

Last Day of Summer Stew
inspired by Nuba and Everybody Likes Sandwiches

1 tablespoon of olive oil
1 small onion, diced
2 large cloves of garlic
2 large, beefsteak tomatoes, roughly chopped
2 yellow summer squash, cut into half-moons
1 large yellow pepper, cut into thick strips
1 quart of fresh borloti beans, shelled and rinsed
1 teaspoon of zaatar spice blend
1/2 teaspoon of ground cumin
1/2 teaspoon of ground tumeric
2 large sprigs of fresh thyme
5-6 basil leaves, cut into a chiffonade
1 small handful of fresh parsley, roughly chopped
salt and pepper to taste

1. In an oven-proof pot, or dutch oven, gently heat the olive oil over low heat. Add the onions and garlic and some salt and pepper. Let them sweat for about 5 minutes, while you chop the rest of your vegetables.

2. When the onions are soft, add in the zaatar, tumeric and cumin and let the spices toast for about a minutes. Add in your tomatoes and give it a big stir.

3. After about 4 minutes or so, the tomatoes should have released their wonderful juices.  Add the squash, peppers, beans and thyme sprigs.  Pop the lid on and put the whole thing a 375 degree oven for about an hour (but check at the 45 minute mark to see if your beans are tender, or if you need to add liquid).

4. When you're about to serve, sprinkle with the basil and parsley.

Sunday, September 15, 2013

Snacking back to Vancouver


Where did the weekend go? In the summer when I'm off, all the days meld into each other. It's only when school starts up again that I really treasure the weekend. Chatty, giggly Friday night dinners, early Saturday morning market walks or lazy afternoon brunches, and quiet, studious Sunday coffees, because tomorrow, it's back to the grind. Does that sound like your weekend too?

If it does, why not take a little break from the Sunday night sensible dinners and snack on these incredibly addictive roasted beet fries. We had these from a take-out carton in Vancouver, sitting on a bench near the water and feeling like summer would never end. They're a specialty from one of our most exciting food finds in Vancouver -- a food truck called "Le Tigre."


I know you've probably had roasted beets before, but these are special. They're roasted skin on, and sprinkled with plum powder -- a salty, sweet, tangy powder that comes in colourful packets. You can get in the candy section of Asian supermarkets next to the dried plums. If that's too much of a stretch, I'd suggest a sprinkling of brown sugar and dried sumach, which is probably easier to find.

In Vancouver, these beet fries were served with a special seven-spiced mayo which was awesome. When we made these at home, we kept our mayo plain, but if you wanted to kick it up a notch, add some hot smoked paprika to your mayo, or maybe a squeeze of lemon and a good grinding of black pepper.

Go ahead and snack your Sunday night away and try to forget, even if it's just for an hour, that we have to go back to work tomorrow.

Roasted Beet Fries
inspired by Le Tigre

a quart of beets (about 5-6 medium sized ones)
a good glug of olive oil
a big sprinkling of salt
a big grinding of black pepper
1 teaspoon of dried plum powder

1. Trim and scrub your beets well. Cut them into wedges and blanch them in boiling water for about 5 minutes to start the cooking process. Drain and pat dry with a towel.

2. Put your beets in a large bowl and toss with the olive oil, salt, pepper and plum powder. Lay them on a roasting tray and roast (on broil) for about 15-20 minutes, tossing twice, or until the the beets are tender.

3. Serve with mayo.


Monday, September 2, 2013

Labour Day Again


Labour day snuck up on me this year. I usually see it coming at least a month in advance, and then begin the slow lament of summer's end. But not this year. This year was sunny skies and patio brunches and early morning farmers' markets, and tree ripened peaches and juicy, impossibly sweet watermelons all the way up until this weekend. And then all of the sudden.  Ouf. It's Labour day.

It's in my small tradition on this blog to bake a little something on Labour day to help me ease back into the routine of getting up early, teaching, marking, planning, going to bed at an insanely early hour, and then doing it all over again. Not that it's particularly painful -- I like routines, and I love my job. But after 2 months of adventures and unstructured days, of coffee breaks whenever I felt like it and spending whole days reading in pyjamas, it's kind of hard to let go.


So today, I've made us a chocolately zucchini bread to help smooth over the Labour day jitters and make us feel happy about returning to work or school tomorrow. This bread is dark and deep, but with a very light and fluffy crumb. It's packed with good things like shredded coconut, summer zucchini, cocoa nibs and spelt and just a whisper of those pumpkin pie spices -- nutmeg and cinnamon. It was a great way to use up two zucchinis that I kind of forgot about at the bottom on my crisper, and that quarter cup of coconut milk I was dying to use up. The crunchy topping of flaked almonds and raw sugar make this loaf feel like something really special... and it is! It's a Labour day treat and will last all through the work week.

I'm still sad summer is over for me, but I still look forward to a few more weeks of warm temperatures and fair skies.. and just a few more posts about Vancouver!

Chocolate Zucchini Bread
adapted from Everybody Likes Sandwiches

2 small zucchinis, grated
1 egg
2 tablespoons of safflower oil
2 tablespoons of plain yogurt
1/4 cup of coconut milk
1/2 cup of brown sugar
1/4 cup of cocoa powder
1 1/4 cups of spelt flour
1/2 teaspoon of baking soda
1/2 teaspoons of baking powder
a pinch each of cinnamon and nutmeg
a small handful each of shredded coconut and cocoa nibs (chocolate chips if you haven't got nibs)
a small handful each of flaked almonds and raw sugar

1. Put your shredded zucchini in the middle of a large tea towel. Gather the towel up around the zucchini pile and then squeeeeeeeeeeeeeeeeeeze! Try to get as much liquid out of the zucchini as possible. Don't skip this step, otherwise your bread will be gummy.

2. Put the squeezed zucchini, egg, oil, yogurt, coconut milk and brown sugar in a large bowl and mix very well. Sift in the cocoa powder, spelt flour, baking powder and soda, and spices. Mix gently, until just combined.

3. Add in the coconut and cocoa nibs and give it one final stir. Pour the batter in a loaf pan and sprinkle with flaked almonds and raw sugar.

4. Bake the loaf in a 350 degree oven for about 45 minutes, or until the almonds get slightly golden, and a cake tester inserted in the middle comes out clean.


Sunday, August 25, 2013

Molten Tofu: Another Vancouver Next Time


There were so many things we wanted to do in Vancouver and unfortunately, time was limited. We had so many adventures but there are so many more left .. like hiking through Indian Arm Provincial Park, visiting Vancouver island, camping .. and sampling food and drink from places we just couldn't squeeze into our adventure-packed days: drinks at Alibi Room (too big a line-up from when tried), coffee from  Elysian (we always had our mugs full of Matchstick brew when we biked past this place), vegan goodies from Edible Flours, (closed for a vacation when we got there) and a chilled-out dinner at The Foundation.

I really have no excuse for not eating at The Foundation since it was on our way home. But despite my perusing the menu a couple nights while we were there, it just never happened. At one point, I even picked out what I was going to order. Hands down, I had to have the molten tofu, described as "brown and spicy brokly and tofu served on rice." The picture of it, also looked delicious -- comforting and filling. So when we got back to Toronto, and I needed a bit of tofu love to soak up all that excess coffee, I thought I'd make my own version of molten tofu.


It was quite a task at first, seeing as it's kind of hard to re-create something you've never tasted, but a little googling led be to Johnny Hetherington's website (lead vocals in the Canadian band Art of Dying) where he describes making his version of molten tofu -- veggies, fried tofu and a rich, spicy peanut sauce. Awesome!

I'm not too big a fan of hot sauces like tobasco or sriracha, so I don't keep any in the house. Instead, I heated my peanut sauce with lots of fresh ginger and pinch of hot smoked paprika. Other usual suspects go into the mix -- dark soy, light soy, a touch of toasted sesame oil and a big squirt of lime juice. After that, it was just a question of mixing the sauce with the veggies and tofu and eating it up over rice.

This version of molten tofu satisfied me, but I'm still putting The Foundation on my list for our next visit to Vancouver.

Molten Tofu Rice Bowl
inspired by The Foundation, with help from Johnny Hetherington 

For the Sauce:
2 tablespoon of natural peanut butter
juice of a lime
2 teaspoons of finely chopped ginger
pinch of salt and pepper
pinch of hot smoked paprika
1 teaspoon each of dark soy and light soy
1/4 teaspoon of toasted sesame oil

1. To make the sauce, simply whisk all the ingredients together. Taste, and add more lime juice or seasonings as needed. Add in a squirt of hot sauce if that's your thing.

For the Bowl
1/2 cup of brown rice
1 cup of water or stock
1/2 small head of broccoli, chopped into florets
6 oz of tofu, cut into cubes
a big handful of baby spinach leaves
a few good grinds of black pepper
splash of water
2-3 basil leaves, chopped (I used beautiful purple basil)

1. In a small pot, add the rice and water or stock. Bring it up to a boil, stir gently, then turn down the heat and cook uncovered for about 10 minutes.

2. Add the broccoli to steam with the rice. Replace the lid and cook for an additional 10 minutes. The brocoli and rice should be tender and the water should all be absorbed. Separate the broccoli from the rice and set aside.

3. In a pan, heat a bit of olive oil, then fry the tofu for about 2-3 minutes on each side, until they get nice and brown. Add the pepper and the peanut sauce and stir well.

4. Add in the broccoli and spinach leaves. Stir gently until the spinach wilts. You may need to add a splash of water to help it along.

5. Divide your rice among two bowls and top of the molten tofu mixture. Enjoy!

Monday, August 19, 2013

Next Time: Strathcona


Let's chat one more time this summer about cafes. Just one more time. Anyway, it's that time for lamenting when we're all trying to hang on to the last breeze of summer and psyche up for all the pumpkins and apples and squash.

I'm going to lament in this post about a neighbourhood that we casually strolled through in Vancouver, one that I promised myself I would visit again the next time around. It's the beautiful neighbourhood of Strathcona. Beautiful houses, quiet streets, a huge park, cute corner stores that double as cafes, not to mention a beautiful young lady bicycling down the street selling gourmet, Popsicles. It's like a neighbourhood that I dream of living in "when I grow up" whenever that may be. We spent our last day in Vancouver camped out on a bench, napping, re-living our two week adventure that seemed to pass by way too quickly.

We only managed to visit a few places in Strathcona, and sampled only one coffee -- from The Wilder Snail. Our perfect bench was right across from this grocery store/cafe. It kept us caffeinated and satisfied with gourmet, locally-made energy bars and hot drinks, as we waited patiently, our backpacks stuff to the brim, for time to pass so that we could make our way up to the airport and say good-bye to Vancouver. 


We also strolled by Union Market which I've heard so much about -- namely their treats. I had read about addictive chocolate macaroon bars and irresistible cinnamon buns, but seeing as our stroll was later in the day, the only treats to be found were a few sugar-dusted orange cookies. At 75 cents for two, they made for a perfect strolling snack. Cakey and light, with a big hit of orange and slight almond flavour, these treats didn't last too long, and I was wishing that we had bought more. They'll always be next time .. right?

To curb my Strathcona cravings until the next time I visit Vancouver, I made a batch of orange scented, almond cookies. I kicked it up with some ground cinnamon and nutmeg and instead of dusting with powdered sugar, which I didn't have, went for a sprinkling of crunching demerara sugar. If you're in the mood, adorn each cookie with some flaked almonds and powdered sugar like the original recipe. I think I'll try it like that next time.  Perfect way to console a summer longing that will have to wait until next year.

Spiced Orange Almond Cookies
adapted from Shutterbean
makes about 20 smallish cookies

3/4 cup of ground almonds
2/3 cup of brown sugar
zest of an orange
1 cup of spelt flour
1/2 teaspoon of ground cinnamon
a pinch of freshly grated nutmeg
1 egg, beaten
1/4 cup of olive oil
1/4 cup of orange juice
demerara sugar, for sprinkling

1. In a large bowl, combine the ground almonds, brown sugar and orange zest. With your fingers, rub the zest into the almonds and sugar to bring out the oils.

2. Add the flour, cinnamon and nutmeg and mix well. Add the egg, olive oil and orange juice and mix to combine. You should get a fairly sticky dough.

3. On a parchment-lined sheet, drop spoonfuls of dough making sure that you leave about 2 inches between each cookie -- they expand quite a bit. Wet your fingers and flatten each cookie. Sprinkle with coarse sugar (or flaked almonds)

4. Bake at 350 for about 10 minutes, or until the cookies get golden brown and your house spells like oranges. Enjoy with your coffee.


Sunday, August 11, 2013

My Favourite Summer Baking with Longing for Marché St. Georges


There are few things I enjoy or remember more about my summer holidays then long afternoons alone or with friends at a cafe. Even if I'm enjoying only one mug of coffee, the act of sitting and drawing out the experience, makes it seem as if I'm drinking coffee "all day." And what could be more relaxing?

We're spoiled here in Toronto -- there is so much good coffee .. here ... here ... here...oh and this one and this one.. this is one of our old stand-bys, where I drank I gigantic up of cinnamon laced coffee served to me in a beer glass and enjoyed and peanut butter and jelly sandwich, all alone. This one is a frequent stop on our bike rides, and this one, just around the corner from me, holds such sentimental value. I've enjoyed solo breakfasts over bottomless coffee here and here, because breakfast treats make the coffee experience that much better, don't you think?


Despite all the wonderful cafes here in Toronto, yesterday, my heart tugged towards to a neighbourhood coffee shop that we went to in Vancouver: Marché St. Georges.  It's tucked away in quiet residential neighbourhood, away from the more stylish, sleek-looking cafes on busier, streets. It's also a market that sells unique products and gifts such as specialty teas, coffees, cookies and an intriguing honey, flavoured with thai chillies. Although the gifts were tempting, we settled on iced coffees and a few treats -- a cherry crumble tart and a butter tart -- and let the late afternoon melt into evening.


But yesterday when I was thinking about Marché St. Georges, it occurred to me that I wanted to have breakfast there, sitting in the patio, slowly enjoying a coffee and something sweet, warm and fruity, in front of some reading material or maybe even some *gasp* planning for September. If anything were to make the prospect of going back to work in a few weeks bearable, it would be breakfast and coffee at Marché St. Georges. But since I'm in Toronto and no longer rambling about the streets and trails of Vancouver, I'll just savour the memories along with my fruity and caffeinated breakfast.

And my breakfast of choice? It would have to be a simple summer fruit crumble. When I got back from Vancouver, there were baskets of sour cherries just begging to be taken home from the farmer's market. Some of them were cooked down and jarred, but most of them went into making this crumble many, many times. In with the cherries, I threw some raspberries, and some chopped rhubarb. A squeeze of lemon would have made sense, but I didn't want to taint that beautiful, almost almond-like flavour of the sour cherries, so I skipped that part. I also skipped the spices I would generally add to a crisp or crumble topping like cinnamon or nutmeg, just to keep things nice and fruity and pure.

I ate this warm, right out of the oven with my coffee, but it was equally as good eaten cold then next day with some yogurt. It was beautiful and the perfect way to wake up on a perfect summer day.

Simple Summer Fruit Crumble
inspired by Joy the Baker
serves 4-6

6 cups of fresh summer fruit, chopped if necessary (berries, cherries, peaches.. go wild)
2 tablespoons of natural cane sugar
1 cup + 1 tablespoon of spelt flour
1/2 cup + 2 tablespoons of rolled oats
1/3 cup of brown sugar
2 tablespoons of maple syrup
3 tablespoons of Earth Balance (or butter)

1. Place your fruit in a large baking dish. Sprinke over the cane sugar, 1 tablespoon of flour and 2 tablespoons of rolled oats. Mix well.

2. In a bowl, stir together the rest of the flour, oats and brown sugar until everything is evenly combined. Add the maple syrup of stir gently.

3. Add the Earth Balance or butter and with your fingers, rub it against the flour mixture until you get a nice coarse meal.

4. Spoon the crumble mixture over the fruit mixture and bake in a 350 degree oven for about 25 minutes or so, or until the crumble is golden brown and the fruit is bubbling up.


Friday, August 2, 2013

Tiger Salad


When we were in Vancouver, we hit up a lot of coffee places. but we didn't always have time to eat at all those raved-about restaurants. We did make a list, but sometimes, stuff got in the way. Lunch was more often than not, peanut butter and banana sandwiches eaten during a long out-of-city hike or biking trip, and breakfast was usually cereal with a healthy helping of local berries purchased at a farmer's market. Dinner, well, that was where we got to experiment a little. But sometimes, we were just too exhausted. We sometimes ate take-out or walked a couple blocks and ate at a little Asian-style cafe, and once, we were so tired that we *gasp* ordered pizza.

Buuuuuuuuut, we did get to go out a bit and when we did, it was usually quite awesome. One of my favourite places that we ate at in Vancouver, was from a food truck called Le Tigre. We sampled almost all of the menu, including a pulled pork bao, popcorn chicken, crispy, lemony-parmesany brussels sprouts and cauliflower, amazingly addictive roasted beet fries and the most refreshing, filling, flavourful quinoa salad ever.

This quinoa salad was amazing. First, not only did it have quinoa, but there was brown and wild rice thrown into the mix, along with sweet roasted carrots and parsnips, crunchy cabbage, lots of fresh mint and a rich, tangy miso dressing. Since discovering the joys of miso not so long ago, I had to try making this salad at home.

My version is summered up a bit. I used roasted yellow zucchini and eggplant, some thinly sliced celery for a big crunch, and some left over blanched green beans, just because. I threw in lots of fresh mint and also a big hit of purple basil. And the dressing .. oh the dressing. Just a few teaspoons of white miso and big juicy lemon, but oh, the flavour was so big and bold. Because the miso is so intense there's no salt added to the rest of the salad, just a few big grinds of black pepper. And don't worry if the dressing tastes a little too zippy and salty when you try it -- all that lovely rice and quinoa soaks it all up. And while this salad isn't an exact replica of the one we ate from the truck, sitting by the Lonsdale quay and enjoying a perfect evening after hiking all day, it's pretty darn satisfying in it's own right.

Quinoa Rice Salad with Roasted Summer Veggies
inspired by Le Tigre
makes 3-4 servings

For the roasted veggies:
1 large, yellow zucchini, diced
1 small eggplant, diced
1 tablespoon or so of olive oil

a few grinds of black pepper

1. In a large bowl, toss the veggies with the olive oil and black pepper. Spread them out on a making sheet.
2. Roast (oven on broil), tossing occasionally for about 15-20 minutes, until the veggies get nicely golden brown and tender.

While the veggies are roasting, make the rest of the salad:

1/4 cup of brown rice + 1/4 cup of wild rice + 1 cup of water
1/3 cup of quinoa + 2/3 cup of water
1 large stalk of celery, sliced thinly
a small handful of green beans, trimmed
2 teaspoons of white miso
juice of a lemon
lots of freshly ground black pepper
a big handful each of fresh mint and basil, chopped roughly

1. First, cook your grains. Mix together the brown and wild rice with 1 cup of water. Bring to a boil, then cover and turn down the heat. Cook for about 20 minutes, or until all the liquid is absorbed and the rice is tender. Same for the quinoa -- 1/3 cup of quinoa and 2/3 cup of water.

2. Blanch the green beans in water for about 2 minutes, or until they're tender. Cut them in half and put them in large bowl.

3. To the bowl, add in your cooked grains, roasted veggies, sliced celery and black pepper. Toss well.

4. Make your dressing! Carefully whisk together the miso and lemon juice until you get a creamy yummy sauce. Pour it over your salad and add the fresh herbs. Toss well and serve!

Thursday, July 25, 2013

Memories of Matchstick


A few days before our trip to Vancouver, when I was in the midst of wrapping up another school year, my partner asked me "What are you most excited to do when we get to Vancouver?" In my foggy brain that was still focused on report cards and marking and cleaning up the classroom, I blurted out "Drink lots of good coffee." And so the search began.

With a few tips and a little research, we developed a little list of coffee shops we wanted to visit while in Vancouver. Although we didn't get to do all of them, we did sample a lot of coffee on our vacation. I had many many iced americanos and countless cups of drip coffee, along with quite a few coffee shop treats. One of the first (and favourite!) places to went to for coffee in Vancouver, was Matchstick. It seemed to pop up out of no where (there's a trend .. finding coffee shops when you least expect it!) while we were trekking downtown on our first day in Vancouver. And it was on the list!


 And we loved it. They roast their beans in many different varieties in house and bake all their goodies right on site. The coffee did not disappoint. The americanos and cappuccinos were smooth and flavourful and the many different varieties of drip coffee available are single-brewed to order. Although there were many many different treats to choose from, we were recommended to try to chocolate almond berry scone. 

Let me tell you about this scone: first, it's vegan (which I didn't even realize until the next day when I actually read the sign) and also, it's made with hearty, nutty spelt flour. It was a dense, flavourful kind of scone, oozing with dark chocolate chips and fresh raspberries and blackberries and I definitely tasted a distinct but not over-powering coconut flavour. It was perfect with our coffee and I made a note to myself to try to re-create it at home.


Check out my drink! It's a home-made iced chai soy latte! You freeze a concentrated chai tea in ice cube trays and add your milk of choice! Recipe here. But I cheated .. and just used chai tea bags instead of regular tea with whole spices.


My scones turned out a little bit lighter but tasted quite similiar. I was sure that Matchstick used coconut oil in their recipe, but seeing as I haven't jumped on the coconut oil craze just yet, I settle for coconut flavoured Earth Balance, which worked perfectly. Ground almonds, almond milk, spelt flour, vegan chocolate chips and of course, fresh-from-the-market raspberries are also in the mix. These scones were a perfect morning and afternoon treat and were gone in no time. I'm already planning a second batch ..


Vegan Chocolate Berry Scones

inspired by Matchstick
recipe adapted from Post Punk Kitchen
makes about 10 medium-sized scones

1/2 cup of ground almonds
1 cup of spelt flour
2 teaspoons of baking powder
1/4 cup of organic cane sugar
1/3 cup of coconut Earth Balance
1/2 cup of fresh raspberries
1/4 cup of vegan dark chocolate chips
1/4 cup of almond milk

1. In a large bowl, stir together the almonds, flour baking powder and sugar.

2. Add the Earth Balance and, with your fingers, rub the mixture together until you get a coarse mealy-textured mixture.

3. Add the berries, chocolate chips and almond milk. Gently stir the mixture until it comes together in a semi-sticky dough.

4. Drop 1/4 cup-sized mounds of dough on cookie tray and bake at 375 for about 15 minutes, or until the tops get nice and toasty brown.

5. Enjoy with your coffee.  Thanks, Matchstick!!


Sunday, July 21, 2013

Obsessed with Brunch


I, like most other Torontonians am obsessed with brunch. I don't just mean brunch food -- I mean that act of going out or making brunch and enjoying it with people you love. We've had celebration brunch parties, cozy brunches at home with French-press coffee and goodies just purchased at the farmer's market, and we've had intimate, just-you-and-me best-friend hangouts over strong coffee, egg dishes and toast. Brunch is so much more than a meal -- it's a whole social event.

What was one of the first things I did when I got back to Toronto? Have brunch. And what was one of the first meals we had out when we started our Vancouver vacation? Yup. Brunch. We had cleverly arranged our Vancouver trip so that we'd be there at the same time as my best friend, who was there for a conference. And of course we had to have brunch. And there was no question as to where. We had both agreed when doing Vancouver brunch research, that it had to be the Wallflower, recommended by a very trusted source. And of course it was perfect. Nice, strong coffee, a friendly, chatty server, lots of good conversation and of course, awesome food.


My partner loves classic bacon-egg-hash-brown breakfasts (this one had the addition of a waffle!), and my best friend is partial to eggs Benedict (spiked with smoked salmon and cream cheese), but me, I'm usually a granola and yogurt kind of bruncher. Granola being absent from the menu, I tried their tofu hash special -- potatoes, peppers, onions, mushrooms, spinach and tofu, all messed up together into the one happy plate, served with toast. It was great, and I didn't miss granola at all.

After the heat wave passed and I could safely turn my oven on here in Toronto, I set about to re-create this beautiful breakfast hash -- for dinner!  The way I made it was super simple -- roast the veggies, quickly saute the tofu and spinach with a hit of ginger, and mix it all together. Yum! I don't have mushrooms in my version because I forgot to pick them up, but they would be lovely -- just slice and saute with the spinach and tofu. I also used beautiful purple potatoes which made this meal that much more special. Oh, and you can totally skip the ginger if that's not your thing, and use garlic instead.

Super simple, delicious, and memory-invoking .. ;) You could totally make this for brunch .. TODAY!

Tofu Veggie Hash
inspired by the Wallflower

I'm not putting measurements on this recipe, because, really, it's up to you when you're making hash. The dish that I was served at Wallflower was heavy on potatoes, and while I love potatoes, I chose to balance it out more when I made it at home. But it's totally up to you. Go for it!

red, yellow and orange peppers, cut into strips
new potatoes, cut into eighths (depending on the size of your potato .. make them the same size as the peppers)
onion, sliced thinly
firm tofu (mine was flavoured with herbs)
baby spinach
mushrooms, sliced thinly
ginger, minced
salt and pepper to taste
olive oil
chopped herbs, whatever you like -- I used green and red basil and parsley from my garden

1. First -- roast the veggies. Put the peppers, potatoes and onions in a large bowl. Add a sprinkling of salt, a few good grinds of pepper and about a tablespoon or so of olive oil. Toss to coat. Lay the veggies out on a baking sheet and put them in the oven on broil. Cook for about 25-30 minutes, tossing every once in a while.

2. When the veggies are almost done, heat some olive oil in pan. Add the ginger and cook for a minute or so, until it gets really fragrant and toasty. Add the tofu and mushrooms and season with salt and pepper. Cook for about 3 minutes, or until the tofu starts to get a bit brown.

3. Add the spinach and toss to wilt. You may need a little splash of water to help it. Once the spinach is wilted, you're done!

4. Take some of your roasted veggies and mix them in a bowl with the tofu, spinach and mushrooms. Sprinkle liberally with fresh herbs. Enjoy!


Wednesday, July 17, 2013

Iced Tea Limeade


It's so hot! It's like a sauna out there -- nothing compared to the beautiful Pacific coast and Rocky Mountain air that I took in for two weeks when we were vacationing in Vancouver. Although it's good to be home, I already miss the cool mornings, crisp evenings, cedar-scented air and the comfort of knowing that at any point in the city, all I need to do is look up and I'll see the mountains, so close and beckoning.

Toronto's smoggy summer air welcomed us home. But hey, I'm not complaining too much. I still have more than half of my summer holidays left and lots of catching up to do. I was terrible at documenting my food adventures in Vancouver, although we did have quite a few! So I thought I'd try to re-make some of my favourite things that I sampled while on vacation and re-live the experience all over again.


Let's start with this drink. I had to start with something low-key and easy, seeing as I'm easing back into this Toronto weather. This drink is tart and refreshing and just the thing to keep you hydrated on a day like today. Let me tell you about what inspired this drink. On one of your last city walk in Vancouver, we stumbled upon this cute little coffee shop called Arbutus Coffee that's housed in a beautiful building in a mostly residential area. We literally stumbled on it -- it's in a place you wouldn't expect, much like Le Marché St. Georges which we loved, Union Market (saved for another post!) and the Wilder Snail where we bought juices and power bars, coffees and hot chocolate and sat on a perfect spot across the street in a park on our last day in Vancouver.

But back to the iced tea. When we came across Arbutus, I was a little caffeinated already, but couldn't resist trying the coffee, which was very strong and smooth. My partner took it easy, and ordered a summer special -- iced tea lemonade. I was offered a sip and was very impressed. It wasn't watery and bland like a lot of homemade iced teas can be. It was strong, very lemony and sweet: a perfect refresher on a summer afternoon. Thinking about Vancouver cafes today, I made a batch of my own iced tea, using limes instead of lemons, and brewing a strong white tea berry blend as the base. I sweetened it with some lime-infused simple syrup and drank it up with lots of ice. And although I wish I were drinking this refreshing tea from a straw, walking along a quiet sidewalk in Vancouver, relaxing at home with homemade iced drinks is just fine by me.

Iced Tea Limeade
makes about 5 cups

For the Lime-Infused Simple Syrup
1/2 cup of natural cane sugar
1/2 cup of water
zest of one lime

1. Combine the sugar and water in a small pot. Heat on low, stirring gently, until the sugar dissolves.
2. Turn off the heat. Add the lime zest and let it rest for about 15 minutes.
3. Strain out the zest and store in a jar.

For the Tea
4 tea bags of your choice (something fruity yet caffeinated would be my recommendation)
4 cups of boiling water
1 cup of cold water
juice of 4 limes
4-6 tablespoons of lime-infused simply syrup (taste as you go and add as much as you like)

1. In a pot, bring 4 cups of water to a rolling boil. Add in the tea bags, turn off the heat and let the tea steep. Allow it to cool.

2. Transfer your strong tea into a large jar or jug. Add the cold water, lime juice and syrup. Stir well.

3. Serve over ice and stay cool!