Saturday, April 30, 2011

I'll Miss You, Winter


Every year near the end of March, I ache for spring to arrive. During the first day that temperatures get above 5 degrees, I shed my puffy winter coat for a light spring jacket and declare it spring. A week later, when it's snowing and -13, I'm in denial; I add two more layers underneath my spring jacket and carry on. It's always a Spring-Winter battle this time of the year where I live. There's rain, there's snow, there's hail, there's chilly wind, there's sunshine and there's warmth. Spring wants to arrive, but Winter doesn't want to say good-bye.

This past week has been pretty soggy, but temperatures haven't been too bad. I'm seeing plants for sale at the market, and there's light out when I get ready to go to work. I think Winter has finally said good-bye. Now that's it's happened, I'm thinking back to cozy days spent curled up on the couch with coffee or tea, winter adventures and hikes, and of course, winter food: hearty soups and stews, casseroles, and my favourite, spicy curries made with winter vegetables. I made this cauliflower and chickpea curry last weekend to welcome home my love after a week spent in New Brunswick. It lasted us the entire week and helped to shake off the damp chill that early spring rain can leave in your bones.


This curry is comfort in every way. It's got chickpeas, lentils, cauliflower and a big dose of ginger to scare away the cold. The recipe is simple and straightforward, despite the long ingredient list, so you can make it even when you're coming down with a cold, like I was. I used Malaysian curry powder, which gives this stew a beautiful smoky flavour and a bright orange-red colour. A little dash of hot smoked paprika brought it to a new level. We ate bowls of this curry paired with rice one night, pita bread the next, and even all by itself. It was the perfect way to say goodbye to Winter and welcome home my love.


Chickpea and Cauliflower Curry

1 medium onion, diced
2 cloves of garlic, minced
an inch chunk of ginger, finely diced
1 teaspoon of ground cumin
1/2 teaspoon of ground coriander
2 teaspoons of Malaysian curry powder
a pinch of hot, smoked paprika
5-6 curry leaves (or lime leaves)
2 medium carrots, diced
1 stalk of celery, diced
a handful of mini potatoes, quartered
1 can of sodium-free chickpeas
half a large head of cauliflower
1/4 cup of red lentils, rinsed well
4 cups of water, or vegetable stock
1 small can of crushed tomatoes
salt and pepper to taste

1. In a large pot, sweat the onions for about 2-3 minutes, or until translucent and fragrant. Add the garlic and ginger, carrots and celery and season with salt and pepper.

2. Turn up the heat and add the spices and curry leaves. Stir vigorously to toast the spices. Add the potatoes and lentils and toss around until everything is coated in spice. Add the stock or water and crushed tomatoes and stir well, making sure to scrape up any yummy spicy bits that have stuck to the bottom of the pot. Bring to a boil, then reduce to a simmer.

3. Cook until the potatoes are tender and the lentils have almost melted away. Add the cauliflower and chickpeas and give it a good mix. Put the lid on and let the cauliflower cook for about 5-7 minutes, or until tender. Give it one big stir, and then leave the lid on and let it sit for about 10 minutes so everything can mingle.

4. Serve warm with rice, pita or all by itself!

Sunday, April 24, 2011

Pear and Plum Grunt for Two


Yeah, I just used the word "grunt" in a title of a recipe. Yeah, it's an actual food word, not just a sound that comes out of us when we're grumpy. A grunt, better know as a slump, is one of those fruit and biscuit combinations. So many names .. betty, crumble, crisp, cobbler, pandowdy (that one's almost as bad as grunt!). What distinguishes a grunt from a cobbler, is the cooking of the biscuit topping. Instead of baking it in the oven so that top gets golden and crunchy, the biscuit batter is spooned on top of fruit that's been simmering in a pot, the lid goes on, and magically, the biscuits turn into these soft, pillowy, dumpling-like things that have the essence of the fruit steamed right into them. Yum.

It was really really easy to make, and it was the perfect thing to share with my Grandma. I made it last weekend for just the two of us to share, but I'm sure the recipe doubles quite easily. For the fruit, I used a pear and a plum instead of the apricots that the original recipe called for, but I think this dessert would work with any kind of fruit that strikes your fancy.

I checked the weather forecast for this coming week and it looks like rain, rain and more rain. I don't mind really.. just an excuse to curl up with a warm, spicy dessert, and another season of X-Files.


Pear and Plum Grunt for Two
adapted from Eating Well

1 large bosc pear, peeled and diced
1 black or red plum, peeled and diced
juice and zest of half a lemon
pinch of cardamom
2 tablespoons of honey or maple syrup

1/4 cup of whole wheat flour
1 tablespoon of sugar
1/4 teaspoon of baking powder
1/8 teaspoon of baking soda
pinch of salt
2 tablespoons of plain yogurt
1 tablespoon of canola oil
1/2 teaspoon of sugar with a pinch of cinnamon mixed in

1. Place the fruit, lemon zest and juice, honey and cardamom in a small pot cook on medium heat for about 5-7 minutes, or until the the liquid gets a bit thick and the fruit starts to soften.

2. In the meantime, prepare the biscuit topping by sifting the flour, baking powder, baking soda, sat and sugar together. Add the yogurt and canola oi and mix with a fork until just blended.

3. Drop spoonfuls of batter over the cooking fruit and sprinkle with the cinnamon sugar. Put the lid on the pot and cook (peaking as little as possible) for about 12-15 minutes, or until the biscuit is puffed and cooked.

4. Serve warm and enjoy with someone you love.

Friday, April 15, 2011

The Baking Days


I'm speaking of the baking days like they were a thing of the past ... They're not. Really, they're not. I'm being a little over-dramatic. It's been a long week. I wanted to bake, but stuff got in the way. Lots of stuff. Lots of stressful, last-minute stuff.

On Wednesday, right smack in the middle of all the stressful action, I longed for one of these muffins. Apple tahini muffins to be exact. I made them awhile ago when I wanted to bake up some wholesome treats to help ease me through report card writing. And they really hit the spot -- incredibly moist and flavourful with a big, rich tahini punch that rounded out the tart, sweet grated apples that just about melted into the muffin. Along with the whole wheat flour, and wheat bran, these little mini-muffin-gems were also a much-needed energy booster just as my batteries were running low.


Darn. I should have planned ahead and made a batch of these last weekend before the madness started. Oh well. I have a big long-weekend to look forward to, and you can bet that I'll be back in the kitchen, covered in flour, working through a batch of something warm and fragrant.

Apple Tahini Muffins
makes 24 mini muffins

1 egg
1 tablespoon of canola oil
2 tablespoons of tahini
1/4 cup of yogurt
1/4 cup of honey
1/2 cup of milk
1/2 cup wheat bran
3/4 cup of whole wheat flour
1/2 teaspoon of baking powder
1/2 teaspoon of baking soda
2 little apples, grated

1. In a large bowl, whisk together the egg, oil, tahini, yogurt, honey and milk until well-combined.

2. Sift in the flour and baking soda and powder. Add the wheat bran and give everything a big but gentle stir. Add in the grated apples and mix until just combined.

3. Spoon the batter into lined mini-muffin tins and sprinkle a few sesame seeds on top of each one. Bake in a 350 degree oven for about 15 minutes or until a cake tester inserted comes out clean.

Sunday, April 10, 2011

Jamie Oliver's Humble Home-Cooked Beans


Do you like baked beans? If you're like me, the only kind of baked beans that you know about are the kind that come in a can and taste maple-y sweet and are, yes, let's admit it, totally addictive. In exploring a new kind of baked bean, the home-made kind, I came across many different options. Pineapple and molasses, bacon and apple cider vinegar, beer and dried berries .. there were so many options. But I wanted to start simple. Then, I remembered the list. Yes, the list. Towards the end of my March break, I had made a list of all the cooking that I wanted to do before the summer, and Jamie Oliver's baked-beans was on it. I was flipping through one of his cookbooks and somehow, those creamy comforting beans caught my attention. A quick ingredient scan told me that they were totally doable.


These beans are the perfect thing to eat on a rainy, cool spring Sunday afternoon while watching a funny movie and relaxing. The beans cooked on the stove top, bubbling away with bay leaves, celery, onion, garlic, thyme and a couple new potatoes. The funny and genius part of this recipe is that when the beans are tender, you drain some, but not all of the water, and smash up the potatoes and garlic. They get stirred back in the beans to make them creamy and delicious. A little splash of vinegar brightens everything up at the end, and the few glugs of olive oil that Jamie calls for is not even needed.


I can totally see myself adding a big dose of maple syrup at the end next time ... and yes, there will be a next time .. lots of next times...

Jamie Oliver's Humble Home Cooked Beans
adapted from Jamie at Home

1.5 cups of dried cranberry/borlotti beans, soaked overnight in cold water
1 bay leaf
2 sprigs of thyme
half a stalk of celery
a quarter on a white onion, roughly chopped
garlic clove, unpeeled
2 baby potatoes, quartered
salt and pepper to taste
1 splash of balsamic vinegar

1. Placed the soaked beans, bay leaf, thyme, celery, onion, garlic and potatoes in a large pot and cover with cold water. Gently bring to a boil, and then simmer for about an hour, or until the beans are tender.

2. Remove about 2 cups of the cooking liquid. Drain the beans. Discard the thyme stems, celery and bay leaf. Remove the garlic and potatoes to a small bowl and give them a good smash.

3. Put the beans, reserved cooking liquid and potato garlic mixture back into the pot over low heat. Cook, stirring gently until the liquid has reduced a bit. Season well with salt and pepper. Add in a splash of balsamic vinegar, stir and serve.


Pssssst! We've started our own coffee adventure! Here's our first one ..

Coffee Tree: double americano, cappuccino and german chocolate cake flavoured coffee (soooo delicious!). And of course .. one of us walked away with 1/2 pound of beans .. French Caramel flavoured beans to be exact .. SO worth the trek to Jane/Bloor

Saturday, April 2, 2011

Chocolatey Fudgey Vegan Goodness


On my last real day of March break, my love brought home a little present for me: a compact little cookbook called "Vegan Cookies Invade Your Cookie Jar" by Isa Chandra Moskowitz and Terry Hope Romero. Since then, I haven't stopped looking through it during every spare moment I have, or every time I feel like procrastinating. It's just so distracting! Pages of easy-looking recipes and alluring photos of delicious looking vegan treats .. how was I supposed to get any work done at all?

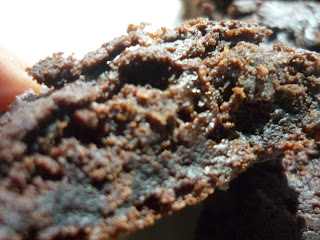
My only choice was to break down and bake something. I chose one of the first thing that caught my eye when I was skimming through the book for the very first time: vegan chocolate brownies. Within the brownie section there was lots to chose from: cocoa brownies, espresso fudge brownies, simple blondies, spiced sweet potato blondies, peanut butter blondies .. choosing was definitely a challenge. I ended up combining two of the chocolatey brownie recipes together and my result was a fudgy, dense-but-not-heavy, very very chocoately brownie. Total heaven.


And the secret ingredients? First, there was tofu -- yup, the protein power of blended silken tofu gave these brownies an amazingly fudgey texture and kept them nice and moist. Second, there were squares of Trader Joe's dark chocolate. That's right, Toronto! Not only did my love bring me back a wonderful cookbook, but he also scored 3 tins of the mysterious Trader Joe's chocolate -- mysterious because the blog world is full of Trader Joe's followers, yet there are none to be found here in Toronto. I didn't ask, I just dove right in and melted down a few wedges to enhance the chocoatelyness of the cocoa powder. The brownie was so delicious that it even fooled some junk-food-loving 13 year-olds. Have a found a healthy brownie ?? You be the judge!


Chocolate Vegan Brownies
adapted from "Vegan Cookies Invade Your Cookie Jar" by Isa Chandra Moskowitz and Terry Hope Romero.

1/4 cup of canola oil
2 oz of bitter sweet chocolate
6 oz of soft, silken tofu
1/4 cup of soy
3/4 cup of brown sugar
2 teaspoons of vanilla
1 tablespoon of cornstarch
1 cup of all purpose flour
1/2 teaspoon of baking powder
1/2 cup of natural, unsweetened cocoa powder
a pinch of salt

1. Melt the chocolate with the oil over low heat, stirring constantly. Set aside.

2. In a blender of mini-chopper, blend the tofu and the soy until smooth the fluffy. Remove to a large bowl.

3. Add the chocolate mixture, sugar and vanilla and whisk to combine.

4. Sift in the cornstarch, baking powder and cocoa powder and stir gently. All the flour and salt and mix until just combined. At this point you could add in whatever extras you like: chocolate chips, chopped nuts .. go for it.

5. Spread the mixture out onto a square baking pan (non-stick or lined with parchment) and bake in a 325 degree oven for about 25-30 minutes, or until a it has puffed up a little in the centre, and is firm to touch. Cool, cut into squares and fool your pickiest chocolate lovers.