Showing posts with label ginger. Show all posts

Sunday, August 25, 2013

Molten Tofu: Another Vancouver Next Time


There were so many things we wanted to do in Vancouver and unfortunately, time was limited. We had so many adventures but there are so many more left .. like hiking through Indian Arm Provincial Park, visiting Vancouver island, camping .. and sampling food and drink from places we just couldn't squeeze into our adventure-packed days: drinks at Alibi Room (too big a line-up from when tried), coffee from  Elysian (we always had our mugs full of Matchstick brew when we biked past this place), vegan goodies from Edible Flours, (closed for a vacation when we got there) and a chilled-out dinner at The Foundation.

I really have no excuse for not eating at The Foundation since it was on our way home. But despite my perusing the menu a couple nights while we were there, it just never happened. At one point, I even picked out what I was going to order. Hands down, I had to have the molten tofu, described as "brown and spicy brokly and tofu served on rice." The picture of it, also looked delicious -- comforting and filling. So when we got back to Toronto, and I needed a bit of tofu love to soak up all that excess coffee, I thought I'd make my own version of molten tofu.


It was quite a task at first, seeing as it's kind of hard to re-create something you've never tasted, but a little googling led be to Johnny Hetherington's website (lead vocals in the Canadian band Art of Dying) where he describes making his version of molten tofu -- veggies, fried tofu and a rich, spicy peanut sauce. Awesome!

I'm not too big a fan of hot sauces like tobasco or sriracha, so I don't keep any in the house. Instead, I heated my peanut sauce with lots of fresh ginger and pinch of hot smoked paprika. Other usual suspects go into the mix -- dark soy, light soy, a touch of toasted sesame oil and a big squirt of lime juice. After that, it was just a question of mixing the sauce with the veggies and tofu and eating it up over rice.

This version of molten tofu satisfied me, but I'm still putting The Foundation on my list for our next visit to Vancouver.

Molten Tofu Rice Bowl
inspired by The Foundation, with help from Johnny Hetherington 

For the Sauce:
2 tablespoon of natural peanut butter
juice of a lime
2 teaspoons of finely chopped ginger
pinch of salt and pepper
pinch of hot smoked paprika
1 teaspoon each of dark soy and light soy
1/4 teaspoon of toasted sesame oil

1. To make the sauce, simply whisk all the ingredients together. Taste, and add more lime juice or seasonings as needed. Add in a squirt of hot sauce if that's your thing.

For the Bowl
1/2 cup of brown rice
1 cup of water or stock
1/2 small head of broccoli, chopped into florets
6 oz of tofu, cut into cubes
a big handful of baby spinach leaves
a few good grinds of black pepper
splash of water
2-3 basil leaves, chopped (I used beautiful purple basil)

1. In a small pot, add the rice and water or stock. Bring it up to a boil, stir gently, then turn down the heat and cook uncovered for about 10 minutes.

2. Add the broccoli to steam with the rice. Replace the lid and cook for an additional 10 minutes. The brocoli and rice should be tender and the water should all be absorbed. Separate the broccoli from the rice and set aside.

3. In a pan, heat a bit of olive oil, then fry the tofu for about 2-3 minutes on each side, until they get nice and brown. Add the pepper and the peanut sauce and stir well.

4. Add in the broccoli and spinach leaves. Stir gently until the spinach wilts. You may need to add a splash of water to help it along.

5. Divide your rice among two bowls and top of the molten tofu mixture. Enjoy!

Monday, March 25, 2013

A Sure Sign of Spring: Rhubarb


It's still a bit nippy out there. The winds are still whipping by my face in the morning, and I still reach for my pair of fuzzy socks when I'm walking across the cold concrete floors.

But ... spring is definitely on the way. It was warm enough for me to take my hat off this afternoon, the sun peaked at us for more than just a few minutes, and this past weekend, I saw rhubarb in the market. Yup, rhubarb -- those beautiful pinky-red stalks of deliciousness. They are a sure sign of spring. I couldn't resist snatching up a bunch and immediately turning them into something sweet and gooey and tasty. And what could be easier than a crumble?


I mixed my rhubarb with a crisp apple to give it a little sweetness, and added a double dose of ginger -- candied and fresh -- to give this dessert a little spice. It's the perfect mesh of flavours to have while winter melts into spring -- fresh and tangy, warm and spicy. Perfection!

Because I baked this crumble in a smallish baking dish, it ended up being more like a pandowdy -- the top of the crumble topping turned nice and brown and crumbly, but the because it ended up being such a thick layer, the further you went down, the more biscuit-like it turned. Totally fine by me, though. The biscuity parts were tender and tasty and soaked up the rhubarby-gingery juices really well. It was the perfect way to end a meal, and as the original recipe suggests, also perfect served with a dollop of yogurt and alongside a strong coffee for breakfast.

Happy spring!!

Rhubarb Apple Ginger Crumble
adapted from Poppytalk

For the Fruity Part
1 pound of rhubarb (about 4 large stalks)
1 large apple (I used a Jonagold)
1/3 cup of brown sugar
1 tablespoon of minced fresh ginger
1 tablespoon of candied ginger, chopped fine
juice and zest of a lemon

1. Mix all the ingredients in a large pot and heat gently -- stirring frequently. Let the fruity mixture bubble and cook for about 5-7 minutes, or until the rhubarb and apple start to get soft and juicy.

2. Pour the mixture into a baking dish -- keep in mind that if you use a smaller (like 6inch) dish, you'll get pandowdy-like results -- biscuity with a bit of crumble on the top. If you more crumble/crisp- like results, use a larger dish.

For the Topping
1 cup of spelt flour
1/2 cup of rolled oats
1/4 cup of brown sugar
1 tablespoon of minced fresh ginger
1 tablespoon of candied ginger, chopped fine
1/3 cup of butter (I used Earth Balance)


2 tablespoons of maple syrup

1. Mix the flour, oats, sugar and gingers together. Using your fingers, rub the butter into the flour mixture until you get a coarse mealy texture.

2. Add the maple syrup and use a spatula to incorporate into the crumble. Spread the crumble mixture over the fruit mixture.

3. Bake in a 350 degree oven for about 30 minutes, or until the fruit starts bubbling up over the top, and the crumble is nice and golden brown.

Sunday, March 3, 2013

It's just the thing: Sticky and Spicy


I love all seasons. Summer is adventures and relaxing, sipping lemonade on hazy hot days, and endless afternoons. Spring is rejuvenation and long city walks outdoors, extra cups of coffee and excitement growing about farmer market season. Autumn is routines and brisk walks to work warmed by steaming tea and coffee, biting into crisp apples and hearty pumpkin stews. And winter. Winter is snow walks and hot chocolate, stirring pots of homemade rice pudding and shameless weekends spent in pjs. That's where I am today. It's past noon and I haven't changed out of my fuzzy socks and sweatpants, nor have I stepped foot outside into the icy flurrying skies during these last days of winter.

Although I've done my fair share of moaning about the cold weather, I still love winter. And I also love winter flavours. Yesterday, I noticed a lonesome jar of homemade marmalade in the back of the freezer and decided to pull it out to play with today. Marmalade on English muffins would have been a good breakfast, but I wanted to put it to use in a cake that I know I'd be craving later in the day. This beautiful sticky gingerbread cake is just the thing. Sticky and spicy, almost fudgy yet light and fluffy at the same time. It's vegan and made with spelt flour and a lot of ground ginger. It's got a big dollop of homemade marmalade in it, and just a whisper of dark cocoa powder to bring out all the spices. It's just thing to have with tea or coffee while you watch the flurries float down over the balcony and wait for spring to peak around the corner.

Sticky Marmalade Spice Cake
adapted from Bittersweet


1/2 cup of orange juice
1/4 cup of molasses
1/3 cup of marmalade (preferably homemade)
1/4 cup of apple butter (or apple sauce)
1/4 cup of olive oil
1/4 cup of dark brown sugar
1 cup of spelt flour
1/4 cup of all purpose flour
2 T cocoa powder
1.5 teaspoons of baking powder
1/4 teaspoon of baking soda
2 teaspoons of ground ginger
1/2 teaspoon of cinnamon
a pinch each of grated nutmeg and black pepper

1. In a large bowl, whisk together the orange juice, molasses, marmalade, apple butter, olive oil and brown sugar until well combined.

2. Sift in the flours, cocoa powder, baking powder and soda and all the spices. Mix gently and until just combined. Don't over mix.

3. Pour the batter into a prepared cake pan (I used a 9inch round pan) and bake in a 350 degree oven for about 30 minutes, or until the top is springy to touch and a cake tester inserted comes out clean.

4. Serve with a spicy chai tea, strong coffee or a few slices of clementines. ;)

Saturday, November 12, 2011

Freezing the Goodness


Are you one of those clever people that clears out the freezer ever summer to make room for the bounty of berries and sweet corn and then in the dead of winter you pull out these amazing, local frozen berries from the freezer and make your smoothies and baked goods taste like heaven while snickering at the rest of us who have to make due with flown in berries or Europe's Best frozen ones (which are actually a product of Chile?)?


This summer, I sooo wanted to freeze a harvest of blueberries and strawberries -- the problem was, we ate them so quickly, and we could never buy enough. There was also the problem of room shortage in my freezer. Yeah, that'll do it. But we did do something to preserve the goodness of summer: we made preserves! No thick, pectin-laden jam that's almost half sugar. Nope, we made preserves that actually tastes like strawberries, rhubarb and blueberries. It was awesome.


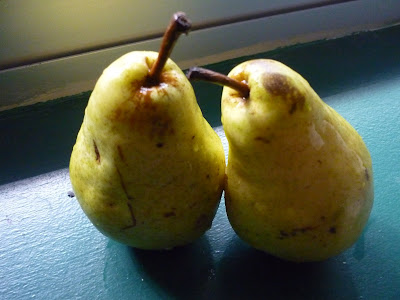
So when fall rolled around -- and I loooooooove fall -- I wanted to preserve a bit of that too. I always get excited about the apples that roll around. A new variety showed up in my local market -- the Ambrosia. Totally delicious. But I find that the apples always overshadow the pears -- which symbolize fall as perfectly as apples do. I remember buying spicy pear jam at a market in Guelph and wanting to re-create it at home. Ours was more of a stewed fruit preserve, with less sugar, kicked up with some fresh ginger and lemon juice and of course, all spiced up. It made for a beautiful topping for my weekend oatmeal brunches, a perfect gift for my mommy, and a welcome alternative to go along side peanut butter. When all was said and done, and the two little jars were sealed and stacked in the freezer, I couldn't help trying one right away. But I'm going to save the other one for early July, when I need a reminder that summer will whip right by me, but fall .. fall is likely to linger..

Spiced Pear Preserves
makes about 1.5 cups -- enough to fill three little mason jars; a really small batch, but I'm sure if you doubled or tripled it would be fine -- just adjust the spices and sugar to your taste.

6 Bartlet pears, peeled and diced
1/2 teaspoon of grated fresh ginger
1/2 teaspoon of cinnamon
1/2 teaspoon of cardamom
a tiny pinch of allspice
juice of half a large lemon
2-3 tablespoons of sugar
splash of water, more if needed

1. Combine all the ingredients in a pot and cook over medium heat, stirring often. When the pears start to break down (about 10 minutes later), turn the heat down to low and let it cook.

2. In the meantime, sterilize your stuff by placing the jars (face up), rims and lids (seal side up) on a cookie tray and in a 200 degree oven for about 20 minutes.

3. By the time your pears are nice and softened and the juices have thickened, your jars will be ready. Carefully spoon the pears in each jar. Seal tightly and turn them upside down on the cookie tray. Let them stand for 20-25 minutes, after which time, they should have sealed.

4. You're ready! Freeze or eat at your leisure! :)

Saturday, December 18, 2010

Local Things


I never thought much about local produce and food politics when I was growing up. I got a little taste of it in university, but it wasn't until I started cooking for myself, that I was fully introduced to the world of local eating. That being said, I'm not that good at it, especially during this time of the year. I try my best, but there are just some things that are hard to live without, like oranges, lemons, chocolate, coffee ... ok so I'm not going to list them all because it would be too embarrassing. Veggies, apples, pears, berries definitely and most recently poultry and yogurt .. those I can handle. But local citrus doesn't exist here in the Tdot and I can't imagine my smoothie without that orangey tang, or my curry without that lemon-lime spark.

Recently, my best friend took a work trip down to San Fransisco and in between presenting, note-taking and mingling with professional peers, she took a little time to explore the farmer's market. Upon returning, she described to me something that we would never have here in Toronto: local persimmons. Wow. That's almost as good as getting a local lemon. I HAVE to visit San Fran.


Have you ever had persimmons? It's hard to describe the taste. They're just sweet, and fruity and delicious. I have great memories of eating persimmons as a kid, waiting for them to be smooshy and ripe, and then just eating the pulp like pudding. It was a real treat. Now that I'm all grown up, I kind of prefer the firmer kind of persimmon, the kind that you peel and cut up and snack on. To me, it's best when the flesh has just a little bit of give. Awhile ago when I came home, I found two little persimmons perched on my kitchen counter. I instantly remembered seeing a beautiful, easy recipe for a yummy-looking loaf/quick bread over at Joy the Baker, and I knew I had to try it.

I tweaked the recipe a bit to suit my needs, and baked them up in mini muffin tins instead of a loaf pan. The results were sweet, spicy, warm, wholesome, tender and just plain good. A perfect way to brighten up your streetcar ride home, or make your friend's morning before a dreaded meeting. I think persimmons are still around for a little bit longer, so it's still not too late. And if you're in San Fran, savour the local loveliness and think of those of us up here in TO, who can only dream of local persimmons.

Spiced Persimmon Mufiins
adapted from Joy the Baker makes 24 mini muffins, or one loaf

2 persimmons, peeled, chopped and pulsed until pulpy in a blender or chopper
1/2 an apple, grated
1/2 cup of oats
1/4 cup of skim milk yogurt
1/4 cup of milk
1/4 cup of brown sugar
2 tablespoons of canola oil
1 egg
1/2 teaspoon of grated fresh ginger
a big pinch of cinnamon
1 cup of whole wheat flour
1/2 teaspoon of baking soda
1 teaspoon of baking powder

1. Combine the oats, yogurt and milk in a large bowl. Let stand for 10 minutes (now would be a good time to grate your apple and pulse your persimmons!)

2. Into the oat mixture, add the brown sugar, oil, egg and ginger. Mix to combine.

3. Sift in the flour, baking soda, baking powder and cinnamon. Stir until just combined.

4. Spoon the mixture into prepared mini muffin pans and bake in a 350 degree oven for about 15-20 minutes.

Saturday, November 20, 2010

La Belle Verte


L’Automne me parle. Elle me chuchote dans l’oreille, en disant: Au revoir … au revoir .. à l’année prochaine. Pour la plupart, je ne peux pas l’entendre, elle parle si doucement. Les après-midis sont toujours ensoleillés, je ne dois que porter ma tuque après le couché du soleil. Le vent est toujours doux et frais, et les feuilles sont encore colorés…les belles rouges, oranges et jaunes de l’Automne. Mais .. mais .. son départ est là. Son au revoir reste dans mon esprit comme un rêve dont je n’arrive pas à rappeler tous les détails. Elle me chuchote à l’aube, quand l’air est froid et glacé. Elle berce le soleil beaucoup plus tôt que d’habitude, et elle me suggère avec un tout petit frisson, que je devrais porter mes bas et attacher ma tuque.

L’Automne, je vous aime, et pourtant, vous restez seulement quelques courts mois. Je voudrais vous garder dans mon esprit, même quand la neige de l’Hiver me chatouille le nez, même quand la pluie de Printemps me mouille les cheveux, et même quand la chaleur de l’Été me crie d’enlever mon chandail ..

Mais enfin, le cycle de saisons doit prendre place, et je ne peux que penser aux après-midi de l’automne parfaits, ceux qui sont passés en marchant avec mon amour, en prenant un café lentement, un en particulier passé juste à l’autre côté de la capitale de notre pays, à la ville étrange et charmante de Gatineau. On a marché pour une belle demi-heure, suivant les rues cycliques qui semblent n’emmener qu’aux bâtiments gouvernementales gris et sérieux et bien trop officiels pour un petit séjour en Octobre. Mais, en tournant un coin final, on est arrivé soudain au milieu du centre-ville. Encore, étrange et charmant, pas comme les centres-villes de ma connaissance, ce centre-ville était entouré de maisons résidentielles, et ce centre-ville était solennelle et silencieux. On a dîné chez un petit resto vegan : La Belle Verte. C’est là où j’ai fait connaissance du foncé et feuillu chou frisé (kale en anglais). Ce légume je n’ai jamais goûté auparavant, et maintenant, je l’en suis toute intoxiquée. Mon amour a commandé une spécialité : La Belle Verte, qui est composé des pâtes (faites à la maison de blé entier), des légumes (carottes, choux frisé, brocoli et haricots) et une sauce au choix (il a choisi la sauce épicée aux arachides). Moi, j’ai choisi le cari aux légumes avec du riz, encore servis avec les mêmes légumes délicieux. Le cari était doux et savoureux, mais c’était le chou frisé qui, pour moi, a fait ce repas mémorable. Un simple légume, oui, mais quand je l’ai goûté, c’était l’Automne qui me vient à l’esprit.

Maintenant que mon beau séjour est fini il y a un long moi, et le vent de l’Hiver m’embrasse furtivement pendant les sombres matins, et les soirées tardifs, je cherche à augmenté ces belles souvenirs pour me couvrir avec tous ses chaleurs de l’Automne. C’est certainement les goûts de l’automne qui sont les plus réconfortants, et parmi les pommes, les citrouilles, la cannelle et les canneberges, je cuis le chou frisé. Non, je n’ai pas essayé à refaire les repas de La Belle Verte (mais je l’en veux bien). Ailleurs, j’ai fait un simple dîner de pois de chiches assaisonnés avec le gingembre et les autres saveurs asiatiques et le chou frisé blanchi. Très simple, mais délicieux, et certainement un repas qui emmène mes souvenirs de Gatineau au devant de mon esprit.

Simple Chickpeas and Kale
serves 2

a small bunch of kale, stems removed
1 can of chickpeas, drained and rinsed
1 teaspoon of olive oil
a small chunk of ginger
a splash each of dark soy, light soy and sesame seed oil
1/2 teaspoon of ground coriander
black pepper to taste

1. Blanch the kale in salted, boiling water for 30 seconds. Remove, drain and roughly chop. Divide between two bowls.

2. In a saucepan, heat the oil and ginger over high heat until things get toasty and fragrant. Add the chickpeas, soy sauces, coriander and sesame seed oil and toss around. Add black pepper and cook until the sauces turn syrupy.

3. Pour the chickpeas over the kale and serve immediately.

4. Au revoir L’Autonme. À l’année prochaine!