Thursday, December 29, 2011

Party Crackers for New Year's Eve


Are you a big party person on New Year's eve? I've never been. Somehow, even though I know it's supposed to be a big deal, December 31 never feels like an ending and January 1 never feels like a new beginning. Maybe it's because we have Chinese New Year coming up in a month or so. Or maybe it's because I spent the better part of my life as a student, and now, as a teacher, I feel like year-ends and beginnings fall according to the academic calendar. September is a beginning and June is an end. July and August we don't count because we're too busy sleeping in, going on camping adventures and eating watermelon (or .. cough .. taking courses .. which .. I .. have .. yet .. to do .. yeah so whatever... cough .. New Year's resolution #1 .. cough)


Well this year, we have 2 dinner parties to go to around New Year's eve -- it makes me feel like January 1st, 2012 might feel like a beginning .. just maybe. One of the parties will be my best friend's annual post-Christmas pre-New Year's gathering, and the other is -- a post-Christmas turkey dinner at my sister's. I was told for this one that I shouldn't bring anything as the free-run turkey in question is 14 pounds -- no extra leftovers will be appreciated. But I always feel like you have to go to party offering something, so I baked up some of these crackers. They're cheese and olive oil crackers to be precise, and they're studded with chopped walnuts and sweet tart dried cranberries. You can use any combination of cheese, dried fruit and nuts that you think go well together. I used a dutch kantennar cheese which is nutty and rich and so flavourful -- it's also a lighter cheese so it's easy on the calories and sodium. Total bonus in my books. Sharp cheddar would be really good, or Parmesan of course. Don't skip the dried fruit -- it gives these savoury cheesy bites a burst of sweetness that sends them over the edge -- think of a cheese and fruit plate. See what I mean?

Make them. They're totally addictive and cheesy and sweet and rich without being bad for you -- spelt flour, cornmeal and only 2 tablespoons of oil. I'm not going to lie and tell you they were totally easy -- they're kinda hard to roll out if your dough is cold like mine. They're actually easier to work when the dough is room temperature. But the delicious smell coming from my oven made it worth it. They'll be a hit at your New Year's Eve party -- if that's your thing. But still make them if you're like me and will be staying in on New Year's Eve and possibly going for a midnight skate at the community centre .. possibly .. I said possibly. In any event, I'll be eating lots of crackers.


Happy New Year (and back to the grind for any of you who aren't in education .. I have another week off! Woo hoo! What a way to start 2012!)

Cheesy Cornmeal Crackers with Walnuts and Cranberries
adapted from The Pastry Affair with help from Vanilla Sugar and Savoring Time in the Kitchen
(makes about 3 dozen little star-shaped crackers -- double the recipe if you're making them for a big gathering)

1/2 cup of spelt flour
1/2 cup of cornmeal
1 big pinch of salt
a few good grinds of black pepper
1/3 cup of grated cheese
1/4 cup of walnuts chopped up really small
1/4 cup of chopped dried cranberries
2 tablespoons of olive oil
1/4 - 1/3 cup of cold water

1. In a large bowl, combine the flour, cornmeal, salt, pepper, cheese, walnuts and cranberries. Stir so that everything is well dispersed.

2. Add the olive oil and half the water. Stir to combine. Keep adding water a little at a time and stirring until you form a nice soft dough. It will be really sticky. Don't worry.

3. Let the dough rest, covered at room temperature for about 30 minutes. The cornmeal needs time to soak up all the water and get nice and doughy.

4. On well-floured surface, roll your dough in batches to about 1/8 of an inch. Here's where you can play .. or not. Use little cookie cutters to cut out your crackers, or simply cut out strips. Place them on a cookie sheet and bake at 400 until their golden brown and crispy. Would they go well with champagne??

5. Happy New Year!

Saturday, December 24, 2011

Traditions in Cookies and Muffins


In the past week, I've baked 7 different types of cookies! Whew! They were all deliciously fun to make. I among the most interesting were these brown sugar chocolate cookies, and these maple nutmeg sugar cookies -- I even used freshly grated nutmeg for the first time! Score! I made some old favourites : peanut butter cookies made with all natural crunchy peanut butter, oatmeal cranberry cookies for our school's healthy holiday bake sale (as if I it wasn't enough to be up to my elbows all morning in gingerbread, icing sugar and sprinkles!) and these salty-sweet additively delicious oatmeal butterscotch cookies -- thanks goodness the majority went into a jar to be given as a gift!


I also found these -- rosemary maple pecan cookies with chocolate chunks. If you've ever made this popcorn, or these spiced nuts, you'll love these cookies. And they're vegan! The recipe is via a blog I found through Tastespotting: Bittersweet. You have GOT to make these cookies, stat!

I know I'm a little late in posting cookie recipes, but when I was little and living at home, I'd always bake at least one batch of cookies on Christmas day. While they were in the oven, we'd sing Christmas carols or watch The Sound of Music again. A lovely tradition, that we've kind of kept up with. I now usually bake up a batch of something breakfasty to take to my parents' on Christmas morning. So I thought I'd leave you with 2 recipes: cookies and muffins, and you can make your own tradition on Christmas morning.


Orange-Scented Sugar Cookies
makes lots!

These cookies are lightly sweet, crisp, buttery and fragrant from the orange zest. Lemon or lime zest would be perfect as well .. even grapefruit. Why not? If you refrigerate the cookies for a bit once they're cut out before you put them in the oven, they'll hold their shape nicely. A sprinkle of coarse sugar on top would make these sparkly and extra special.

1/2 cup of butter, softened
1/3 cup of sugar
1 egg
zest of one small orange
1/4 teaspoon of baking powder
1.5 cups of all purpose flour

1. In a large bowl, mix together the butter and sugar until well-combined. Add the egg and mix vigorously until everything is incorporated.

2. Add in the orange zest, baking powder and flour. Mix well.

3. Chill the dough in the fridge for at least 1 hour.

4. Working in batches, roll out the dough on a floured surface to about 1/8 of an inch. Use as many fun cookie cutters as you can to cut out your cookies. Place them on a baking sheet and chill briefly in the fridge -- chill them while your oven is pre-heating.

5. Bake in a 350 degree oven for 10-12 minutes, or until the edges get brown. Cool and enjoy!


Clementine and Spice Christmas Muffins
makes 24 mini-muffins or 12 regular muffins

These muffins are the perfect wholesome breakfast treat to wake up to on Christmas morning. They have a beautiful tender crumb and an almost crunchy exterior. Made with oats, whole wheat flour and honey so there's no need to feel guilty at all! They're also egg-free so it's easily veganized.

1/3 cup of milk (I used soy)
1/4 cup of yogurt
2 tablespoons of honey
1/2 cup of rolled oats
zest of three clementines
3 tablespoons of canola oil
1/3 cup of brown sugar
a little grating of fresh nutmeg
1/2 teaspoon of cinnamon
a pinch of cardamom
1/2 teaspoon of baking soda
1 cup of whole wheat flour
1/2 cup of chopped fresh cranberries

1. In a large bowl mix together the yogurt, milk, honey and oats. Let stand for ten minutes.

2. Add the oil, sugar and zest. Mix well. Sift in the spices, baking soda and flour. Stir until just combined. Add the cranberries and mix once last time.

3. Spoon into muffin tins and bake in a 350 oven. Mini muffins should only take about 15 minutes, and regular muffins about 20.

4. Enjoy with coffee. Happy Holidays!

Saturday, December 10, 2011

Something Warm and Filling


Are you covered in butter and sugar and cinnamon and chocolate? Maybe with pecans and cranberries and candy canes? I don't know about you, but as much as I love holiday baking, it can get a little tiresome, and while I'll be very willing to share my sugaring adventures with you next Friday when the school bell rings at 3:30, right how I'm leaving you with something wholesome.

This is a hearty, comforting and flavourful rice and beans dish. It's humble: canned while beans, dried rosemary and sage, celery, carrots and broth. But it's also made special with red and while rice. Everything gets all stewy and delicious and the white beans make it creamy and comforting. It's something you can reheat and sit down on the couch with. Nothing fancy, nothing guest-worthy; just something warm and filling to get you through all that holiday stress.


Stay chilled out folks ... I'm in for a week of hyper activity and another bake-a-thon!

Creamy Stewy Beans and Rice
makes lots!

1 large carrot, diced
1 stalk of celery, diced
1 medium onion, diced
1 can of white beans, drained and rinsed
1/2 cup each of red and wild rice, rinsed well (or use quinoa, basmati, pearl barely ..)
1 teaspoon of crushed, dried rosemary,
1/2 teaspoon of dried sage
1/2 teaspoon of smoked paprika
salt and pepper to taste
1.5 cups of water or stock

1. In a large pot, heat some olive oil. Cook the carrots, onion and celery over medium heat until the onions of translucent and fragrant, the carrots and celery start to soften -- about 5-6 minutes.

2. Add the rosemary, sage, and paprika. Stir well. Add in the stock and rice and turn the heat up. Bring the mixture to a boil, and then turn it down to a simmer. Add the white beans.

3. Cover, and cook for about 10-15 minutes, or until the beans are creamy and the rice and vegetables are tender. Add in more stock if things are looking a bit dry.

4. Turn off the heat and let stand for about 5 minutes, covered. Serve with a squeeze of lemon and/or accompanied with crusty bread and good olive oil. A grating chesse would be nice if that's your thing!

Saturday, December 3, 2011

Dream Cookies and Snackable Gifts


We've talked more than once about homemade gifts being the best kind. I haven't stopped believing that for a second -- especially when it was my best friend's milestone birthday. But not just any ol' batch of cookies would do for this birthday -- it had to be special.

And these cookies definitely were! After some fruitless internet searches and a quick and painless phone call to one of our favourite coffee adventure shops, I was able to make a re-creation of this moist, rich, vegan, gluten free cashew cookie that we couldn't stop talking about since the summer. Sweets from the Earth -- you rock! A cookie recipe with on 5 ingredients that's vegan and gluten free?! Awesome. I even found a website useful measurements. Score! They were delicious and fleeting!

Cashew Dream Cookies
inspired by Sweets from the Earth; recipe via Madcap Cupcake makes about 20 cookies

1 cup of smooth cashew butter
1/4 cup of silken tofu (about a third of a package of mori-nu)
1/2 cup of sugar
1/2 teaspoon of baking soda
pinch of salt

1. In blender, mini-chopper or food processor, blend the tofu until very smooth. Pour into a large mixing bowl.

2. Add the rest of the ingredients and mix well. The mixture will be really thick and a bit hard to mix at first, but will eventually become smooth and cookie-dough-like.

3. Drop spoonfuls on a cookie sheet and flatten slightly with a fork. Bake at 350 degrees for 10-12 minutes.

4. Cool completely on the cookie sheet before removing -- this is important or the cookies will fall apart!

Oh yeah! I also included as part of the birthday package, some maple rosemary glazed nuts. There are tons of recipes out there, but I didn't really follow any specific one. These are totally addictive and beautiful when packed in a jam or mason jar. Edible gifts are the best!


Maple Rosemary Glazed Nuts

2 cups of mixed nuts of your choice (I used cashews and almonds)
1 teaspoon of crushed, dried rosemary
1 big pinch of salt
a few good grinds of pepper
1/2 teaspoon of chili powder
1 tablespoon of canola oil
3 tablespoons of maple syrup

1. In a large bowl, whisk together the rosemary, salt, pepper, chili powder, canola oil and maple syrup until well-combined.

2. Add in your nuts and mix until everything is coated.

3. Pour the nuts out onto a cookie sheet and bake at 350, turning frequently, for about 20-30 minutes, or until the nuts are deep brown.

4. Cool completely before packaging.

Sunday, November 20, 2011

Snacky Snacks


Are you a snacky person? I definitely am. I know people that eat three meals and nothing in between. I just can't do that. Snacks are wonderful. They perk me up and refuel me for the next chapter of the day. They are definitely worth taking time out to prepare. I usually make a nice big batch of snack-worthy treats that are enjoyed throughout the week. More than often, these are super healthy snacks loaded with good things that nuts, fruits, fiber and natural sugars. I love decadent treats as snacks --hey, who wouldn't love some chocolate smack in the middle of the day to keep you going? But usually these treats just give you a short term high, when what I mostly need is some long-term sustenance.


Healthy muffins and oatmeal cookies are definitely popular in my snack repertoire, as are fruit-packed or nut-butter loaded quick breads. But lately it's been granola. I love granola. I love it with soy milk, or yogurt, or most lately kefir. But usually, it's just on it's own, crunched while walking to the streetcar stop, forgotten about until the 3:30 bell and then happily munched on the way home. I've made fancy granola chunks, batches with ancient grains like kamut and spelt, and even peanut butter granola and tahini granola.


I've seen many different granola recipes lately, and my best friend raved about one from the New York Times made with olive oil, but I have to say that I love to play with this recipe that uses apple sauce instead. I made this granola batch beautifully fragrant with the addition of orange zest, and I added chopped dates instead of raisins or dried cranberries, a lovely, sweet and sticky alternative that goes great with the orange flavour. There's also chopped almonds and sunflower seeds in there too, because a snack always needs to give you a little protein boost, right? Right?! Get snacking people!

Orange Scented Granola with Dates

adapted from Everybody Likes Sandwiches
makes a big batch!

***3 little apples or 2 big ones -- I used empires, chopped and peeled (if you like .. I left the peel on)
splash of water
1/2 teaspoon of almond extract
3 tablespoons of honey or maple syrup
3 tablespoons of orange juice

2 cups of spelt flakes
1 cup of old fashioned oats
1/2 cup of raw sunflower seeds
1/2 cup of chopped raw almonds
1/2 cup of chopped dates
1 teaspoon of ground cinnamon
1 teaspoon of ground cardamom
zest of 1 large orange

1. In a small saucepan, place the apples and water and bring to a simmer over medium heat. Turn the heat to low, put the lid on, and let them cook for about 15-20 minutes, or until the apples gets nice and soft.

2. Take the apples off the heat and let them cool a bit. Add the almond extract and honey, and give mix well. Set aside.

3. In a large bowl, combine everything else except that dates and mix well so that the spices and zest are well distributed. Add the apple sauce mixture and mix carefully so that everything is coated.

4. Spread the mixture out on a cookie sheet and bake in a 350 degree oven, tossing frequently, until the mixture has dried out and turns golden brown. For me, this took about 45 minutes, turning every 15 minutes.

5. Remove the granola from the oven and add the chopped dates immediately. Toss and let cool. Snack away!

***If you don't feel like making home made applesauce, or already have a nice batch, use about 1 cup

Saturday, November 12, 2011

Freezing the Goodness


Are you one of those clever people that clears out the freezer ever summer to make room for the bounty of berries and sweet corn and then in the dead of winter you pull out these amazing, local frozen berries from the freezer and make your smoothies and baked goods taste like heaven while snickering at the rest of us who have to make due with flown in berries or Europe's Best frozen ones (which are actually a product of Chile?)?


This summer, I sooo wanted to freeze a harvest of blueberries and strawberries -- the problem was, we ate them so quickly, and we could never buy enough. There was also the problem of room shortage in my freezer. Yeah, that'll do it. But we did do something to preserve the goodness of summer: we made preserves! No thick, pectin-laden jam that's almost half sugar. Nope, we made preserves that actually tastes like strawberries, rhubarb and blueberries. It was awesome.


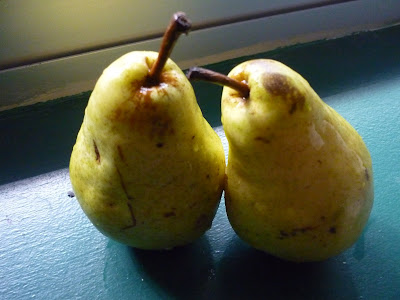
So when fall rolled around -- and I loooooooove fall -- I wanted to preserve a bit of that too. I always get excited about the apples that roll around. A new variety showed up in my local market -- the Ambrosia. Totally delicious. But I find that the apples always overshadow the pears -- which symbolize fall as perfectly as apples do. I remember buying spicy pear jam at a market in Guelph and wanting to re-create it at home. Ours was more of a stewed fruit preserve, with less sugar, kicked up with some fresh ginger and lemon juice and of course, all spiced up. It made for a beautiful topping for my weekend oatmeal brunches, a perfect gift for my mommy, and a welcome alternative to go along side peanut butter. When all was said and done, and the two little jars were sealed and stacked in the freezer, I couldn't help trying one right away. But I'm going to save the other one for early July, when I need a reminder that summer will whip right by me, but fall .. fall is likely to linger..

Spiced Pear Preserves
makes about 1.5 cups -- enough to fill three little mason jars; a really small batch, but I'm sure if you doubled or tripled it would be fine -- just adjust the spices and sugar to your taste.

6 Bartlet pears, peeled and diced
1/2 teaspoon of grated fresh ginger
1/2 teaspoon of cinnamon
1/2 teaspoon of cardamom
a tiny pinch of allspice
juice of half a large lemon
2-3 tablespoons of sugar
splash of water, more if needed

1. Combine all the ingredients in a pot and cook over medium heat, stirring often. When the pears start to break down (about 10 minutes later), turn the heat down to low and let it cook.

2. In the meantime, sterilize your stuff by placing the jars (face up), rims and lids (seal side up) on a cookie tray and in a 200 degree oven for about 20 minutes.

3. By the time your pears are nice and softened and the juices have thickened, your jars will be ready. Carefully spoon the pears in each jar. Seal tightly and turn them upside down on the cookie tray. Let them stand for 20-25 minutes, after which time, they should have sealed.

4. You're ready! Freeze or eat at your leisure! :)

Sunday, November 6, 2011

New Age Wontons


The old school pork and shrimp wonton is a comfort food of my childhood. We would order them in soup with noodles, and they would be swimming around, all hard to pick up with chopsticks , and if you managed to finally spear one, you'd be rewarded with a velvety-smooth pasta-like dumpling stuffed with the classic Asian flavours. Ahhh the wonton.


These days, I don't indulge much in the classic wonton anymore; it's saved for special brunches and Chinese New Year festivals. And that's ok -- they're definitely worth the wait and absence makes the heart grow fonder, especially since they don't tend to sit well in my stomach. One of two will do, thank you very much.


But these new aged, caramalized onion and swiss chard wontons? I could eat these everyday. I originally saw these in my new favourite cooking magazine, Vegetarian Times and marvelled at how pretty they looked: they wonton skins turned kinda transparent when cooking and the ruby red chard stems could be seen on the inside. Totally zen-like and beautiful. But I forgot about them until I saw a dish of leftover caramlized onions in the fridge -- originally used as a gourmet topping for mini burgers at my birthday party.


The originally recipe calls for tofu in the filling, but I skipped that and added some chopped celery instead. I made the filling they day before when I had some free time, and the next day at supper time, all I had to do was package them up and boil them for just a minute. Obviously they would take longer if you were actually caramelizing your onions instead of cheating and using leftovers like I did, but I think the extra 20 minute is worth that deep rich, sweet flavour ... Although, I'm sure plain sauteed onions would be good as well. Which brings me to my other point. You could stuff anything into a wonton wrapper! Heidi at 101 Cookbooks put smashed split peas in hers. A curried lentil mixture with chard would be totally yummy too, as would the original tofu and mushroom. I'm totally making these again this week!

Caramelized Onion and Swiss Chard Wontons
makes may wontons ... enough for 2-3 hungry people

1 onion, sliced thinly
1 tablespoon of olive oil
salt and pepper
about 3 large ruby red swiss chard stalks, stems finely diced, leaves cut into ribbons
1 stalk of celery, finely diced
1 teaspoon of minced ginger
1/2 teaspoon of ground cumin
1 tiny splash of toasted sesame seed oil
1 tiny splash of light soy sauce
a good grinding of black pepper
a package of wonton wrappers
a small dish of water

1. In a heavy-bottom skillet, heat some olive oil until it smokes. Add the onions and season with salt and pepper. Cook the onions, stirring constantly, and adding splashes of water if the brown bits start to build up on the bottom of the pan. Stir them up and keep on cooking for about 15-20 minutes, or until the onions are super soft and a deep brown colour. From the pan and set aside.

2. In a small sauce pan, cook the the celery, chard stems and ginger in some olive oil for about 5 minutes or until things start to get tender and fragrant. Add the cumin and black pepper and give it a good stir. Add the onions, chard leaves and mix together. If things look a bit dry, add a splash of water or broth. Cook until the chard leaves start to wilt.

3. Add the sesame oil and soy sauce and give it one final stir. Taste and adjust your seasonings. Remove the mixture to a bowl and let it cool, or store in the fridge until you want to use it.

4. To make the wontons, place the wonton wrapper flat on your cutting board. Put about 3/4 of a teaspoon of the cooled chard mixture in the centre. Dip your finger the dish of water and wet all four sides of the wrapper. Fold two opposite corners together to form a little triangle. Press down the sides to make sure it's sealed. Repeat!

5. Bring a pot of water to a boil. Add your wontons in batches -- don't over crowd the pot. Cook for 1-2 minutes, or until the skins become soft and translucent. Remove with a slotted spoon. Serve right away, dipped in balsamic vinegar, with an extra splash of soy sauce, or add to a broth and noodle bowl.